Positive vs Negative

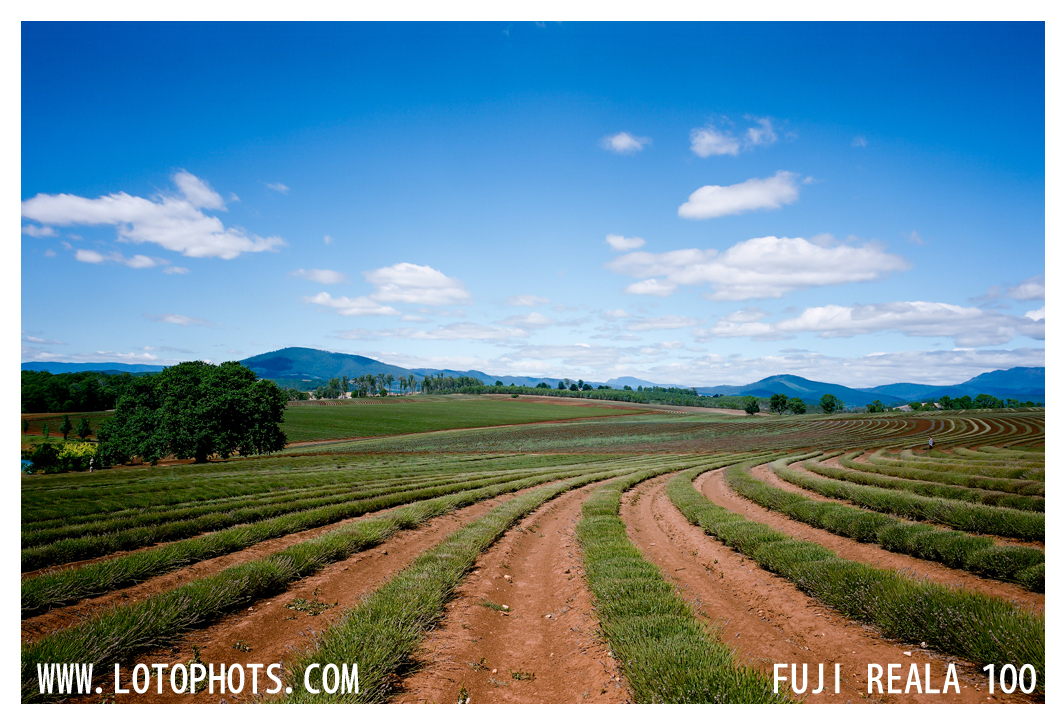
Early this year I was in Tasmania, Australia.  Every time a long vacation comes headache as what photography equipment to bring.  The digital department is quite set, usually the trusty Canon 5D3 + 24-105mm + 40mm pancake + one prime (usually 50mm f1.8, this time I brought a super wide 17mm) and the tiny Sony RX100 II.  The film department is where the headache comes in.  35mm usually is out of the question as a full frame digital can cover this.  It comes to either medium or large.  The SG is manageable but not too good with a family trip, since you don’t want them to wait for you for too long setting everything up.  At the end, I brought my Mamiya Universal, sort of somewhere in between.  Next is film.  I know there will be some large nature shots, but unsure what to use.  At the end, I brought a handful of Fuji Reala and Fuji Velvia 50 films.

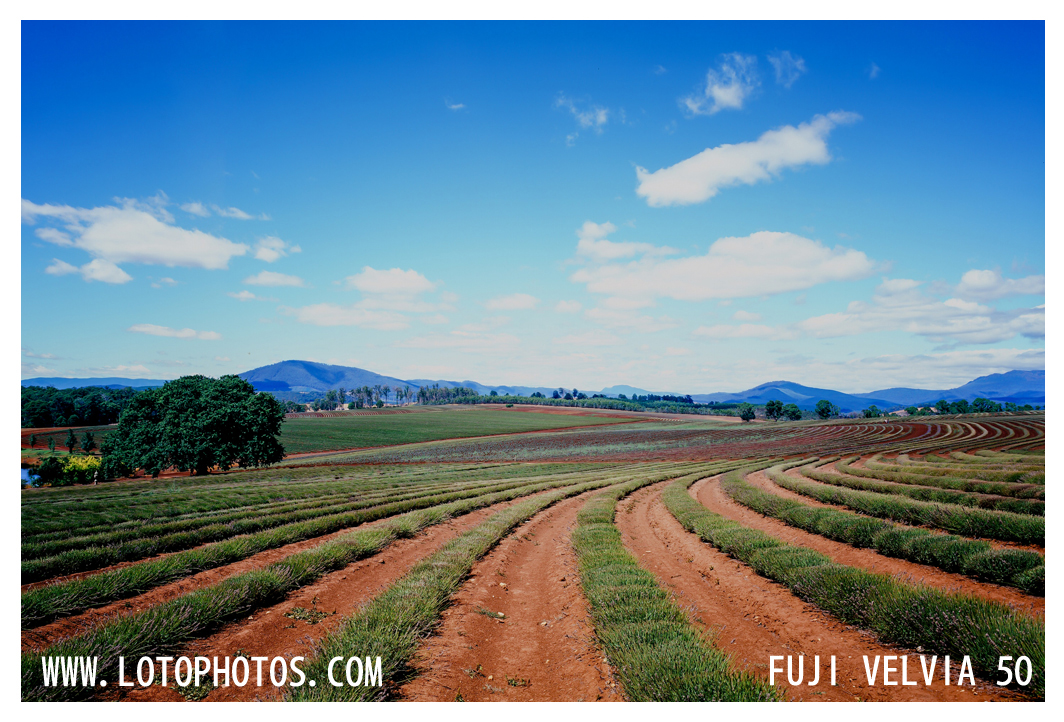
The photos are developed and here are the result. Photo taken with Mamiya Universal + 50mm f6.3 lens + 6×9 back.  I had the luxury of several backs and I took the photo from the same location to compare.  Which one will you prefer? The positive (Fuji Velvia 50) or the negative (Fuji Reala 100).  Both look quite good, what’s better is for you to decide.

Fuji Reala 100
Fuji Reala 100
Fuji Velvia 50
Fuji Velvia 50


Day 4 – Black and white photo challenge

Day 4 of 5 of black and white photo challenge.  Each day I am trying to post a photo that is taken from a different camera and a different medium.  Today I am back on large format but with a different lens and film from day 1.  This was shot at the Bund in Shanghai, China.  Photo taken with Graflex Speed Graphic + Fujinon 65mm f5.6 lens + Shanghai GP3 film.  Developed with Guan long d76 + Guan long F5 Fix, scanned with Epson Perfection V700. Today i nominate Pouya Ash for the BW photo challenge, in which to post one BW photo per day for 5 days and also nominate someone each day because it’s fun.

The Bund, Shanghai, China

Day 3 – Black and white photo challenge

Day 3 of 5 of black and white photo challenge.  Each day I am trying to post a photo that is taken from a different camera and a different medium.  Today I picked a BW polaroid that I shot at the Sake Bar Ginn in Hong Kong a while back.  Ayuchi was working late as usual that night while I took the photo.  Photo taken with Mamiya Universal + 50mm f6.3 lens on Fuji FP3000b scanned with Doxie Flip.  When it comes to Polaroids, it wasn’t too hard to name my next challenger, Charlie Xia.  He has been the biggest ambassador for my Polaroids and we need more people like him to keep this alive!  So Charlie, I nominate you to the BW photo challenge, in which to post one BW photo per day for 5 days and also nominate someone each day because it’s fun.

Ayuchi at Sake Bar Ginn.

Day 2 – Black and white photo challenge

Day 2 of 5 of black and white photo challenge.  Each day I am trying to post a photo that is taken from a different camera and a different medium.  Today I picked a 135mm shot I did in Kyoto, Japan last year.  Amy and my mom were walking in front of me and the shadow was perfect when I took this shot.  Photo taken with Canon QL17 on Kodak TriX.  Film developed in Kodak D76 1+1 and Kodak Rapid Fix, scanned with Epson Perfection V700.  Today I nominate Michael Ho to accept my black and white photo challenge.

Amy and my mom in Kyoto
Amy and my mom in Kyoto, Japan

Day 1 – Black & White photo challenge

Thanks for Cheung Billy Ka Ming, I accepted the BW photo challenge.  I will be posting one BW photo a day for five days and will nominate someone each day just for fun.  Here is a photo I have taken from a maternity shoot I did not long ago.  The lovely couple is Catherine Wong and Denis Ng.  This photo was taken in Hong Kong with Graflex Speed Graphic + Fujinon A 240mm f9 lens + Fuji Acros.  Film developed in Kodak d76 1+1, Kodak Rapid Fix and scanned with Epson Perfection V700.  This is one of the first photos I took with the newly acquired A 240mm f9 lens and I have to say it’s absolutely the sharpest lens I own.  The lens is extremely light and what’s amazing is that it can even cover 8×10!  Today I would like to nominate Kirk Lau to accept my BW photo challenge.

Catherine and Dennis looking lovely in this photo.

Dust – number one enemy

I have been developing for quite some time now in my darkroom (aka my washroom) and I usually just hang them dry without much thought.  I do get dust in my negatives.  I do see them in my scans.  I know it exists but subconsciously, I just ignored it.  Scott Stillman referred this as the “power of positive thinking”.  This was sort of what I did until one day I opened Pandora’s box.  I was developing in my parents’ basement in Toronto and the nightmare started.  Check out this scanned negative (no processing).

Dusty negatives developed in an open environment

Let me zoom into the left corner.

Dust, dust, dust!
Dust, dust, dust!

This seemingly good photo is ruined.  The dust particles simply took over the photo and no software can fix this easily without losing some resolution.  I was not happy about this and decided to do something about it.  I researched online and saw different methods to battle dust.  The professionals have drying cabinets and built in heaters.  Due to space and wallet constraints, those solutions were not possible.  I then decided to create my own.

sock drying rack, wedding gown plastic cover, distilled water

I bought a sock drying rack, a wedding gown plastic cover and a bottle of distilled water.  I will use the distilled water in the final photoflo bath so that my negatives will be mineral/ion free.  I then fitted the sock drying rack inside the gown plastic cover and realized that it was too small.  I upgraded to a larger sock drying rack.  This rack cost $10USD (it’s made of metal!) and the gown cover cost around $3USD.  The 4.5L of distilled water was around $3USD as well.  This solution’s total cost was around $16USD.

Upgraded sock drying rack

It fitted like a glove inside the gown plastic bag.

Fits perfectly!
Fits perfectly!

Now putting it into action.

Dust cover in action.

I scanned the roll of 120 and was impressed with the result.  I will not say it’s dust-free but comparable to the ones that I get back from a professional lab.  I think I have solved my dust issue! and it didn’t cost me an arm and a leg at the end.  Check out this unprocessed scan of one of negatives.

Almost dust free negatives!!!


Large Format Portrait

One of the best LF portraits I have taken recently is this one of my mom.  Taken with Graflex Speed Graphic + Buhl 9″ f3.6 lens + Fuji Acros.  Developed in Kodak d76, 20C 11 minutes, first minute agitation, 4 flips every minute.  Fixed with Kodak RapidFix and scanned Epson Perfection V700.

Large format portrait of my mom.

SFO in 6×6

I had a few shots left on my Zeiss Ikonta 532/16 before I boarded a plane at SFO.  The sun was setting and made a nice reflection on the ground.  Taken with Zeiss Ikonta 532/16 on Fuji Acros.  Developed in Kodak d76, 20C, 11 mins, first minute agitation, then 2 flips every minute.  Fixed with Kodak rapid fix and scanned with Epson Perfection 4870.

SFO in 6x6
SFO in 6×6

where avant-garde is the passé