Tag Archives: film

WPPD 2016

World Pinhole Photography Day (WPPD) was held on April 25, 2016, more information here (http://pinholeday.org/).

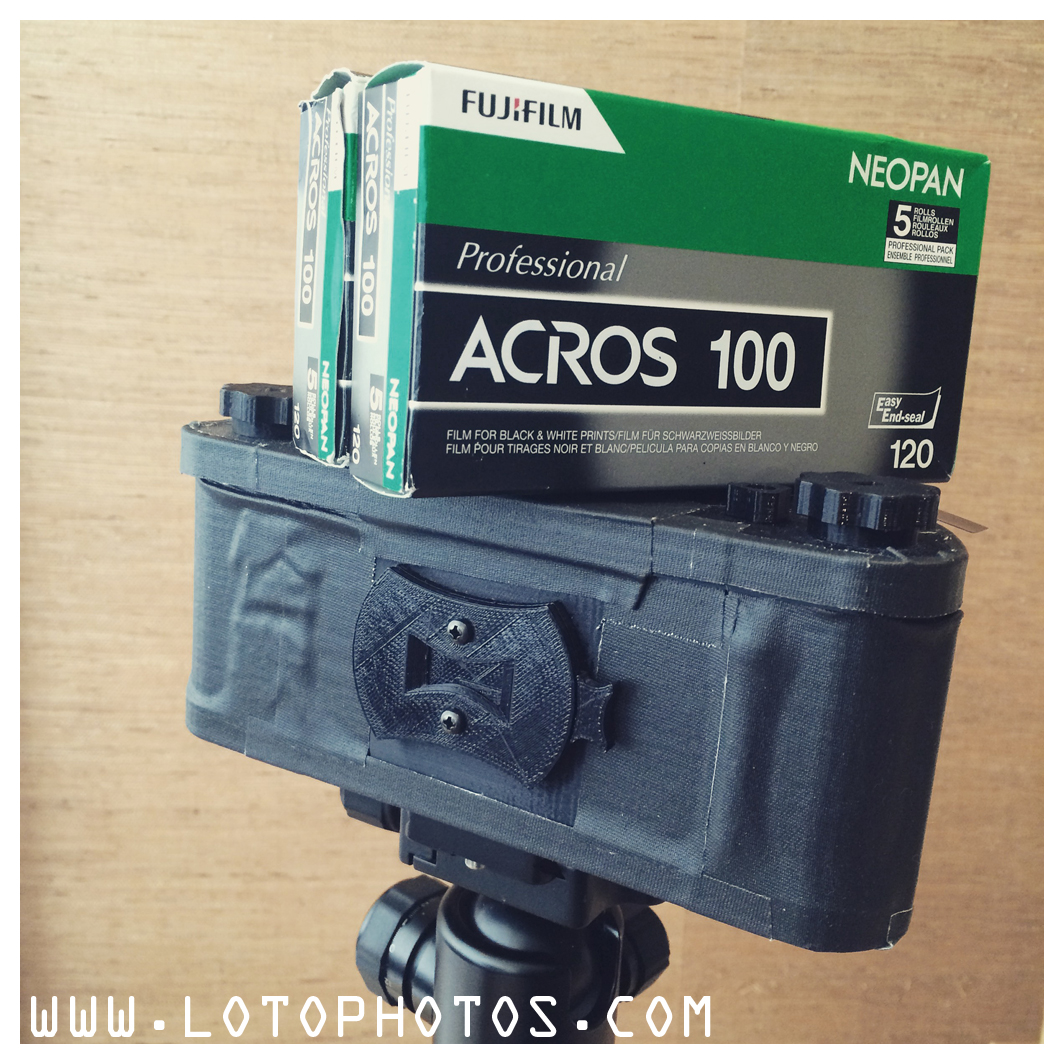
Pinhole day used to be the only day that I shoot with these cameras, but this year, I actually prepared for it.  When I was in Shanghai earlier this year, with the help of Kirk Lau, I 3D printed a 6×18 (actually I find it more 6×19) camera called terraPin Kaiju.  I had a ton of issues with that camera and I will discuss this in a later blog.  After sorting all the issues out, it’s actually a really fun camera to use.

I started WPPD this year with a few plates of 8×10.  I used my Kodak 2D 8×10 camera with 0.5mm hole size and arranged it for 150mm and f/300.

Kodak 2D 8x10, 150mm f300

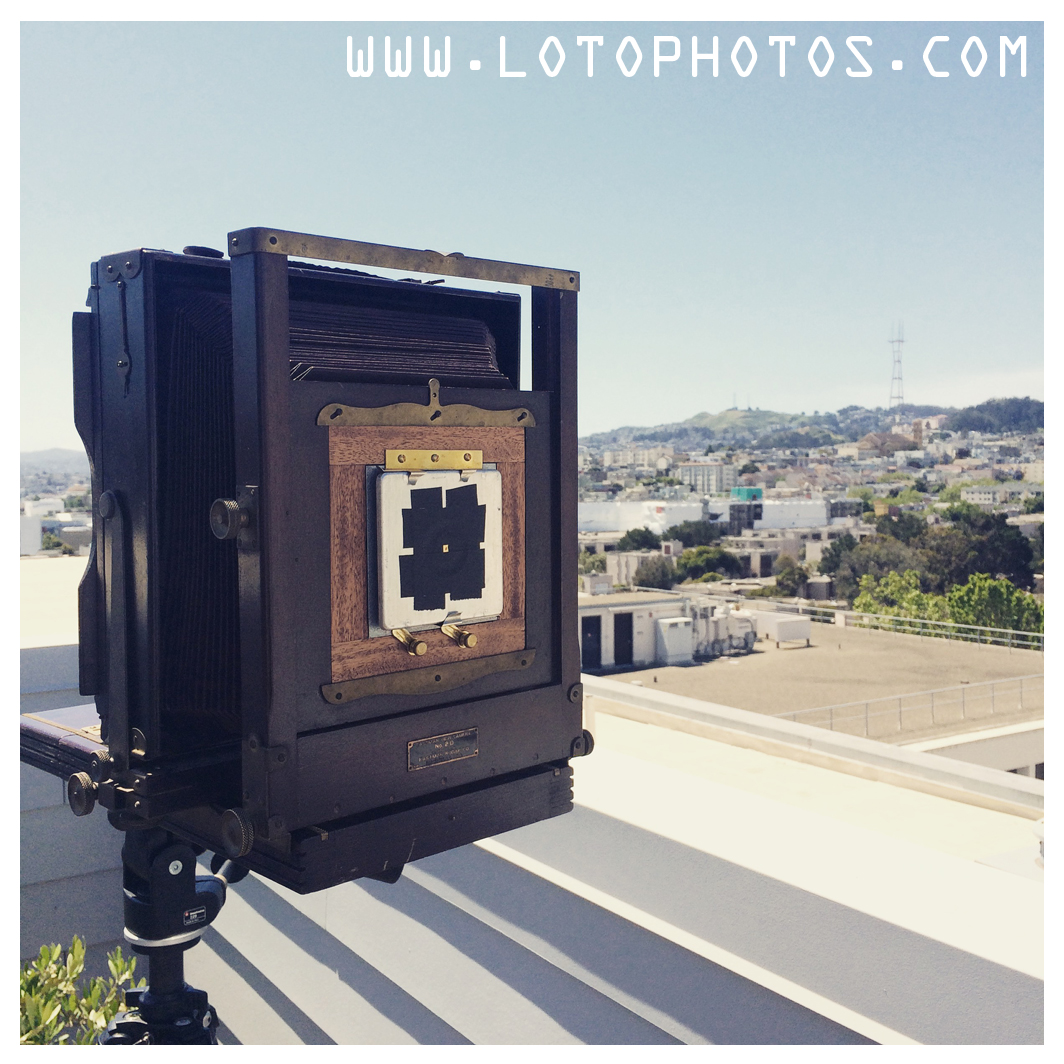
Kodak 2D 8×10, 150mm f/300

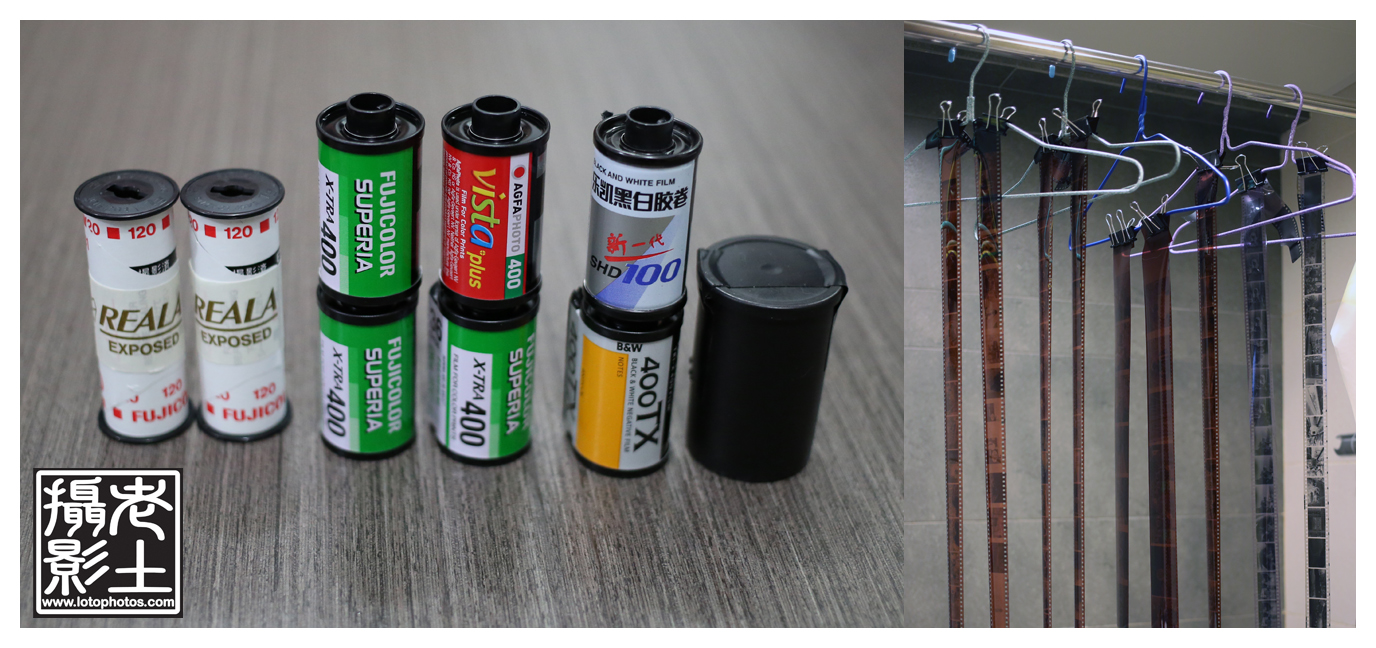
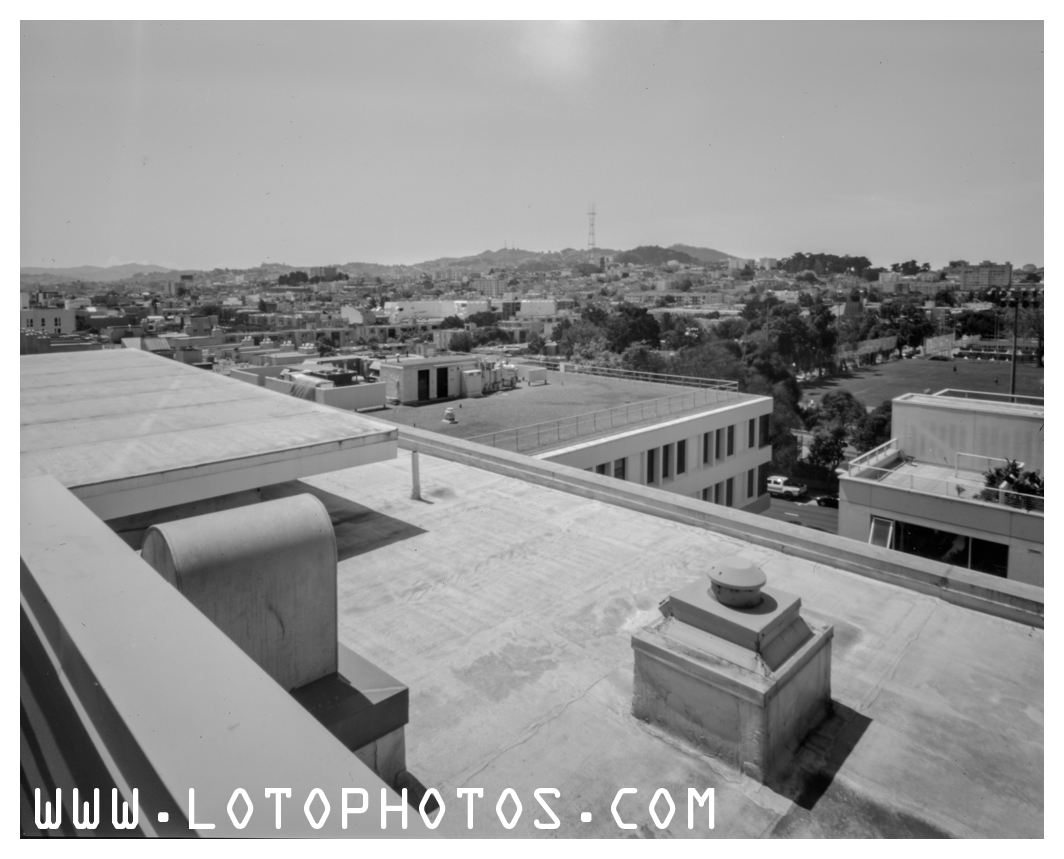
I shot the following with Kodak Ektascan B/RA x-ray film.  Here are a couple of developed plates, the details are just amazing and the exposure is also dead on.

Kodak 2D 8x10, 150mm, f300 with Kodak Ektascan B/RA film
Kodak 2D 8×10, 150mm, f300 with Kodak Ektascan B/RA film
Kodak 2D 8x10, 150mm, f300 with Kodak Ektascan B/RA film
Kodak 2D 8×10, 150mm, f300 with Kodak Ektascan B/RA film

To walk around town, I took the 6×18 panoramic pinhole, equipped with a 0.4mm pinhole, 86mm, f/215 with a view angle of roughly 116.5 deg.  The film that I used was my favorite, Fuji Acros.

terraPin Kaiju 6x19 camera
terraPin Kaiju 6×18 camera

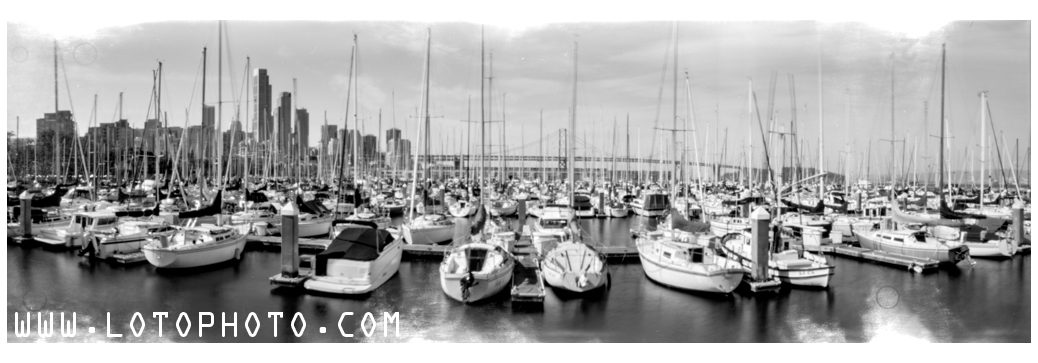
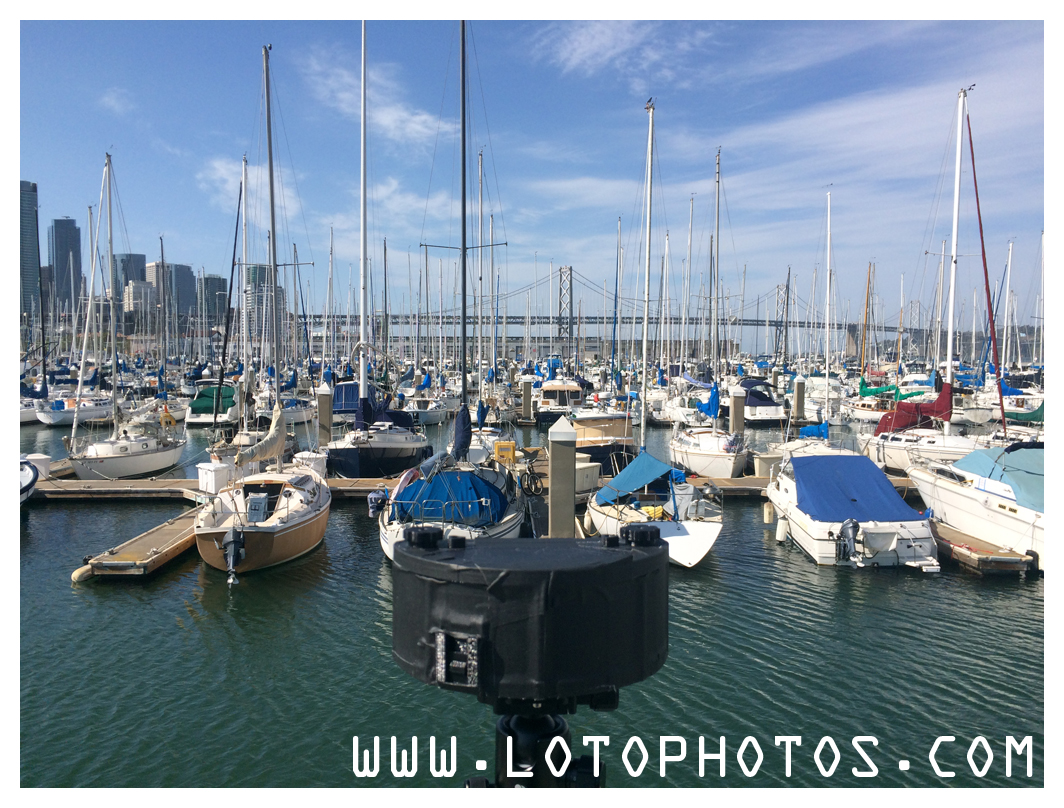
First I hit South Beach Harbor and it was a beautiful day.

terraPin Kaiju 6x19 camera in South Beach Harbor
terraPin Kaiju 6×18 camera in South Beach Harbor

The shots from that roll had a light leak when I was changing film.  This is to remind myself to use the film clip and also change the film in darker places!

terraPin Kaiju 6x19 camera, 86mm, f/215 with Fuji Acros
South Bay Beach and terraPin Kaiju 6×18 camera, 86mm, f/215 with Fuji Acros

As I walked towards AT&T Park, the Giants were playing.

AT&T Park with the terraPin Kaiju 6x19 camera, 86mm
AT&T Park with the terraPin Kaiju 6×18 camera, 86mm

I was trying to get a silhouette photo which came out like this.  I would like it to be sharper but it was crazy windy that day.  It was tough to have the whole thing stable, even for a few seconds.

terraPin Kaiju 6x19 camera, 86mm, f/215 with Fuji Acros
AT&T Park and terraPin Kaiju 6×18 camera, 86mm, f/215 with Fuji Acros

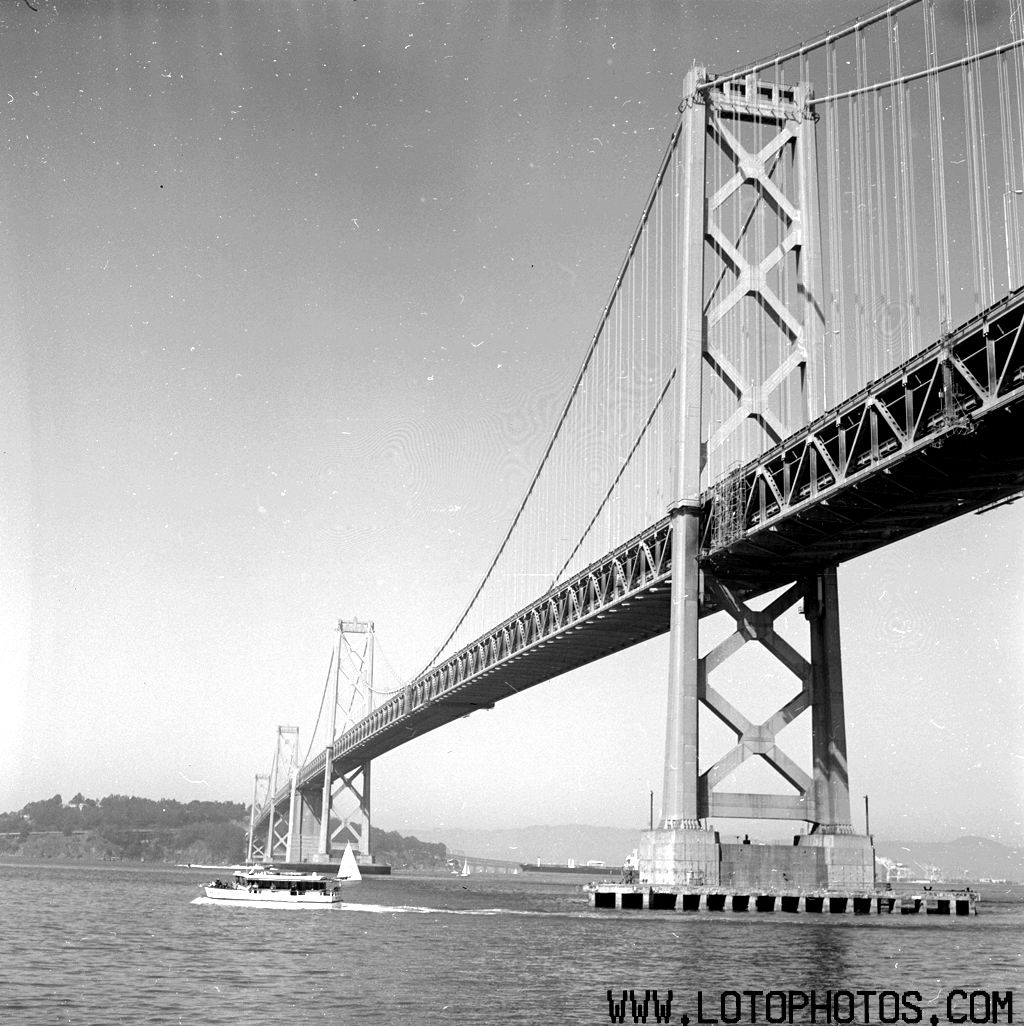
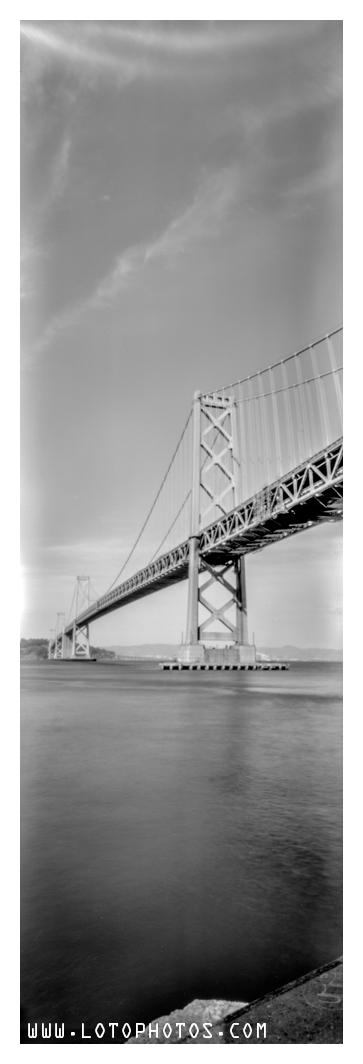
Next are a couple of shots of the Bay Bridge from both portrait and landscape orientation.

Bay Bridge and terraPin Kaiju 6x19 camera, 86mm, f/215 with Fuji Acros
Bay Bridge and terraPin Kaiju 6×18 camera, 86mm, f/215 with Fuji Acros
Bay Bridge and terraPin Kaiju 6x19 camera, 86mm, f/215 with Fuji Acros
Bay Bridge and terraPin Kaiju 6×18 camera, 86mm, f/215 with Fuji Acros

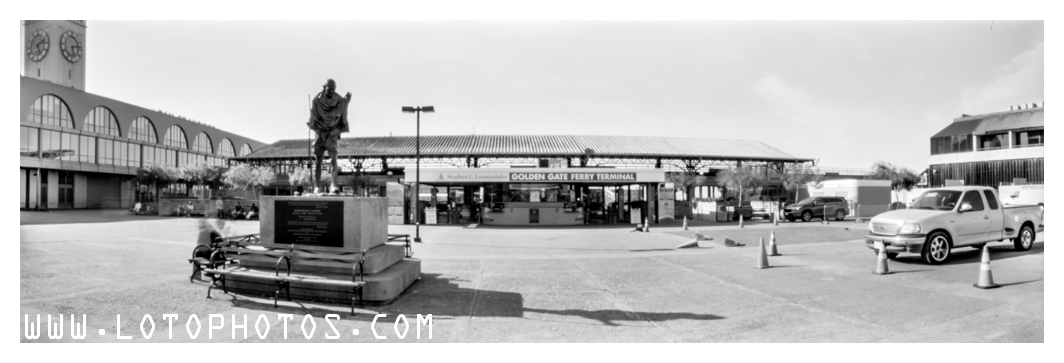
Behind the Ferry Building is the Golden Gate Ferry Terminal and a statue of Gandhi.  In the high resolution copy, you can actually faintly read off Gandhi’s name under the statue.  This is amazing detail, consider the lens is just air!  No fancy optics at play here.

San Francisco Ferry Terminal and terraPin Kaiju 6x19 camera, 86mm, f/215 with Fuji Acros
San Francisco Ferry Terminal and terraPin Kaiju 6×19 camera, 86mm, f/215 with Fuji Acros

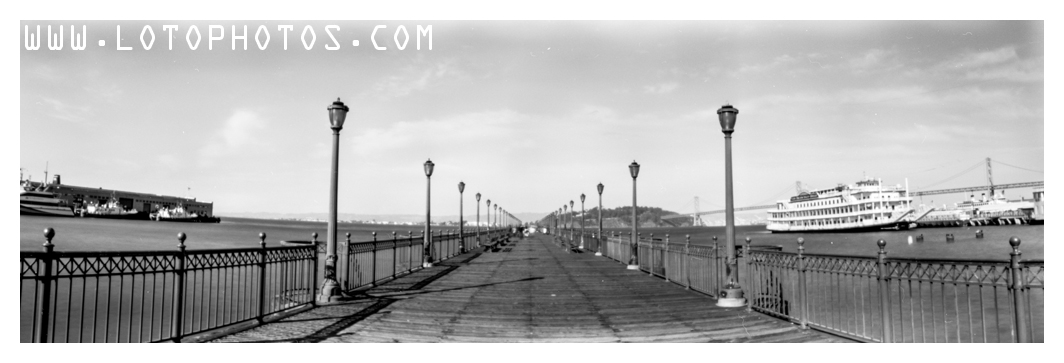
Next is Pier 7 and it was quite empty for a Sunday afternoon.

Pier 7 and terraPin Kaiju 6x19 camera, 86mm, f/215 with Fuji Acros
Pier 7 and terraPin Kaiju 6×19 camera, 86mm, f/215 with Fuji Acros

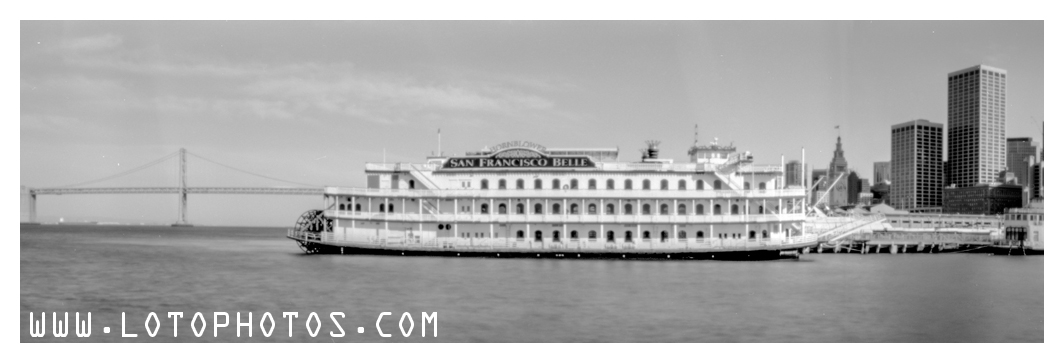
The San Francisco Belle was docked and check out the sharpness!

San Francisco Belle and terraPin Kaiju 6x19 camera, 86mm, f/215 with Fuji Acros
San Francisco Belle and terraPin Kaiju 6×19 camera, 86mm, f/215 with Fuji Acros

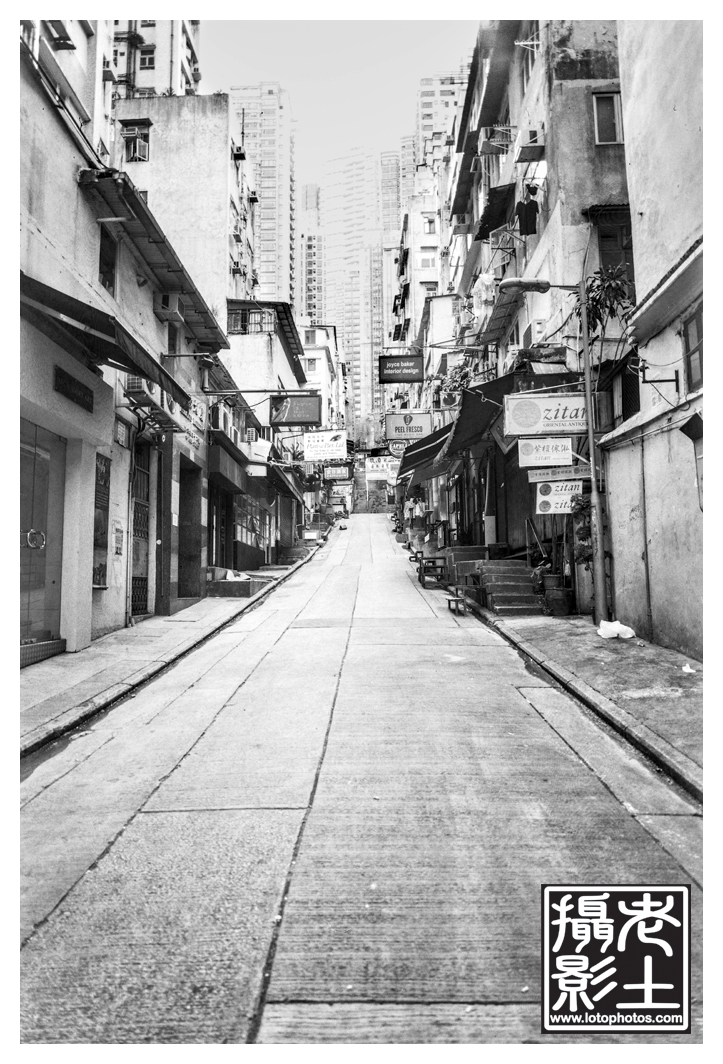
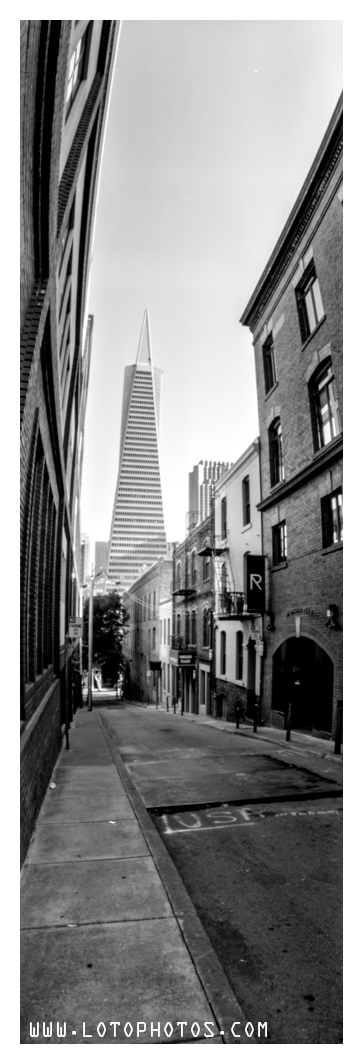
While walking on Broadway, there is an alley with a great view of the The Transamerica Pyramid.  I always love the vertical panoramic but it is often quite hard to frame.

The Transamerica Pyramid and terraPin Kaiju 6x19 camera, 86mm, f/215 with Fuji Acros
The Transamerica Pyramid and terraPin Kaiju 6×19 camera, 86mm, f/215 with Fuji Acros

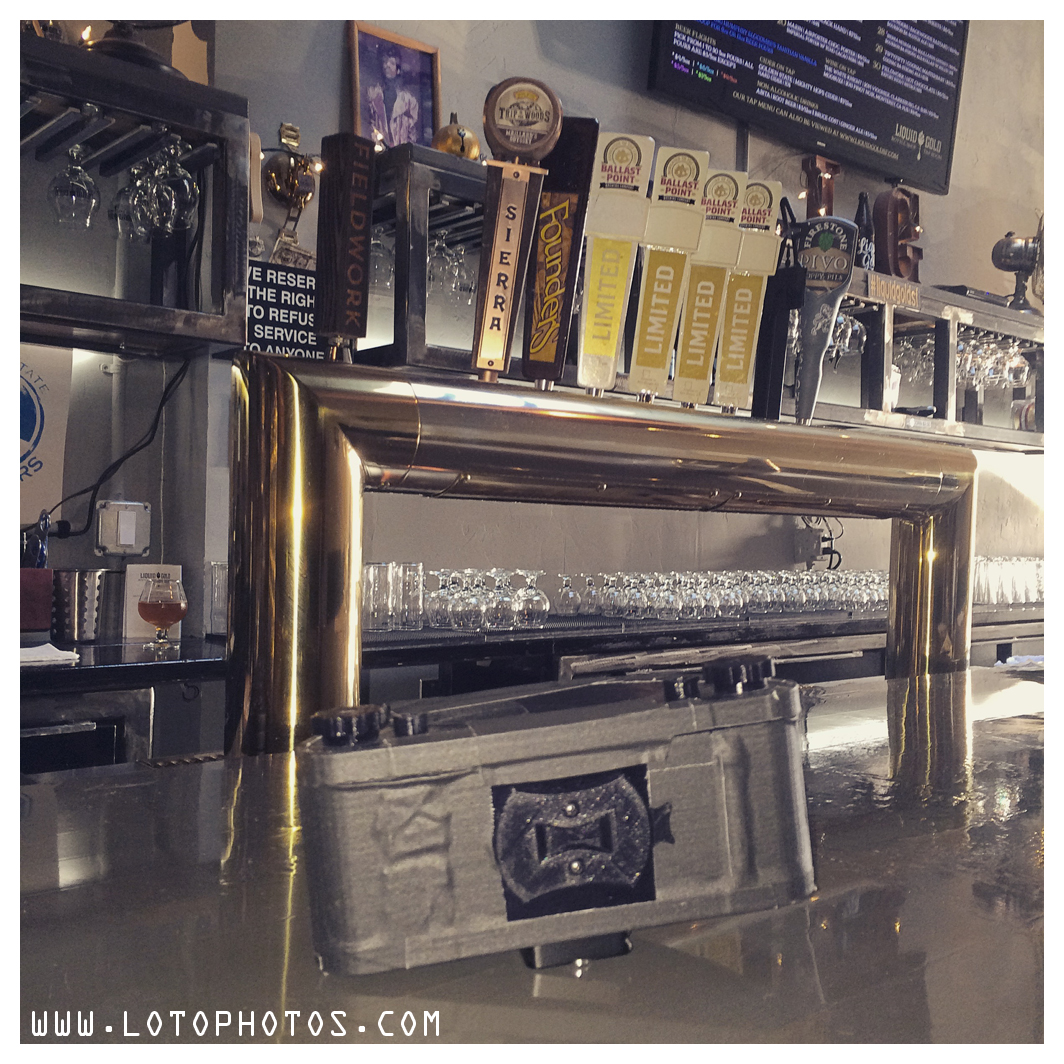
I have to say it was a lot of fun this year on WPPD.   This is the most I have shot compared to previous years.   The final stop was at Liquid Gold with four limited edition Ballast Point beers on tap!

Liquid Gold SF with four limited edition Ballast Point beers on tap!


Dust – number one enemy

I have been developing for quite some time now in my darkroom (aka my washroom) and I usually just hang them dry without much thought.  I do get dust in my negatives.  I do see them in my scans.  I know it exists but subconsciously, I just ignored it.  Scott Stillman referred this as the “power of positive thinking”.  This was sort of what I did until one day I opened Pandora’s box.  I was developing in my parents’ basement in Toronto and the nightmare started.  Check out this scanned negative (no processing).

Dusty negatives developed in an open environment

Let me zoom into the left corner.

Dust, dust, dust!
Dust, dust, dust!

This seemingly good photo is ruined.  The dust particles simply took over the photo and no software can fix this easily without losing some resolution.  I was not happy about this and decided to do something about it.  I researched online and saw different methods to battle dust.  The professionals have drying cabinets and built in heaters.  Due to space and wallet constraints, those solutions were not possible.  I then decided to create my own.

sock drying rack, wedding gown plastic cover, distilled water

I bought a sock drying rack, a wedding gown plastic cover and a bottle of distilled water.  I will use the distilled water in the final photoflo bath so that my negatives will be mineral/ion free.  I then fitted the sock drying rack inside the gown plastic cover and realized that it was too small.  I upgraded to a larger sock drying rack.  This rack cost $10USD (it’s made of metal!) and the gown cover cost around $3USD.  The 4.5L of distilled water was around $3USD as well.  This solution’s total cost was around $16USD.

Upgraded sock drying rack

It fitted like a glove inside the gown plastic bag.

Fits perfectly!
Fits perfectly!

Now putting it into action.

Dust cover in action.

I scanned the roll of 120 and was impressed with the result.  I will not say it’s dust-free but comparable to the ones that I get back from a professional lab.  I think I have solved my dust issue! and it didn’t cost me an arm and a leg at the end.  Check out this unprocessed scan of one of negatives.

Almost dust free negatives!!!


Pushing Shanghai GP3 to 400

Taken with Mamiya Universal + 50mm f6.3 lens + 6×7 film back.  Developed Rodinal 1:65 stand 2 hours. First two minutes agitation, then one flip at 1 hour mark.  Fixed with Kodak rapid fix.  Scanned with Epson Perfection V700.

The result was not bad at all, this photo taken on Peel St. Central, Hong Kong.

Pushing Shanghai GP3 to 400

Film Development Day

Film Development Day

For color film, I generally will save up at least six rolls before I develop them.  This is because I need to setup the water bath in my Peterson Auto Colortherm machine and it’s always a good idea to exhaust the color chemicals in one go rather than several (due to oxidation).

This weekend’s lineup, two rolls of medium format Fuji Reala 100, four rolls of 135 Fuji Xtra 400 (one roll inside the film case because it was removed from a 126 cartridge), one roll of Agfa Vista 400, one roll of Kodak TriX 400 as well as a roll of Lucky SHD 100.

The color film are developed with the Tetenal kit.  Chemical and water temperature are preheated at 38C.  First wet the film with water for 5 minutes, developer for 3:15 minutes, blix for 4 minutes, rince with 38C water for 3 minutes and stabilizer for 1 minute.  Both developer and blix agitation for first 30 seconds, then one inversion every 30 seconds.

Hong Kong is hot these days and water temperature sits at 28C.  This is difficult for BW development.  For Kodak TriX 400, first wet the film with water for 2 minutes.  Kodak HC110 (dilution H) for 5 minutes, water stop for 2 minutes, Kodak Rapid Fix for 4 minutes, wash with water for 2 minutes and finish with Kodak Photoflo.  Agitation for developer and fixer is the same.   Agitation by inversion for the first 30 seconds, followed by two inversions every 30 seconds.

For developing Lucky SHD 100 film, first wet the film with water for 2 minutes.  Kodak HC110 (dilution H) for 14 minutes, water stop for 2 minutes, Kodak Rapid Fix for 4 minutes, wash with water for 2 minutes and finish with Kodak Photoflo.  Agitation for developer and fixer is the same.   Agitation by inversion for the first 30 seconds, followed by two inversions every 30 seconds.

Nine rolls of film drying in my washroom, what a scene!

Results of the developed photos to follow.