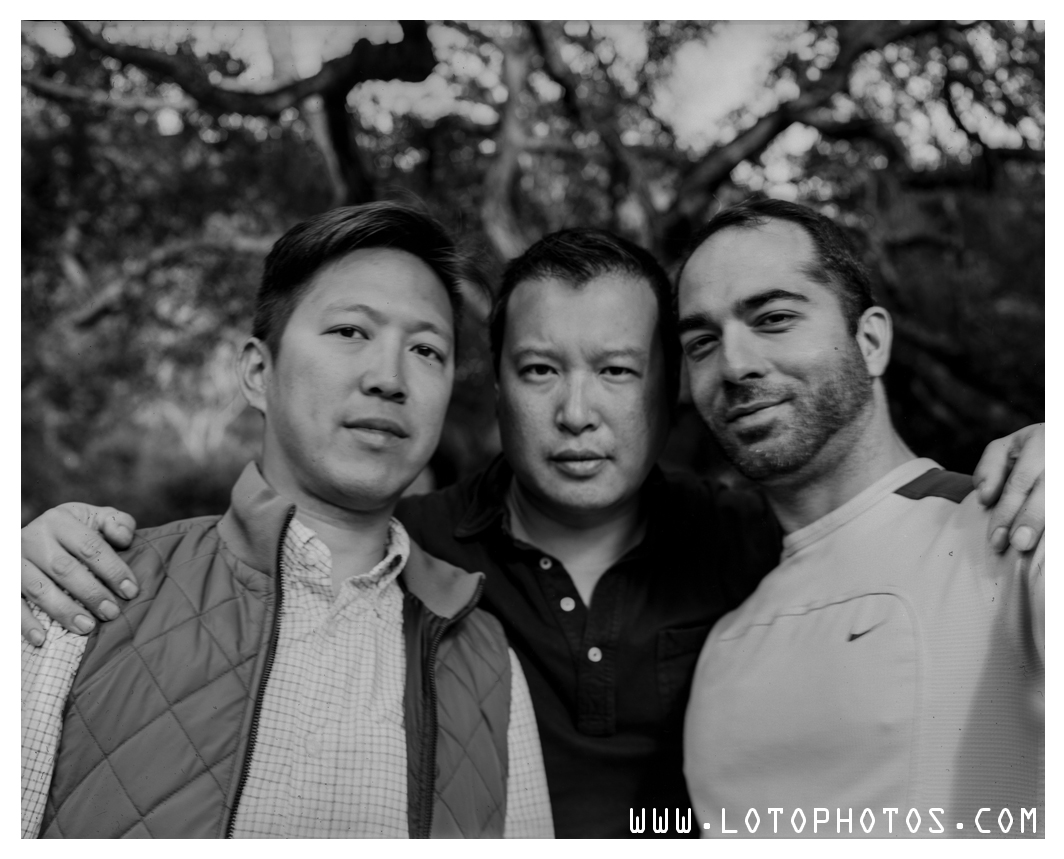
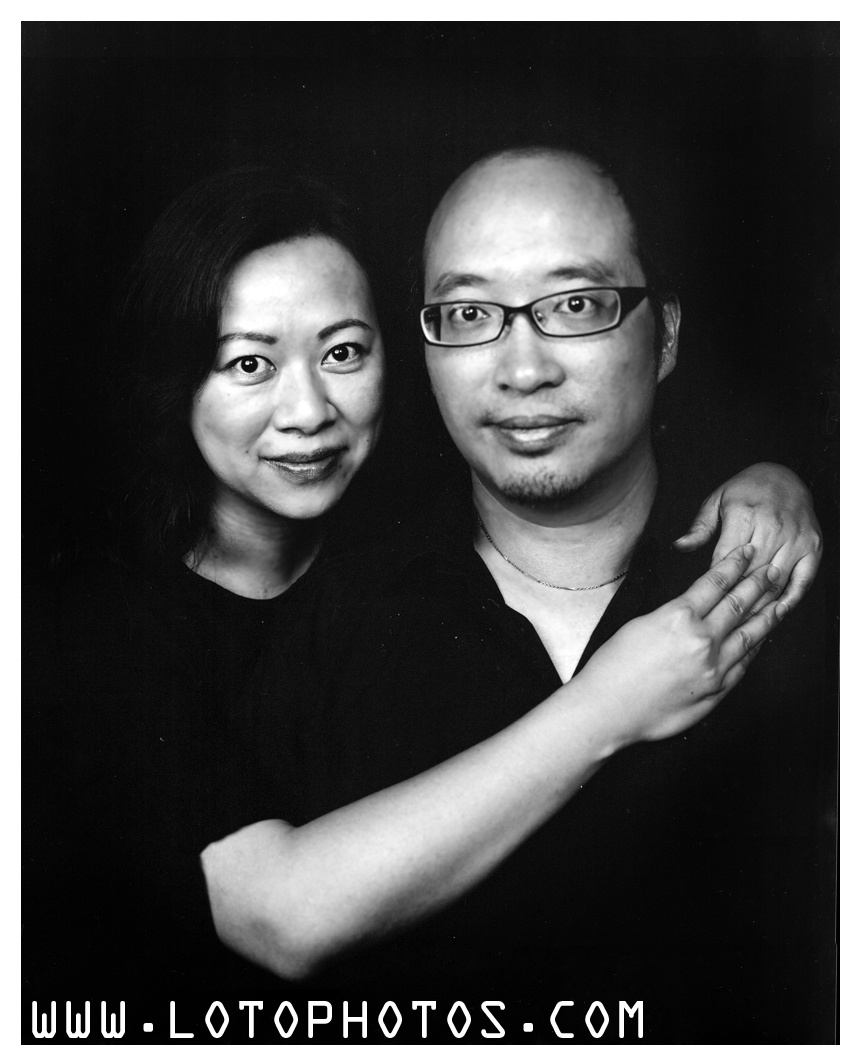
Wrapping up the weekend trip during the last leg on a hike at the Pfeiffer Big Sur State Park, there were a couple of 8×10 free plates left and we decided to do something fun. With a very short shutter cable, we attempted to do a selfie in 8×10!!!
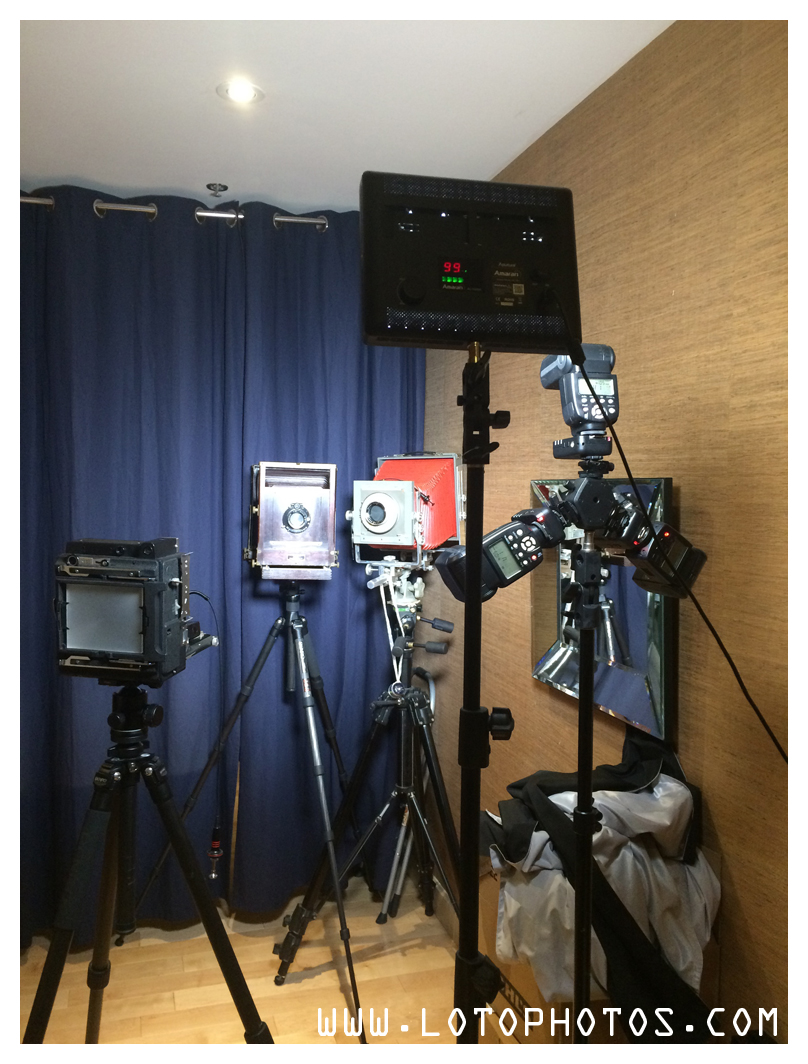
Here is the setup.
8×10 selfie in action!
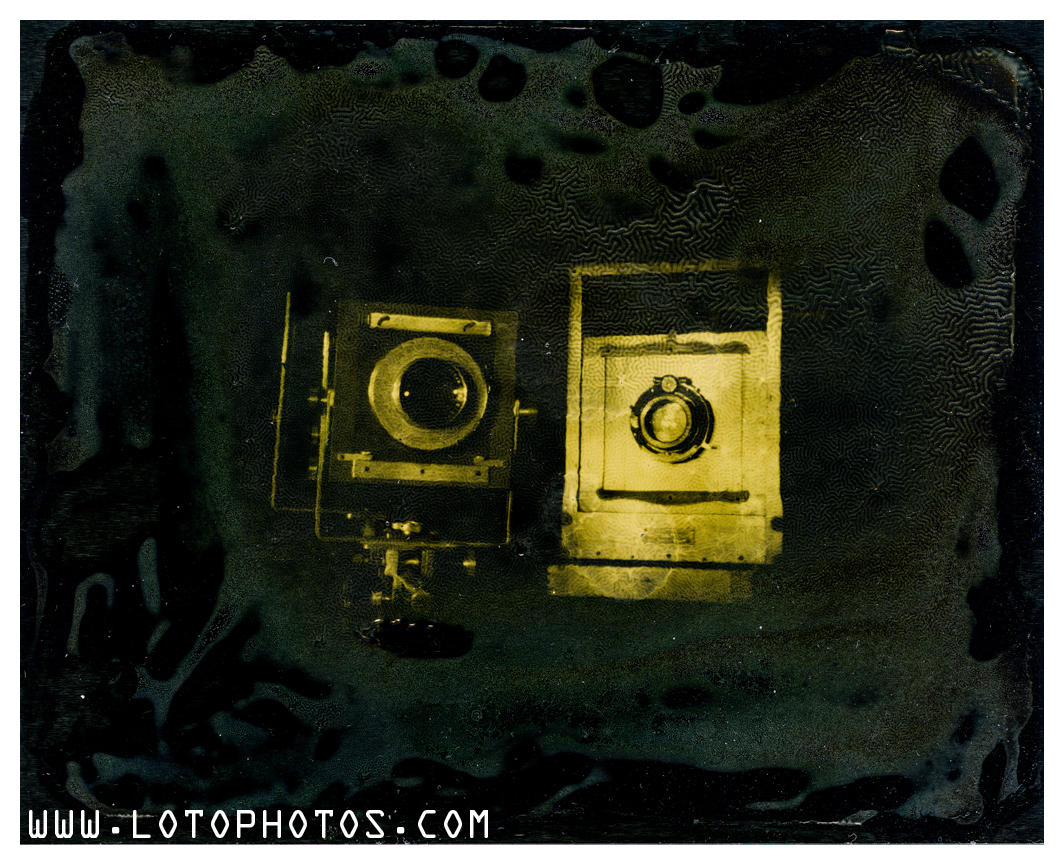
Here is the result! Taken with Kodak 2D 8×10 camera + Fujinon 2400mm f9 lens + Kodak Ektascan B/RA x-ray film.
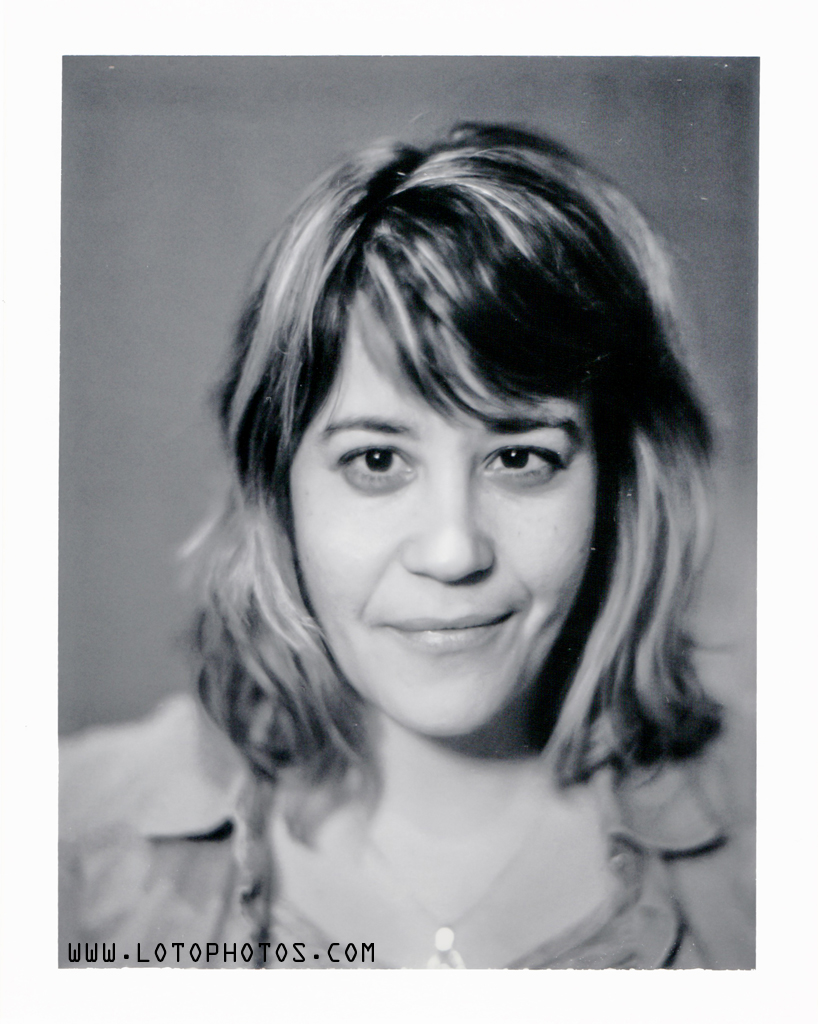
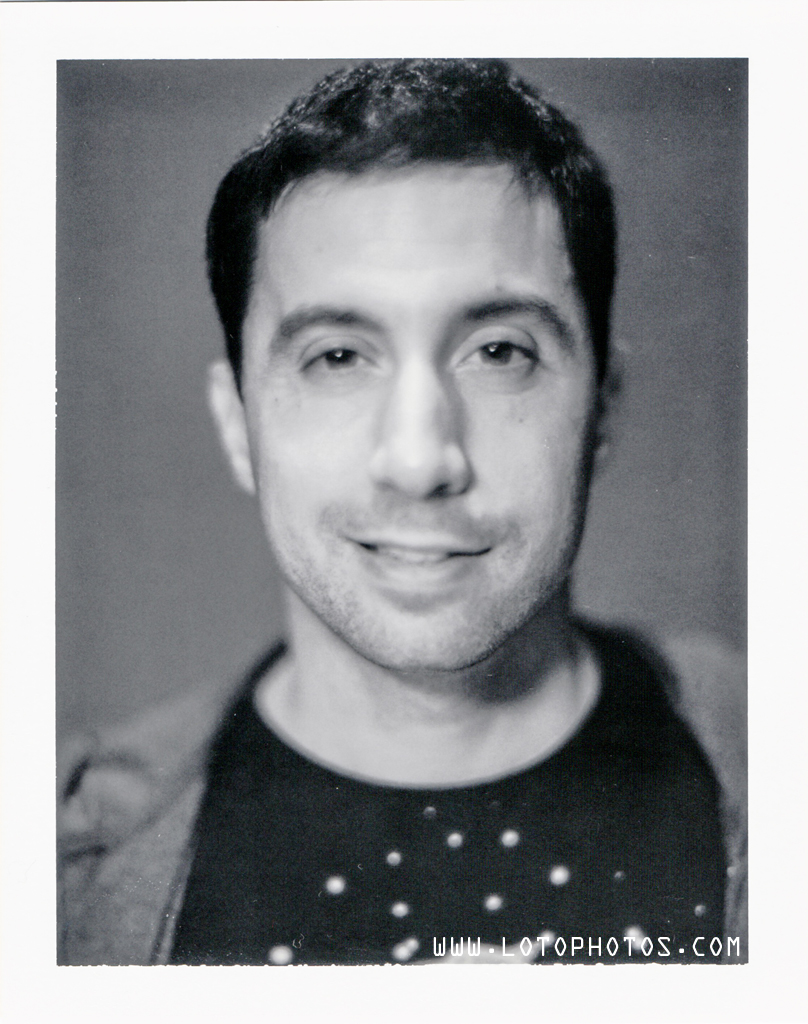
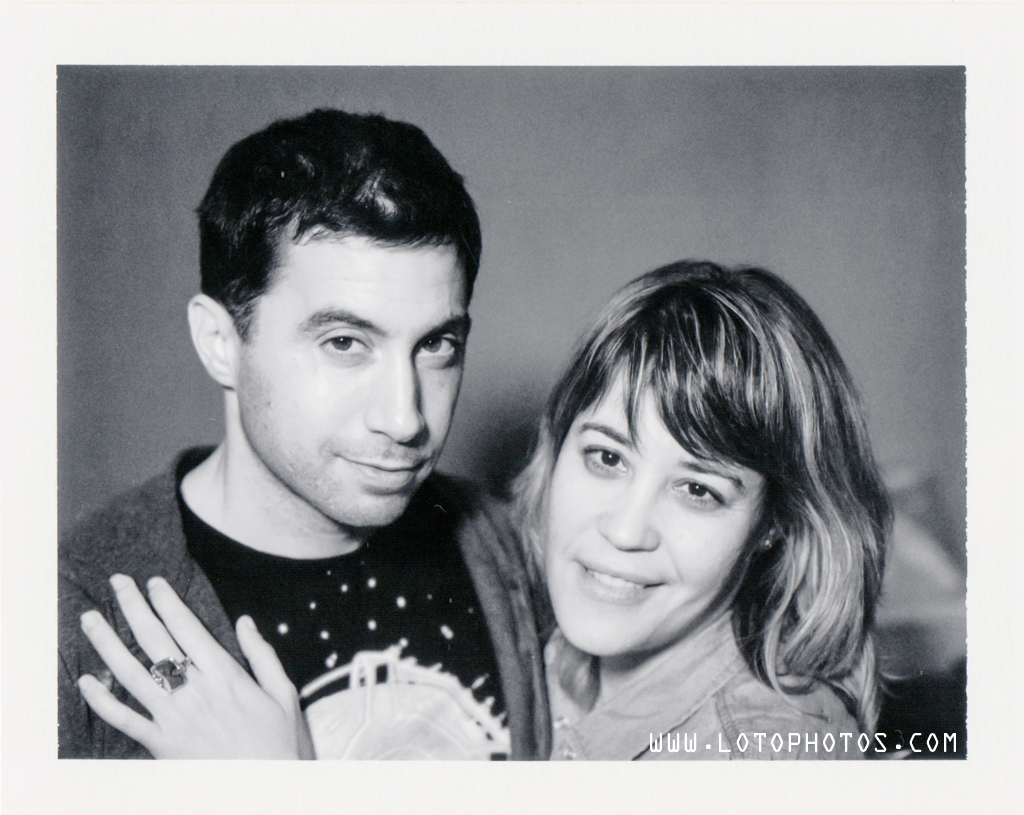
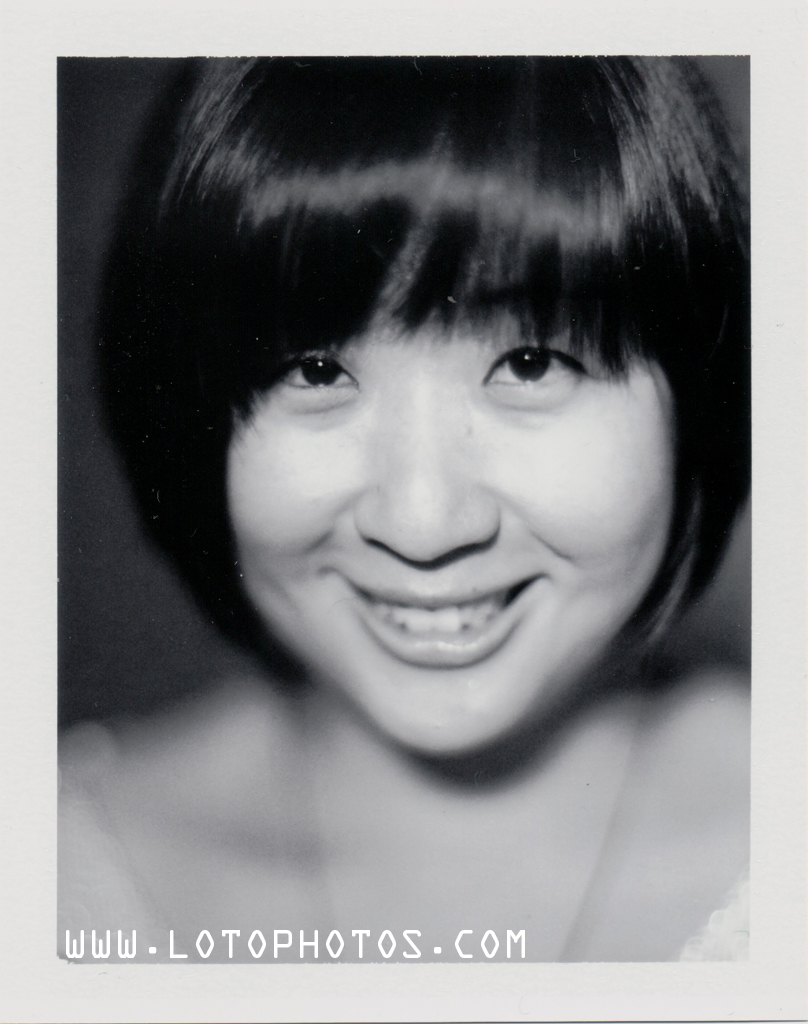
April 2016 had been the most productive month for lotophotos. Here are some large format portraits done for my visitors this month.
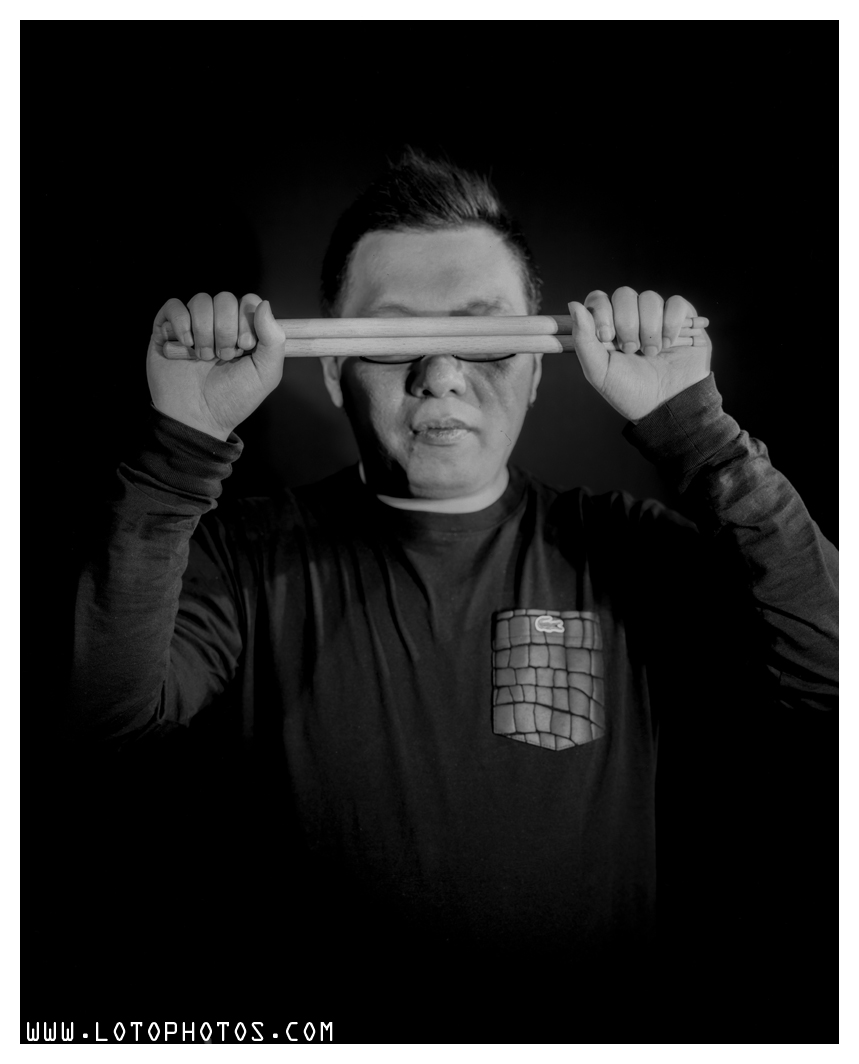
First one is Joseph Wei, a drummer and music producer from Hong Kong. The photo is taken inside a studio (with multiple flashes) from Kodak 2d 8×10 camera + Fujinon 250mm f6.3 lens + Kodak B/RA x-ray film.
The second one is of Michael Ho taken with Graflex Speed Graphic + Kodak Aero Ektar 178mm f2.5 lens + Expired (1993) Kodak Plus-X Pan 4×5 film. The Kodak aero ektar lens is always my preferred lens for 4×5 portraits. I am also happy that the very expired plus-x film still very useable despite metering it at ISO 50 (instead of the stock 125).
Graflex Speed Graphic + Kodak Aero Ektar 178mm f2.5 + Kodak Plus-X Pan film
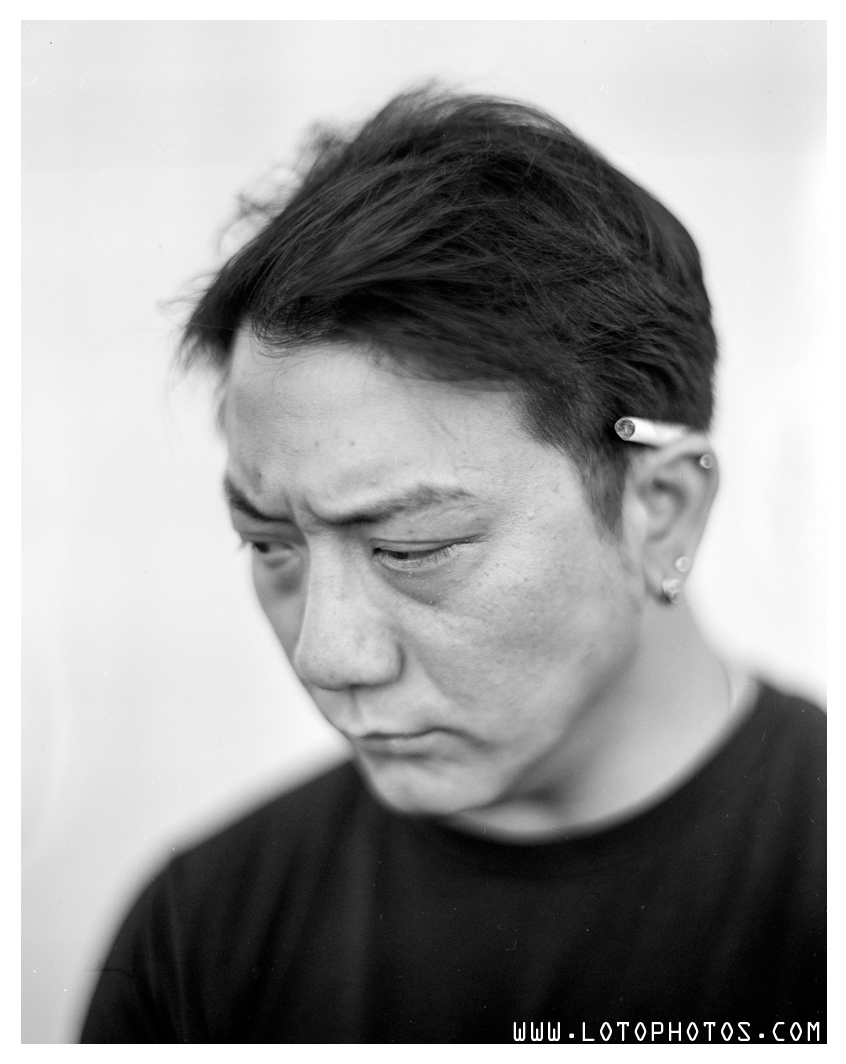
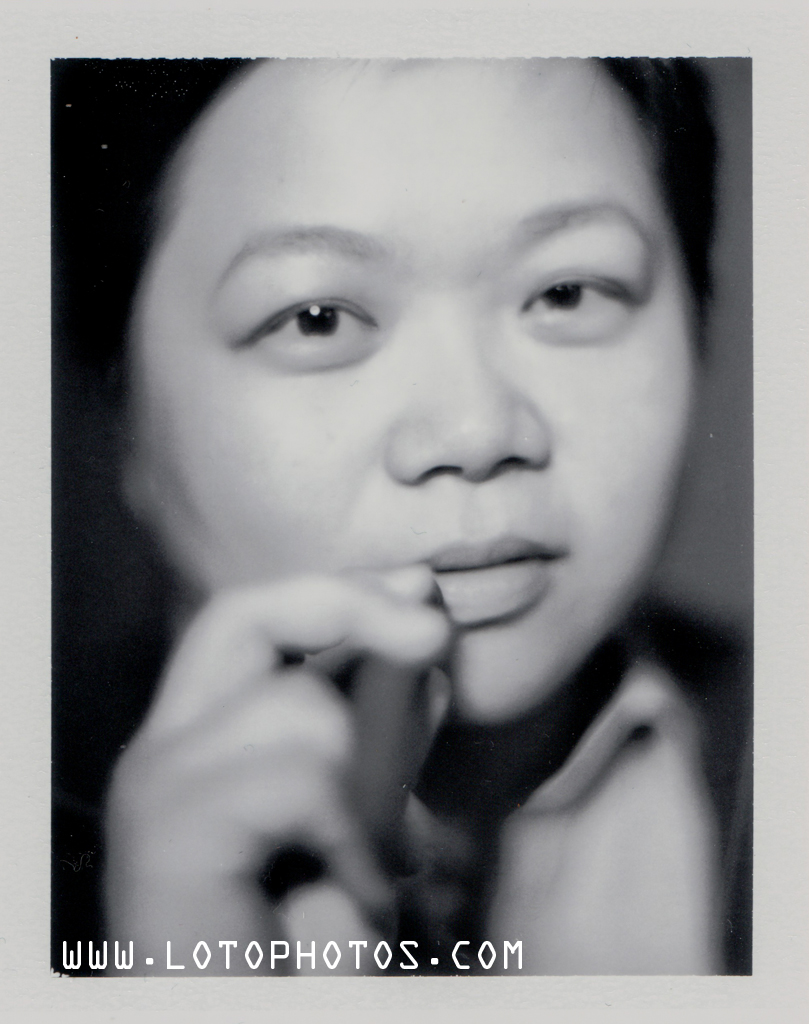
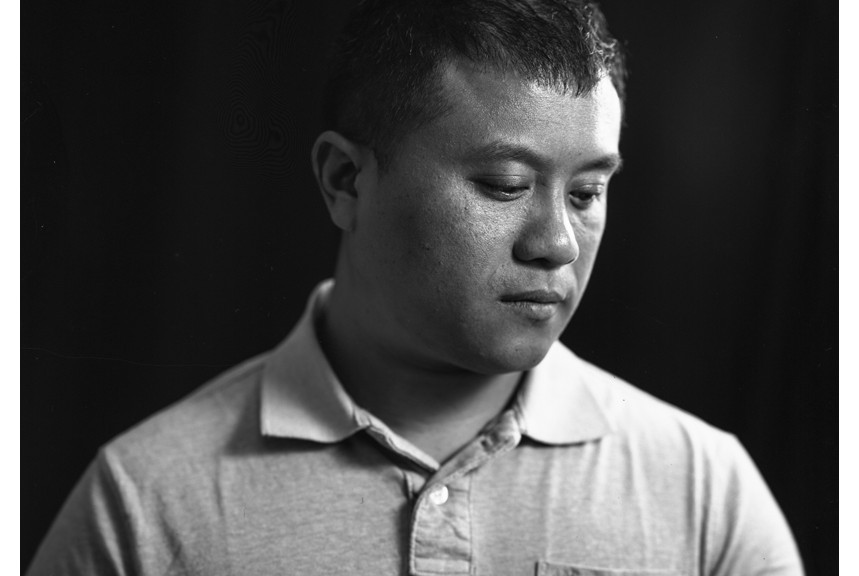
The following one is of Richard Fung in deep thought. Also shot with Graflex Speed Graphic + Kodak Aero Ektar 178mm f2.5 lens + Expired (1993) Kodak Plus-X Pan 4×5 film.
Graflex Speed Graphic + Kodak Aero Ektar 178mm f2.5 + Kodak Plus-X Pan film
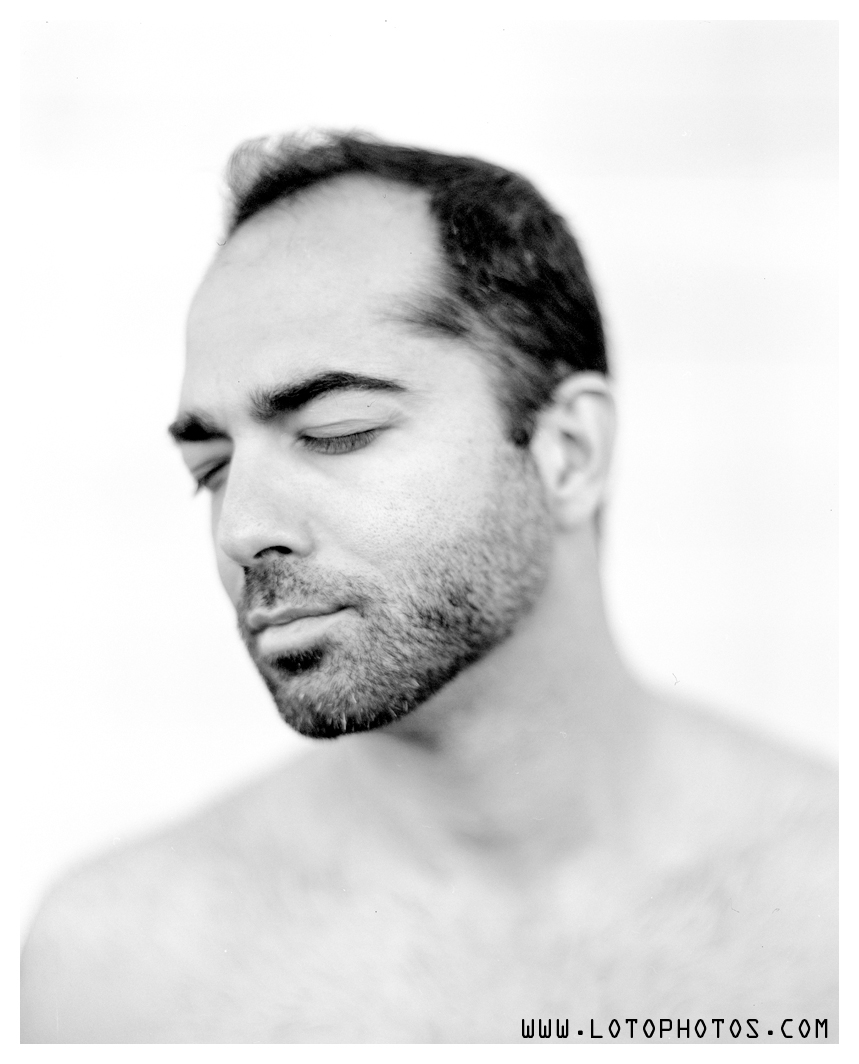
My friend Pouya Ashtiani models for the next shot. He was enjoying the warm San Francisco weather in this photo shot from Graflex Speed Graphic + Kodak Aero Ektar 178mm f2.5 lens + Kodak Plus-X Pan film.
Graflex Speed Graphic + Kodak Aero Ektar 178mm f2.5 + Kodak Plus-X Pan film
The last set is from the lovely couple Marko Kudjerski and Yandra Lluch. These polaroids were taken from Graflex Speed Graphic + Kodak Aero Ektar 178mm f2.5 lens + one big 1000 LED panel as light source.
World Pinhole Photography Day (WPPD) was held on April 25, 2016, more information here (http://pinholeday.org/).
Pinhole day used to be the only day that I shoot with these cameras, but this year, I actually prepared for it. When I was in Shanghai earlier this year, with the help of Kirk Lau, I 3D printed a 6×18 (actually I find it more 6×19) camera called terraPin Kaiju. I had a ton of issues with that camera and I will discuss this in a later blog. After sorting all the issues out, it’s actually a really fun camera to use.
I started WPPD this year with a few plates of 8×10. I used my Kodak 2D 8×10 camera with 0.5mm hole size and arranged it for 150mm and f/300.
Kodak 2D 8×10, 150mm f/300
I shot the following with Kodak Ektascan B/RA x-ray film. Here are a couple of developed plates, the details are just amazing and the exposure is also dead on.
Kodak 2D 8×10, 150mm, f300 with Kodak Ektascan B/RA filmKodak 2D 8×10, 150mm, f300 with Kodak Ektascan B/RA film
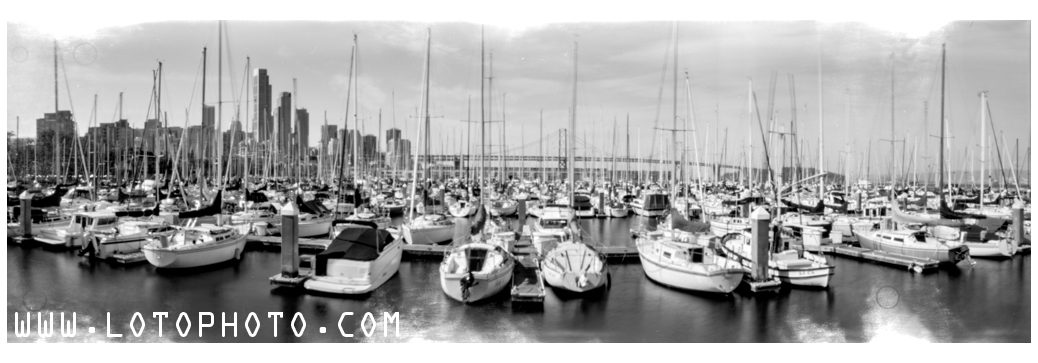
To walk around town, I took the 6×18 panoramic pinhole, equipped with a 0.4mm pinhole, 86mm, f/215 with a view angle of roughly 116.5 deg. The film that I used was my favorite, Fuji Acros.
terraPin Kaiju 6×18 camera
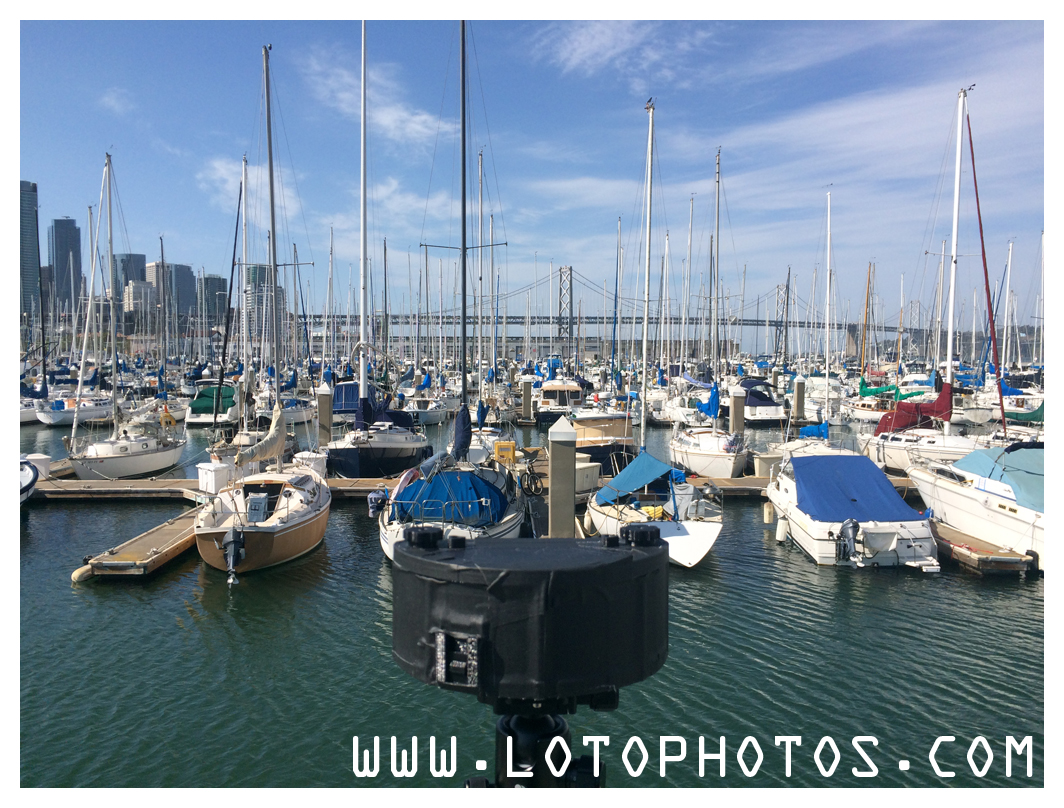
First I hit South Beach Harbor and it was a beautiful day.
terraPin Kaiju 6×18 camera in South Beach Harbor
The shots from that roll had a light leak when I was changing film. This is to remind myself to use the film clip and also change the film in darker places!
South Bay Beach and terraPin Kaiju 6×18 camera, 86mm, f/215 with Fuji Acros
As I walked towards AT&T Park, the Giants were playing.
AT&T Park with the terraPin Kaiju 6×18 camera, 86mm
I was trying to get a silhouette photo which came out like this. I would like it to be sharper but it was crazy windy that day. It was tough to have the whole thing stable, even for a few seconds.
AT&T Park and terraPin Kaiju 6×18 camera, 86mm, f/215 with Fuji Acros
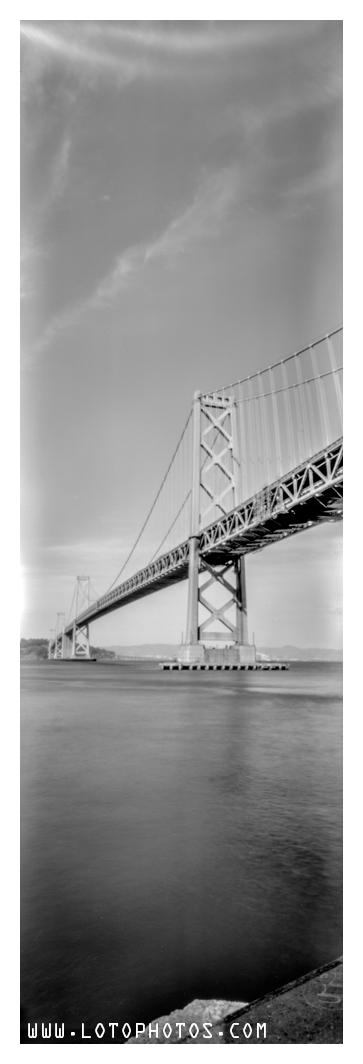
Next are a couple of shots of the Bay Bridge from both portrait and landscape orientation.
Bay Bridge and terraPin Kaiju 6×18 camera, 86mm, f/215 with Fuji AcrosBay Bridge and terraPin Kaiju 6×18 camera, 86mm, f/215 with Fuji Acros
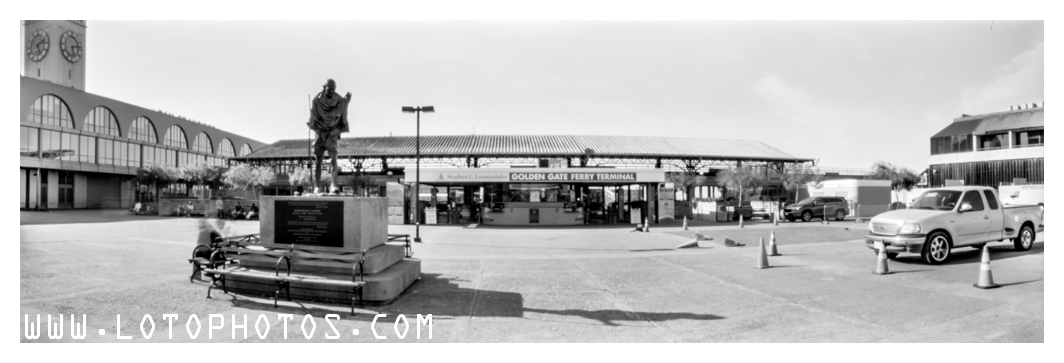
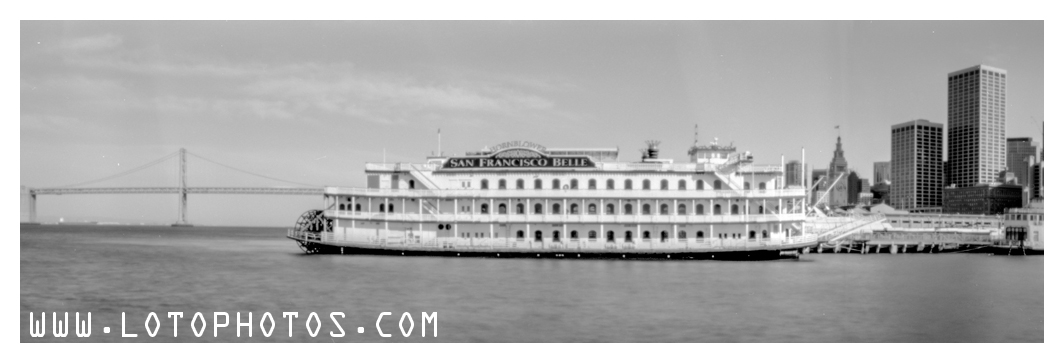
Behind the Ferry Building is the Golden Gate Ferry Terminal and a statue of Gandhi. In the high resolution copy, you can actually faintly read off Gandhi’s name under the statue. This is amazing detail, consider the lens is just air! No fancy optics at play here.
San Francisco Ferry Terminal and terraPin Kaiju 6×19 camera, 86mm, f/215 with Fuji Acros
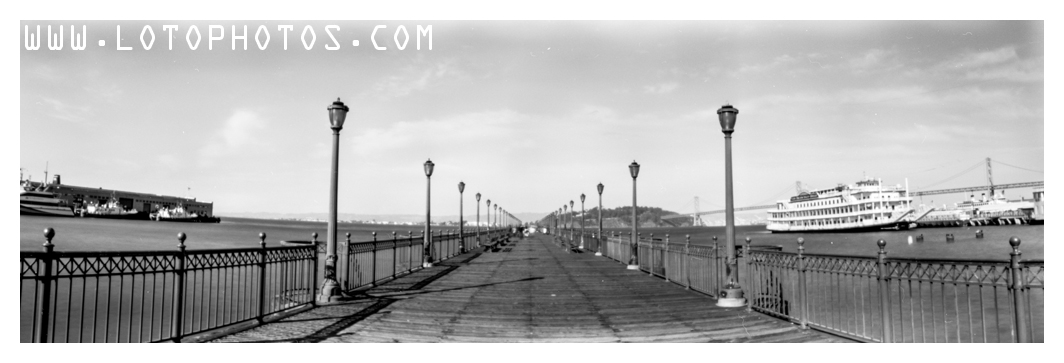
Next is Pier 7 and it was quite empty for a Sunday afternoon.
Pier 7 and terraPin Kaiju 6×19 camera, 86mm, f/215 with Fuji Acros
The San Francisco Belle was docked and check out the sharpness!
San Francisco Belle and terraPin Kaiju 6×19 camera, 86mm, f/215 with Fuji Acros
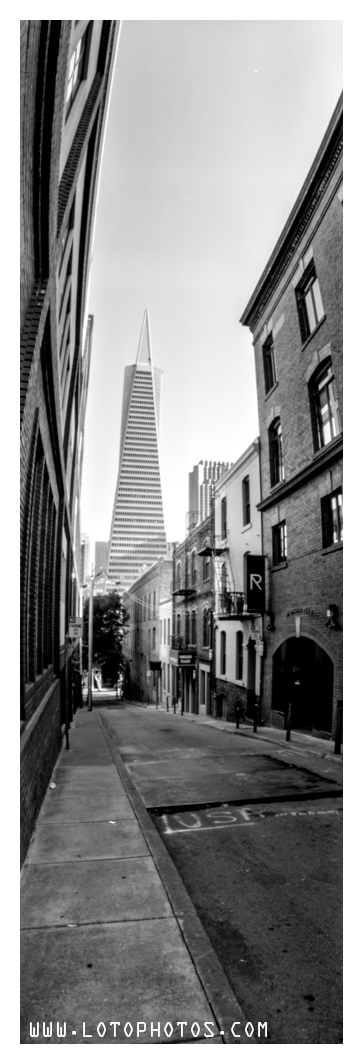
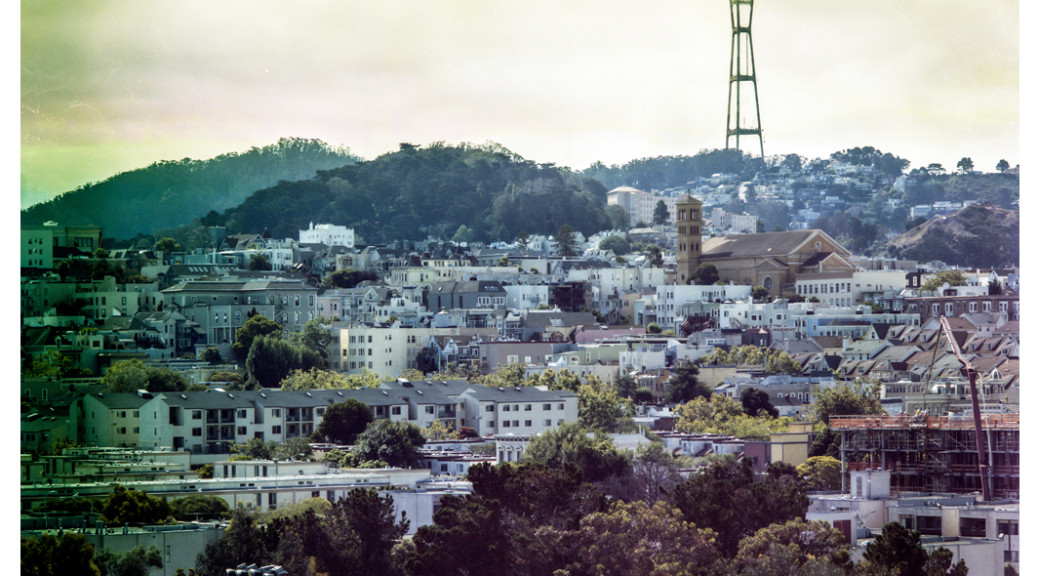
While walking on Broadway, there is an alley with a great view of the The Transamerica Pyramid. I always love the vertical panoramic but it is often quite hard to frame.
The Transamerica Pyramid and terraPin Kaiju 6×19 camera, 86mm, f/215 with Fuji Acros
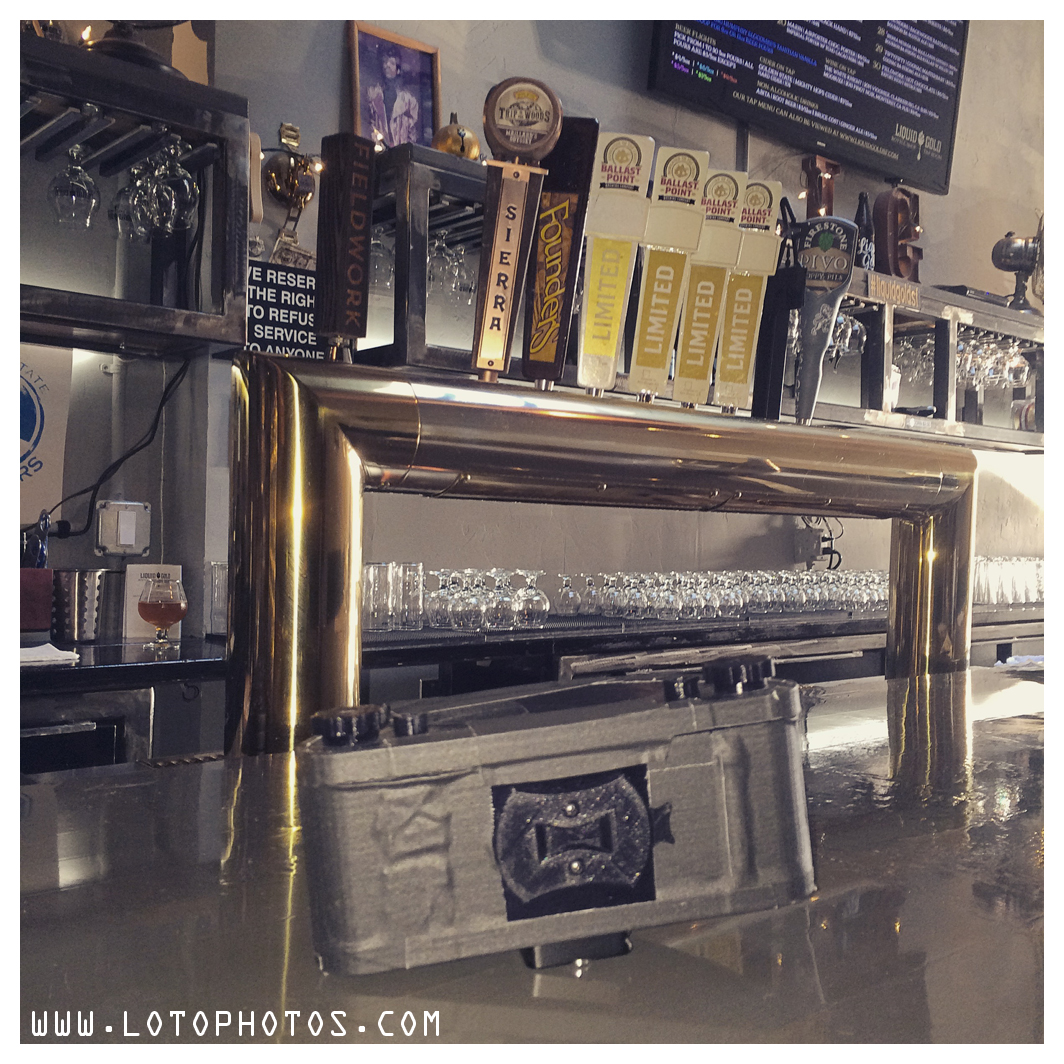
I have to say it was a lot of fun this year on WPPD. This is the most I have shot compared to previous years. The final stop was at Liquid Gold with four limited edition Ballast Point beers on tap!
Liquid Gold SF with four limited edition Ballast Point beers on tap!
Last summer, I had a tinype photo sitting with Nuno Marcelino in Lisbon, Portugal. It was an amazing time and he showed me all the ropes in producing a wet collodion tintype. This had been something that I wanted to do for a while but never got the chance to. I came across the Rockland Tintype Parlor kit a few months back and decided to give it a go before I dive into wet collodion.
The Rockland Tintype Parlor kit includes eight sheets of 4×5 tintype plates, 1 oz of Ag-plus emulsion, a bottle of reversal developer and a small pack of fixer powder. It’s a nice little kit for $35 and you pretty much have all you need to start making tintypes.
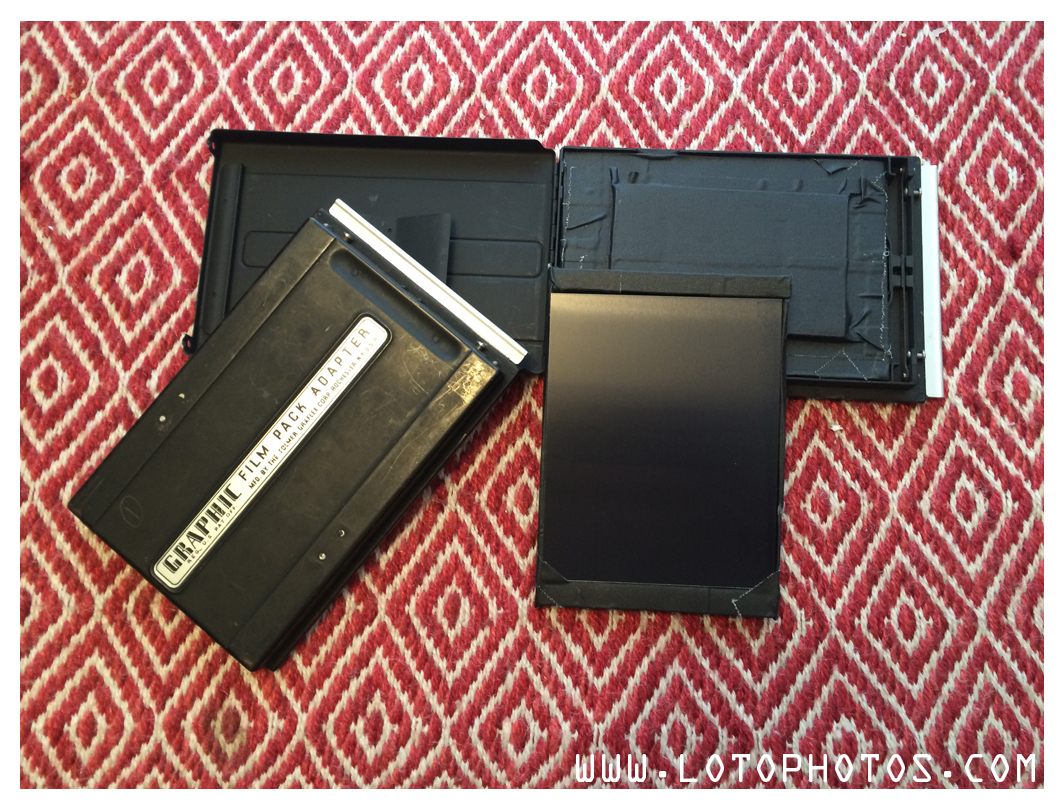
Next, you have to figure out how you are going to mount the tintypes in a film holder. I have done some research and the easiest way is to double-side tape the plate to a normal holder. Or you can cut it down and fit the custom ones sold by RayKo Photo Center in SF. I didn’t like the idea that you need to trim it down to 3.375″ x 4.375″. Why lose the extra 0.625″? I decided to make my own. The idea came when I was cleaning up some old 4×5 holders at home. I saw an old Graflex Graphic Packfilm adapter that I never use (since the film had been obsolete for decades). I opened it up and I thought it would be the perfect candidate to make my own “true” 4×5 tintype holder. Using foam core and black gaffers tape , I custom made the padding and holder that will fit inside this adapter. Everything was snug and I can see the tintype plate fits perfectly with the original mask.
Next, it’s coating the emulsion. I put the clear bottle of Ag-plus in warm water. I put my plates on the red light for preheating. I have a block of ice in tupperware and a hair dryer (that can blow cold air) for solidifying the emulsion and drying of the plates.
Coating my first tintype plates
I waited for about 7-8 minutes and started to squeeze the Ag-plus out of the bottle. Chuck of it came out, oh no! I carefully put the chunks back in the bottle and back in the warm water bath. I waited for another 5 minutes and finally everything in the bottle liquefies. I pour a quarter size of Ag-plus onto plate and started to swirl it around. It just won’t move, so I started to spread it with my fingers. This is bad, uneven coating is just an understatement. I poured the excess in a black 135mm film can for later use. I then put this horribly looking plate onto the block of ice for about 3-4 minutes before blow drying it. Then I put this into my pre-made 4×5 holder to be laid flat and dried overnight.
By my 4th plate, I was getting better at this. I realized a couple of mistakes I made. First, I need to pour a lot of ag-plus (1/4 of the plate) on the plate before it can be coated by swirling it around (no fingers). The consistency of the Ag-plus is best described as white glue. It’s thick and not too easy to flow around the plate (unlike collodion). The second issue I had was the temperature of the plates itself. Heating it on the red safety light was not enough and it cooled down too quickly and the ag-plus solidify almost immediately from contact. Next time I will either hot blow dry the plates to temperature or setup an electric hot plate. Keeping the ag-plus bottle warm is also crucial.
After the plates dry overnight, it’s time for test shots. From the research, the ISO rating of this emulsion varies and highly dependent on the thickness of the coating. My first coating was so ugly that I am sure I will hit all sorts of ISO rating on the one sheet. For rule of thumb of testing, I metered for ISO of 0.5.
Not enough light! ISO 0.5?
I mounted three flashes at full power (1/1, 105mm) and an LED panel (1000 LED) at full 99%. I metered it at ISO of 3 and showed F8 at 1 sec. I have read that you need to put in a blue filter in front of the meter to get an accurate reading. I don’t have a blue filter handy but I will give it a try later to see if there are any difference. I setup my Graflex Speed Graphic with a Fujinon 135mm f5.6 lens shooting wide open. The light was blinding and I took the tintype to my darkroom.
I pour the Rockland reversal developer onto my Paterson 5×7 trays and started to agitate the plate. The instruction says a development time of at least 3 minutes. After 3 minutes, I can still white spots on the plate. Finally after 6 minutes, the plate turned completely black and then an image started to emerge. I developed the plate for another 4 minutes to a total 10 minutes. Instead of using Rockland’s powdered fixer, I just dump it in my Ilford Rapid Fix bath for 6 minutes before rinsing out with water.
Result of my first tintype.
I see an image!! and better yet, I can recognize they’re my 8x10s! The long development time tells me that there might be issues with my developer or my emulsion. The fact that it took so long for my plate to turn completely black tells me that my coating of emulsion might be too thick. The reversal developer in the bottle is also not clear but already slightly brownish when I opened the package. This tells me that the developer might be bad, hence hindered the development. I did a second test shot with the same lighting setup by with my Kodak Aero Ektar 178mm lens wide open at f2.5. When I developed it, even after 13 minutes, only a faint image surfaced. Again, I need to explore rather it’s my developer that’s gone bad or my emulsion is too thick. I was quite shocked that the first tintype turned out as well as it did and this is really encouraging.
Ammonium Thiocyanate, ready to mix my own reversal developer
I did some research online and found a formula for this reversal developer, which is 120mL stock undiluted Dektol with 4g Ammonium Thiocyanate. I will make my own batch and see how it works out.
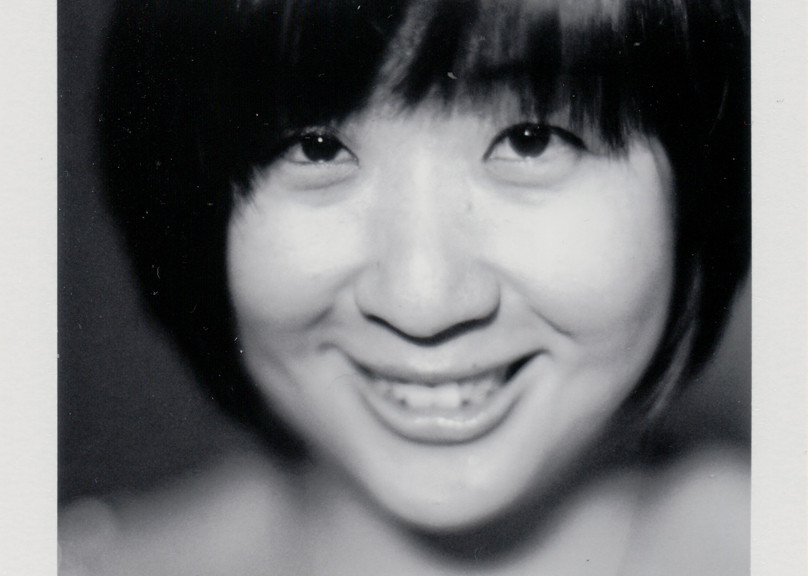
Each time I use the Graflex Speed Graphic with the Kodak Aero Ektar lens, I am always so amazed on what I get. After a professional photo sitting Sunday afternoon, I threw in a pack of Fuji FP3000b and took some portraits. For lighting I used an Aputure Amaran AL-528S LED hitting directly at the subject from the front. All polaroids scanned with Doxie Flip scanner. Here are results of that session.
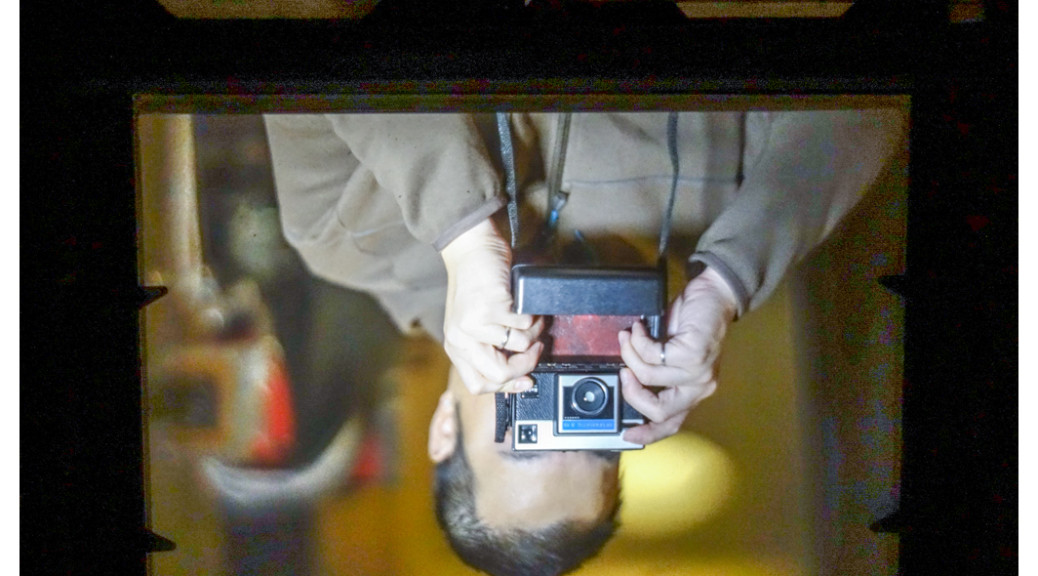
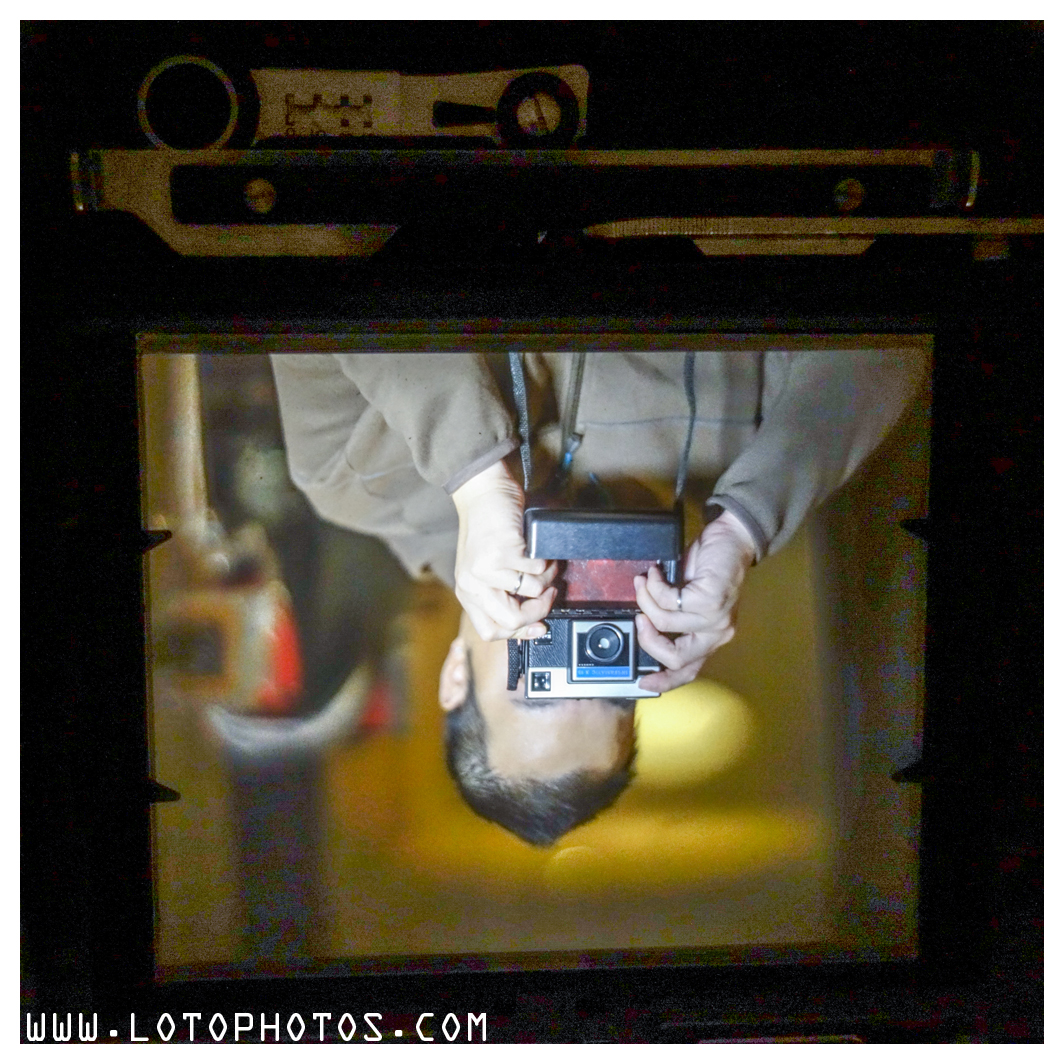
I was nominated by Joyce Peng to do a 7-day self-portrait challenge: 7 days, 7 self-portraits, and 7 nominations to keep this going with other artists/photographers. I invite Kirk Lau to take the time to extend the fun.
I put a small twist to this challenge as well. I will be composing self-portraits through the viewfinders of different cameras.
The last of the challenge, I feature a very special camera. The 1955 Graflex Speed Graphic camera mounted with Kodak 178mm Aero Ektar f2.5 lens. Being large format, the focusing screen is again upside down and reversed left to right. At f2.5, the screen is super bright and you can see the bokeh clearly. Today I am holding my first camera, the Kodak Instamatic X15 which is in 126 format. This is the exact same camera that Dustin Hoffman used in Rain man!
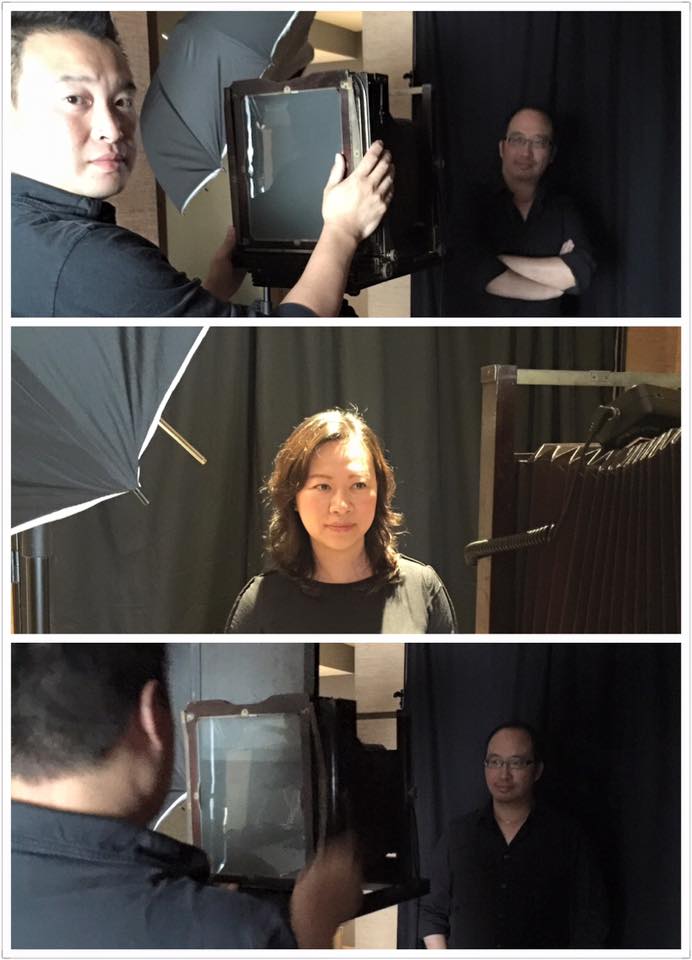
During a recent visit of Henry and Wendy in SF, I invited them to have their portraits done in large format. Setup of the day was my 91-year-old Kodak 2D 8×10 camera with Fujinon A 240mm f9 lens and Kodak Ektascan x-ray film. The strobes, I used two light sources, one direct light above the camera and a reflective light from the left of the subject. The dark background is a big piece of black cloth that is about 2.5 feet behind the subject.
Here is a collage of photo of me in action, courtesy of Henry and Wendy.
Portrait session
The film is developed with Kodak D76 1+1 for 10-12 minutes at 19C with rollers and scanned with Epson Perfection V700. Scanning this time I was faced with a lot of Newton ring issues. I have an AN glass but that only prevented newton rings from one side of the light. I have to scan the negatives with emulsion down on the scanner glass, then I put the AN glass on top of the negative. This way I was able to get rid of most of the newton rings. I guess I probably need another piece of AN glass and hopefully this issue will go away.
The first photo is that of Henry. It was shot at f11, 1/30 sec and turned out quite nicely.
Portrait of Henry
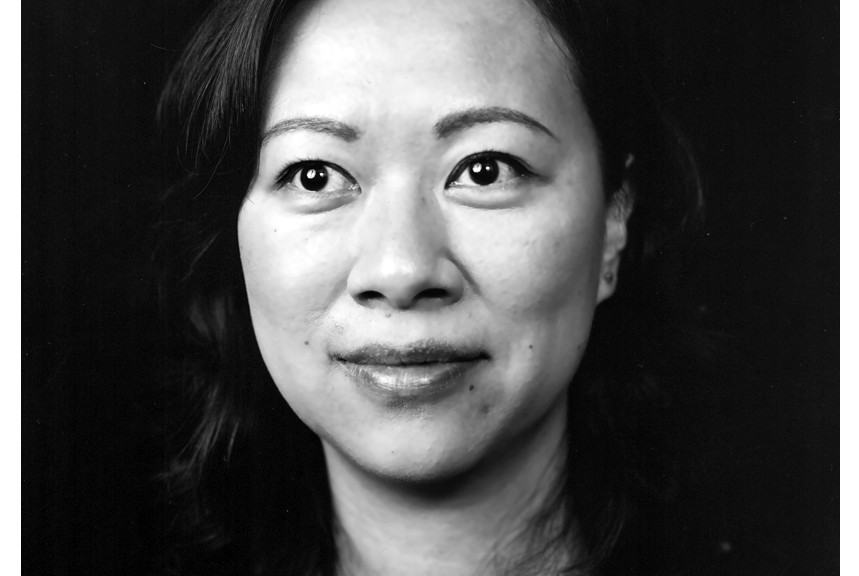
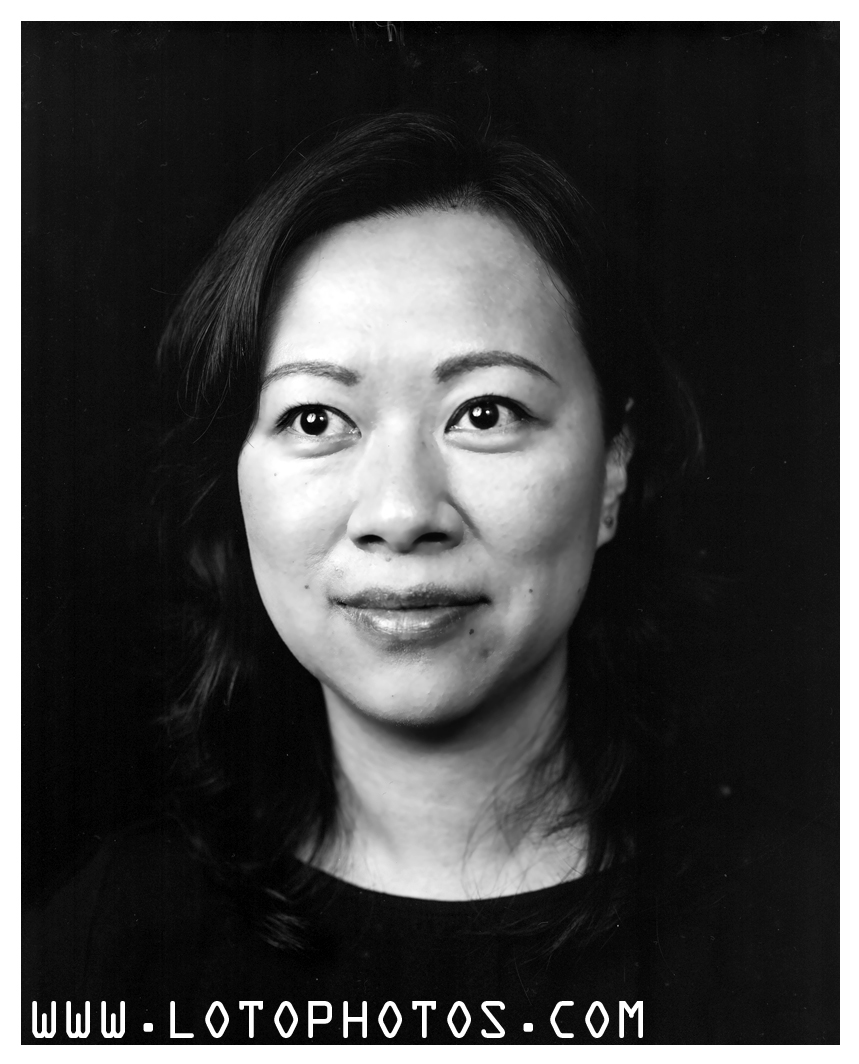
Wendy here featured in the second photo, also shot at f11, 1/30sec. I have asked her to look into the left (her right) reflective light.
Portrait of Wendy
The final shot is of them together, shot at f16 1/4 sec. I had cranked up the strobes to be the highest level. The init negative is dark and about a click off. I need to double up on the flash to get more light next time. I have focused on Wendy’s eyes and even at f16, the depth of field is so narrow that Henry’s eyes were very slightly off focus. I need to add more light sources and try at f22 or even f32 next time for group portraits.
Portrait of Henry and Wendy
Overall another fun shoot that yield some fantastic portraits.
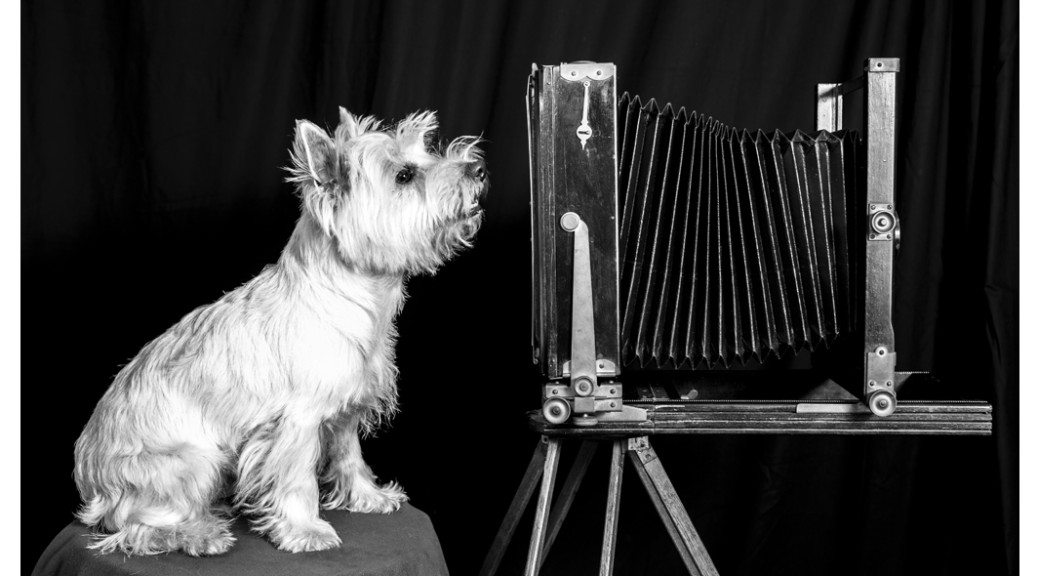
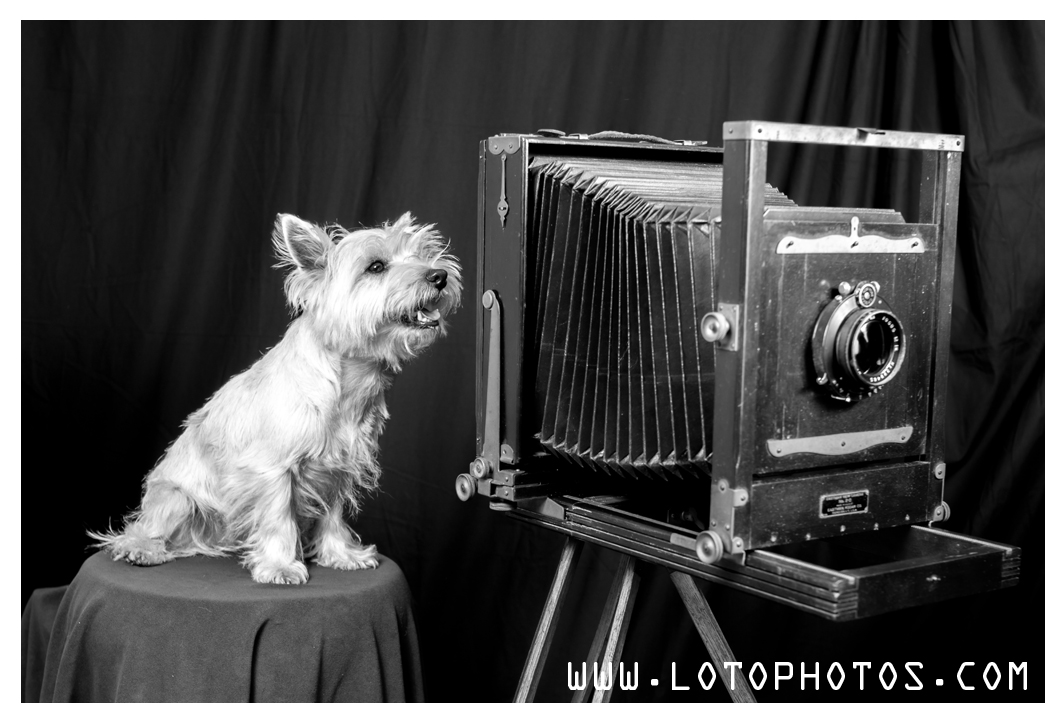
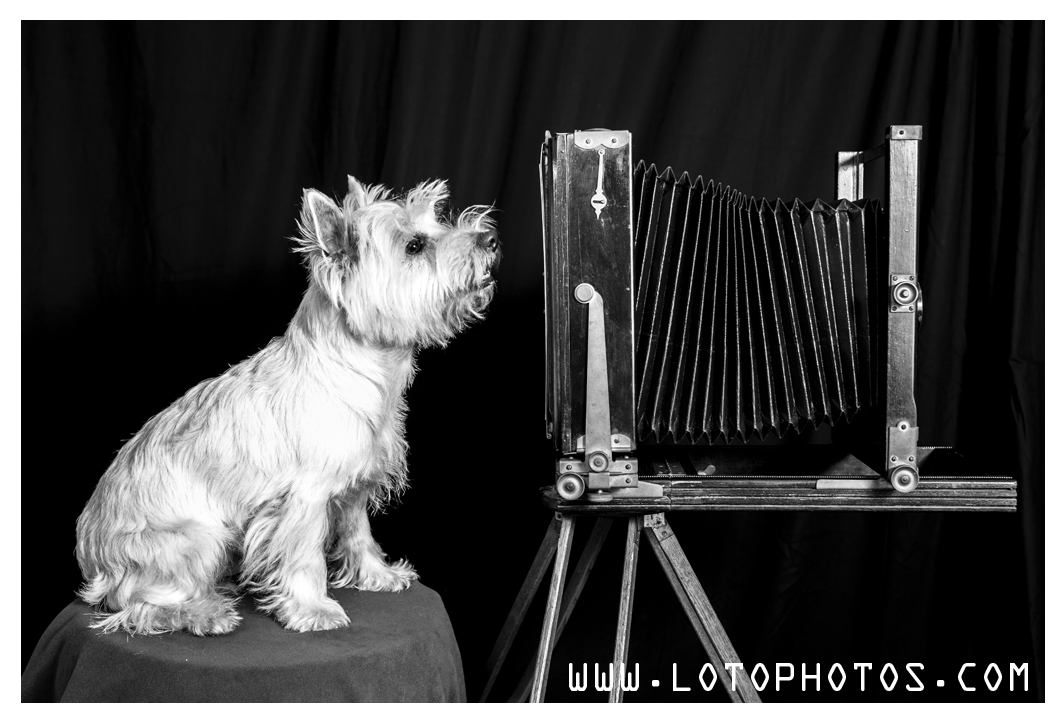
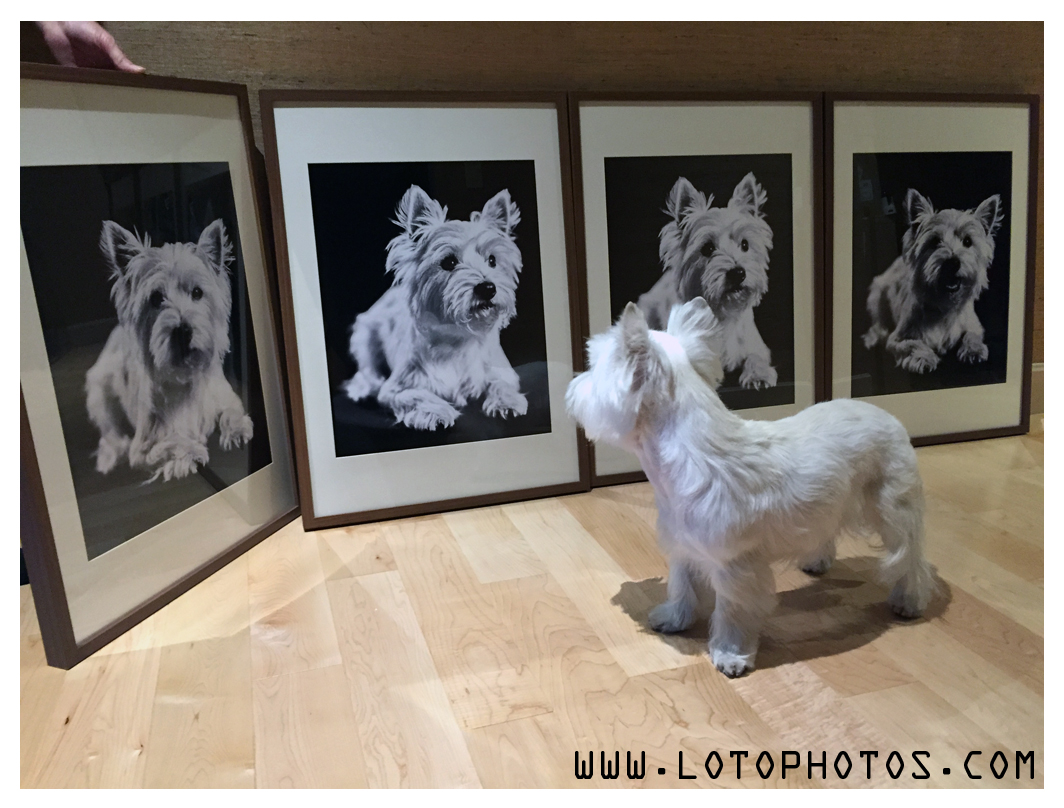
Basil the westie is a happy and friendly dog and always bring joy to me whenever I see him. After a recent dinner gathering with his owner Natasha Hsieh, we decided to head back to our home studio and take some portraits. Basil was a superb model and here are some highlights of that shoot.
I was trying to teach Basil how to operate the Kodak 2D and he got the hang of it quite quickly. Photo below entitled: “His master’s visage”.
Finally took my umbrellas out of their boxes and setup some lights at home. Rick was visiting and took the chance for a portrait sitting. I tried several setups and ended up with two lights. One from the left back with diffuser at 45deg and one in the front with diffuser at about 45deg from the left. A reflector is also placed around waist level. Here is one from the shoot.
Portrait of Rick
Shot with Burke & James Grover 8×10, Fujinon 400mm f8 lens, Kodak Ektascan B/RA film. Developed in Kodak d76. Scanned with Epson Perfection V700. Even though the Fujinon 400mm lens was meant to be used with 5×7, as seen here, at f8, the image circle is big enough for use with 8×10. The lights used are a pair of Yongnuo YN565EXII and a pair of YN622 and YN622TX triggers.
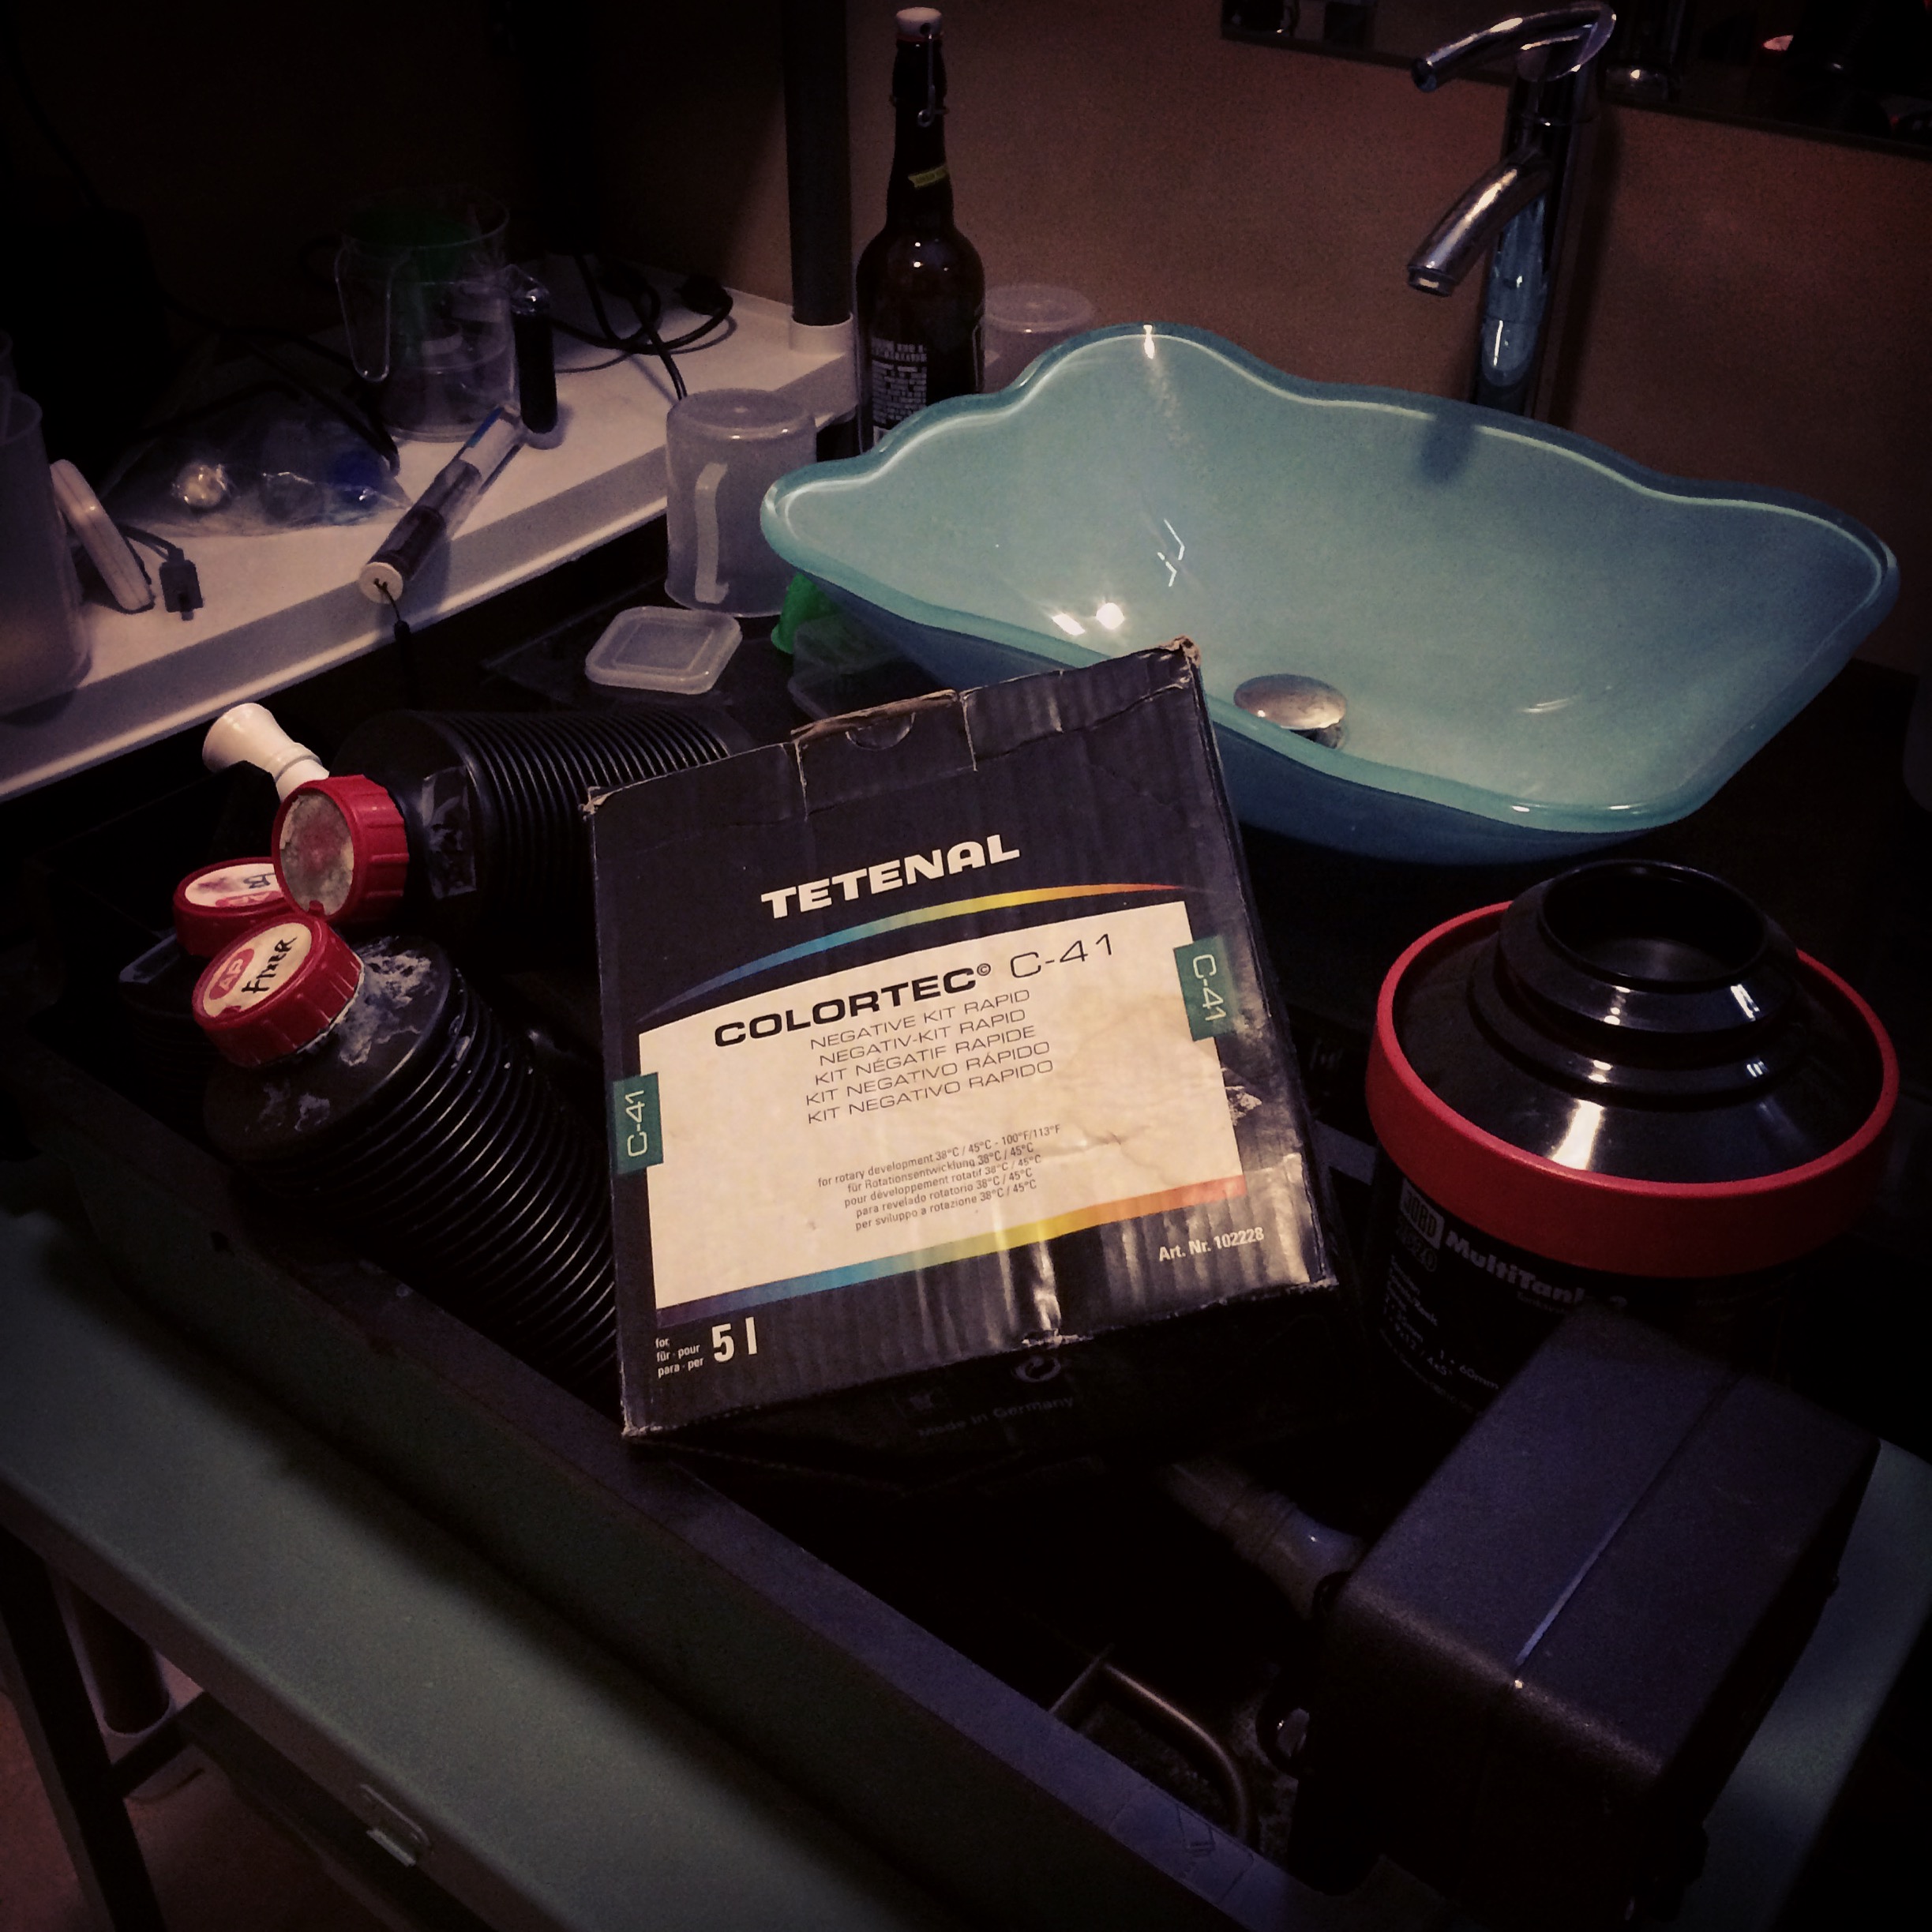
While cleaning up my photo gears, I see a box of Tetenal C41 kit that I got and opened a couple of years ago in Shanghai. Since then, it made its way to Hong Kong and to San Francisco. On arrival to SF, I discovered that one bottle of the Blix solution actually bursted and was leaking all over the box. All these items were stored in a storage that was certainly quite hot (30C+) for months before making its way to the US.
I also found a few 4×5 film boxes of Kodak Portra 400 that I loaded about two years ago. This is when expired chemicals meet expired film, a combination that has the word “disaster” written all over it.
Expired Tetenal C41
I got my Paterson Auto Colortherm machine from Toronto some time back. I refitted it so that I can use the roller for my jobo tank. I mixed the chemicals into its three parts and noticed a few things. First, the clear blix mixture has a lot of residue at the bottom and was stuck. I warmed it out, it helped a bit but there are still chunks of it at the bottom. Second, the stabilizer bottle have merely 50mL left. 1L mixture required 100mL, what the heck, just mix it.
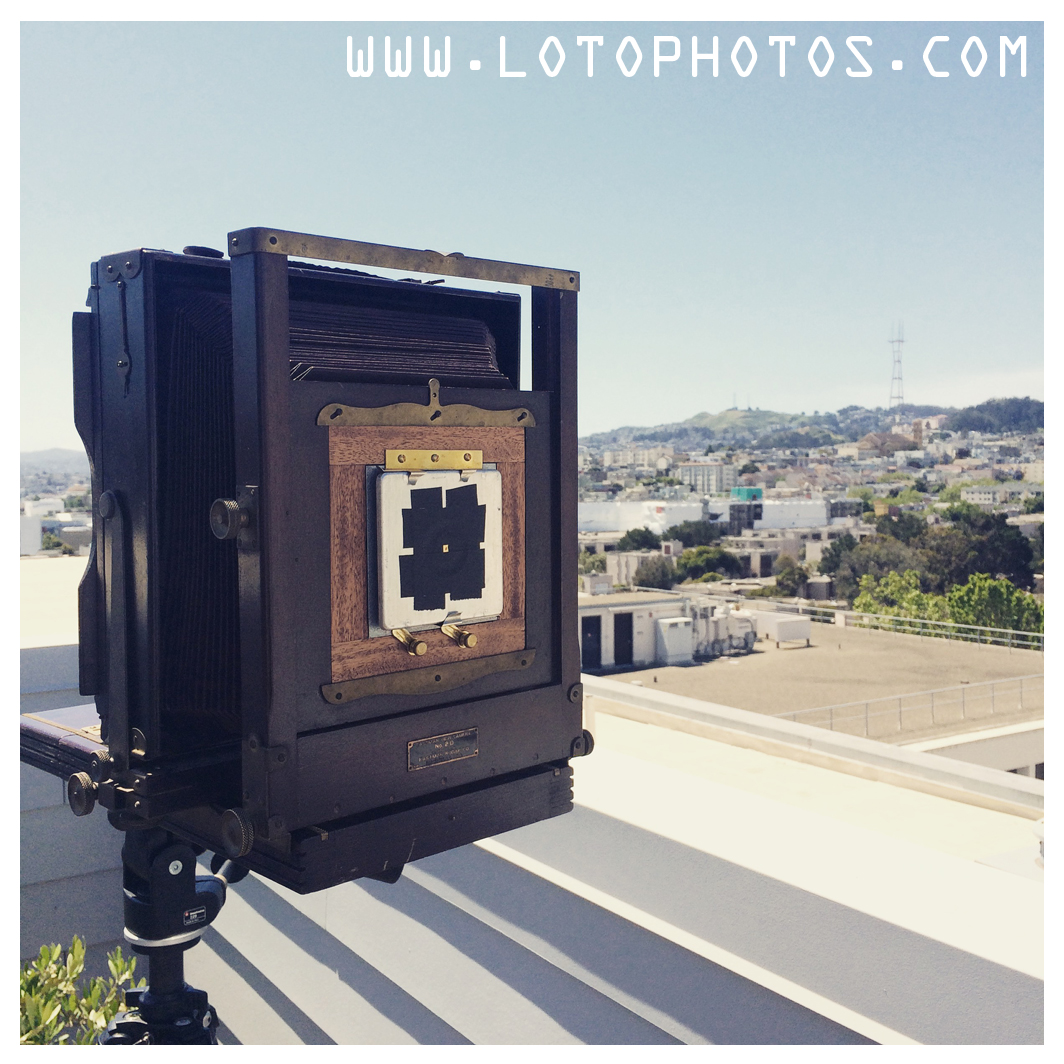
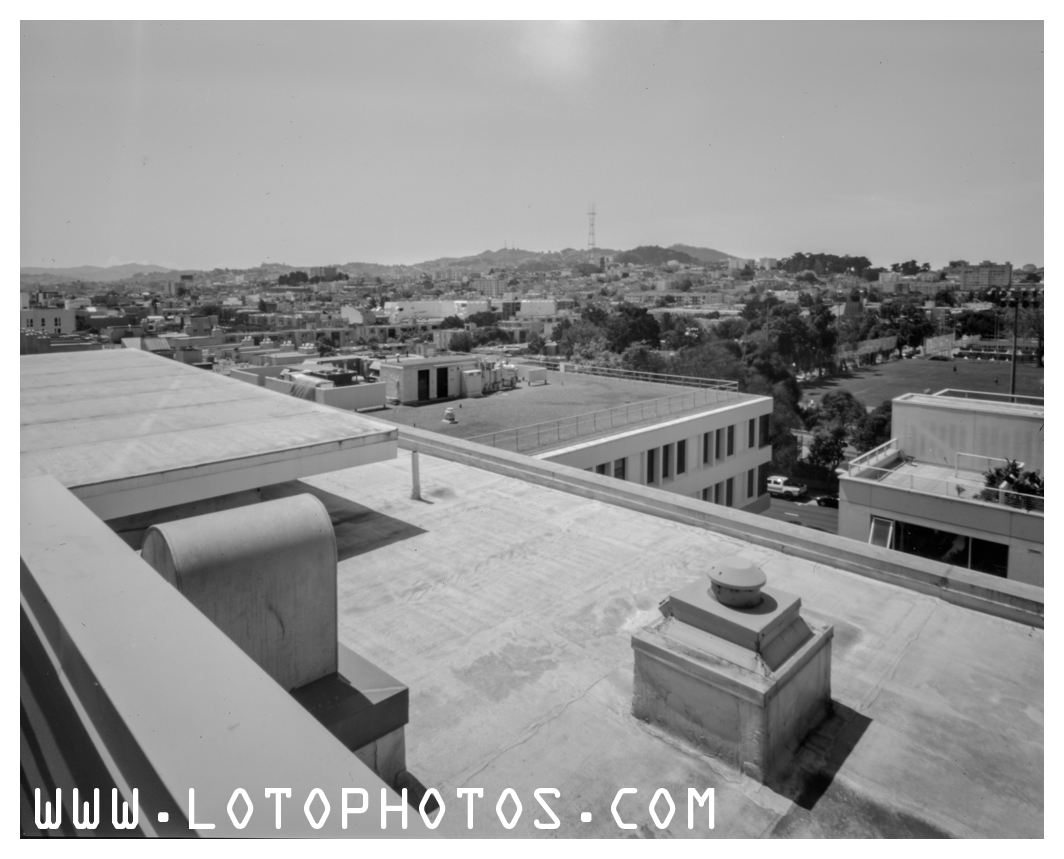
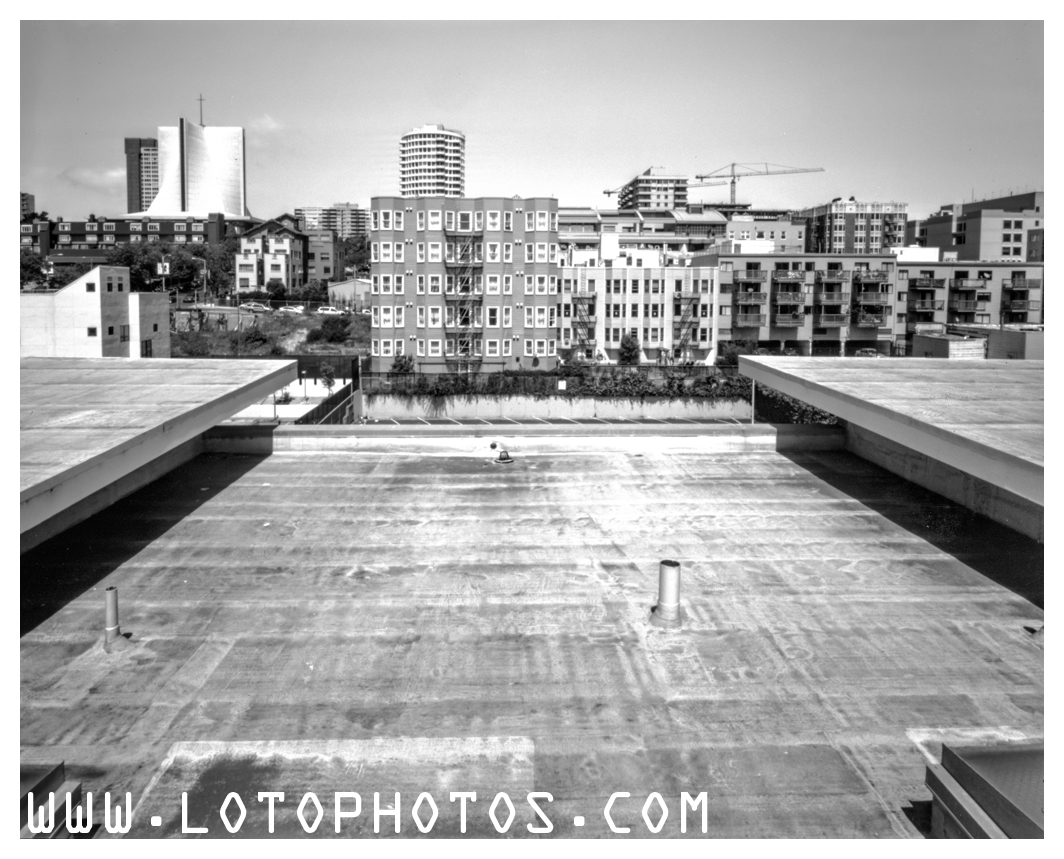
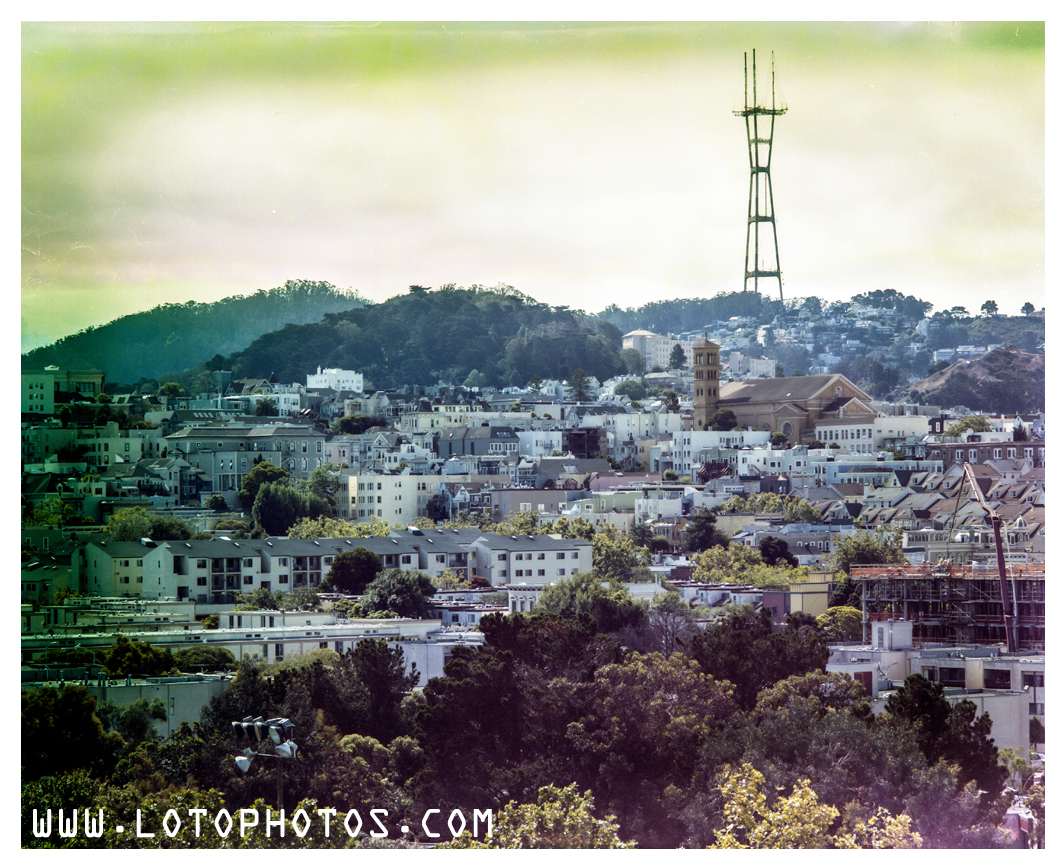
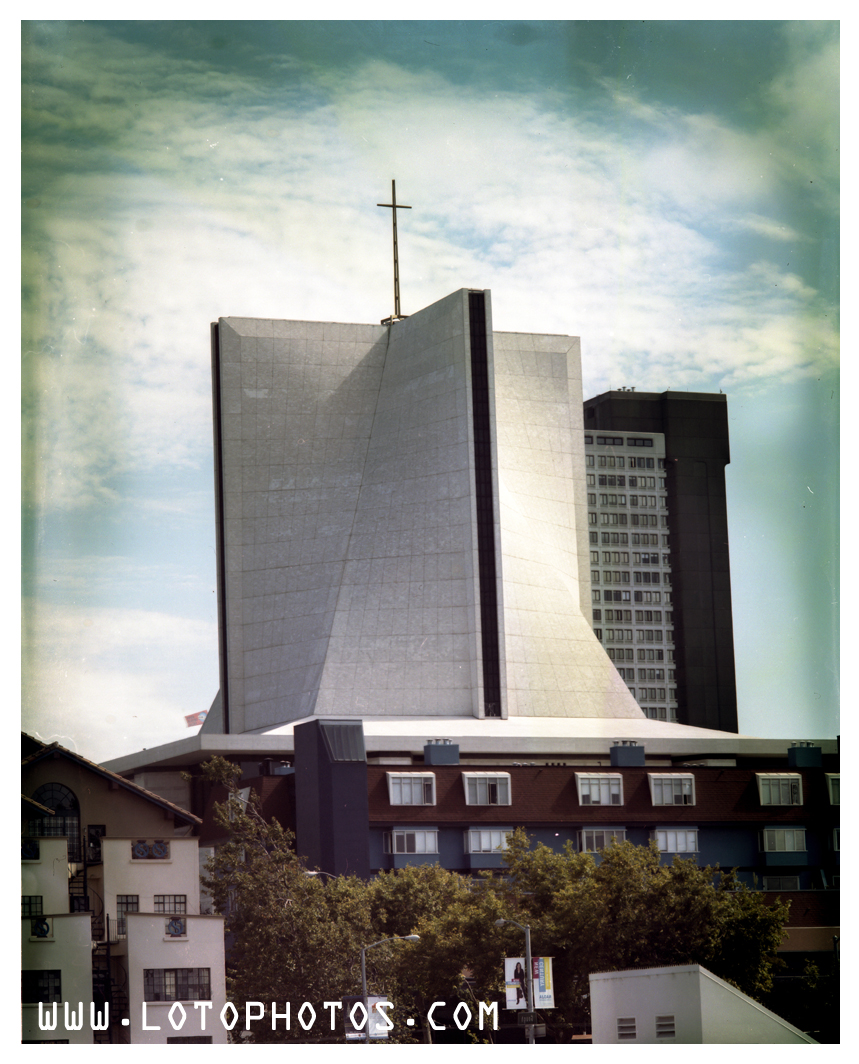
I took my Graflex SG with a Fujinon 400mm f8 lens on my roof for the test shots in one late afternoon.
Graflex speed graphic with fujinon 400mm f8
I shot the Kodak Porta 400 at ISO 200. I developed the sheets slightly longer than the recommended times. Developed 3:30min, Blix 5min. When I opened the Jobo tank, I see images, solid images. I scanned the negatives with my Epson Perfection V700. The unedited result is shown here.
Expired Kodak Portra 400Expired Kodak Portra 400
All the details are there. The edges showed some funky chemical gradient that made the image looked like something out of a roll of lomography film. The overall look of it is vintage and reminded me of a postcard from the 60s.
Overall, I am happy with the result and I guess I will develop many more sheets with the Tetenal kit before it runs out.