Last summer, I had a tinype photo sitting with Nuno Marcelino in Lisbon, Portugal. It was an amazing time and he showed me all the ropes in producing a wet collodion tintype. This had been something that I wanted to do for a while but never got the chance to. I came across the Rockland Tintype Parlor kit a few months back and decided to give it a go before I dive into wet collodion.
The Rockland Tintype Parlor kit includes eight sheets of 4×5 tintype plates, 1 oz of Ag-plus emulsion, a bottle of reversal developer and a small pack of fixer powder. It’s a nice little kit for $35 and you pretty much have all you need to start making tintypes.
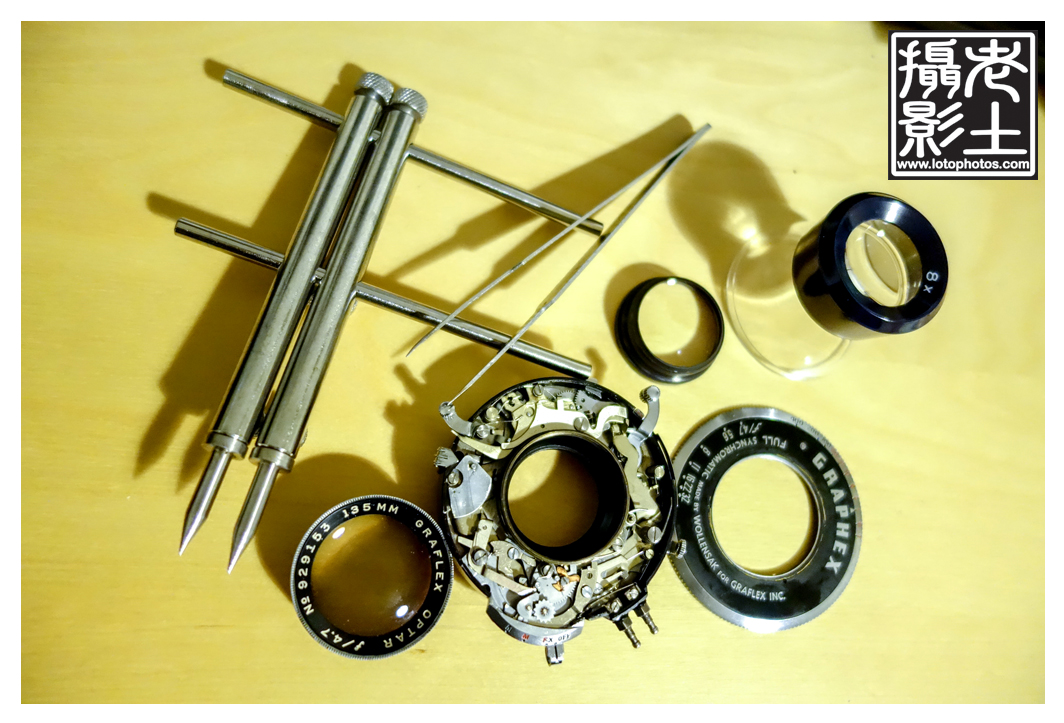
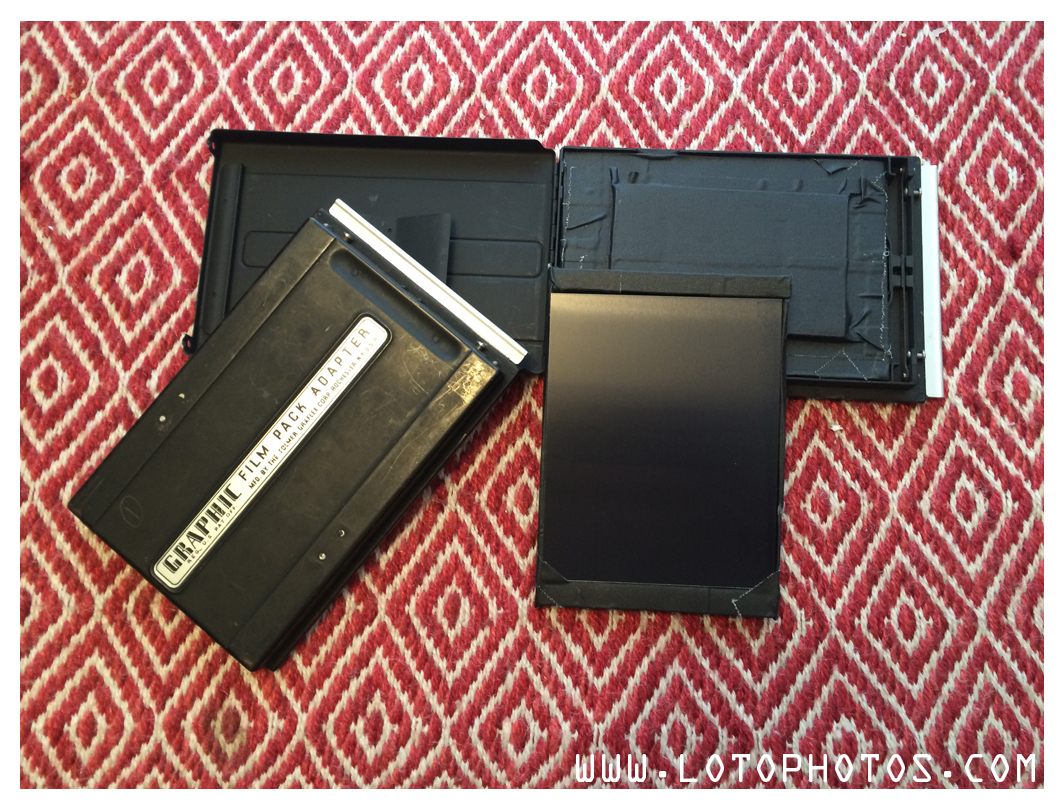
Next, you have to figure out how you are going to mount the tintypes in a film holder. I have done some research and the easiest way is to double-side tape the plate to a normal holder. Or you can cut it down and fit the custom ones sold by RayKo Photo Center in SF. I didn’t like the idea that you need to trim it down to 3.375″ x 4.375″. Why lose the extra 0.625″? I decided to make my own. The idea came when I was cleaning up some old 4×5 holders at home. I saw an old Graflex Graphic Packfilm adapter that I never use (since the film had been obsolete for decades). I opened it up and I thought it would be the perfect candidate to make my own “true” 4×5 tintype holder. Using foam core and black gaffers tape , I custom made the padding and holder that will fit inside this adapter. Everything was snug and I can see the tintype plate fits perfectly with the original mask.
Next, it’s coating the emulsion. I put the clear bottle of Ag-plus in warm water. I put my plates on the red light for preheating. I have a block of ice in tupperware and a hair dryer (that can blow cold air) for solidifying the emulsion and drying of the plates.

I waited for about 7-8 minutes and started to squeeze the Ag-plus out of the bottle. Chuck of it came out, oh no! I carefully put the chunks back in the bottle and back in the warm water bath. I waited for another 5 minutes and finally everything in the bottle liquefies. I pour a quarter size of Ag-plus onto plate and started to swirl it around. It just won’t move, so I started to spread it with my fingers. This is bad, uneven coating is just an understatement. I poured the excess in a black 135mm film can for later use. I then put this horribly looking plate onto the block of ice for about 3-4 minutes before blow drying it. Then I put this into my pre-made 4×5 holder to be laid flat and dried overnight.
By my 4th plate, I was getting better at this. I realized a couple of mistakes I made. First, I need to pour a lot of ag-plus (1/4 of the plate) on the plate before it can be coated by swirling it around (no fingers). The consistency of the Ag-plus is best described as white glue. It’s thick and not too easy to flow around the plate (unlike collodion). The second issue I had was the temperature of the plates itself. Heating it on the red safety light was not enough and it cooled down too quickly and the ag-plus solidify almost immediately from contact. Next time I will either hot blow dry the plates to temperature or setup an electric hot plate. Keeping the ag-plus bottle warm is also crucial.
After the plates dry overnight, it’s time for test shots. From the research, the ISO rating of this emulsion varies and highly dependent on the thickness of the coating. My first coating was so ugly that I am sure I will hit all sorts of ISO rating on the one sheet. For rule of thumb of testing, I metered for ISO of 0.5.
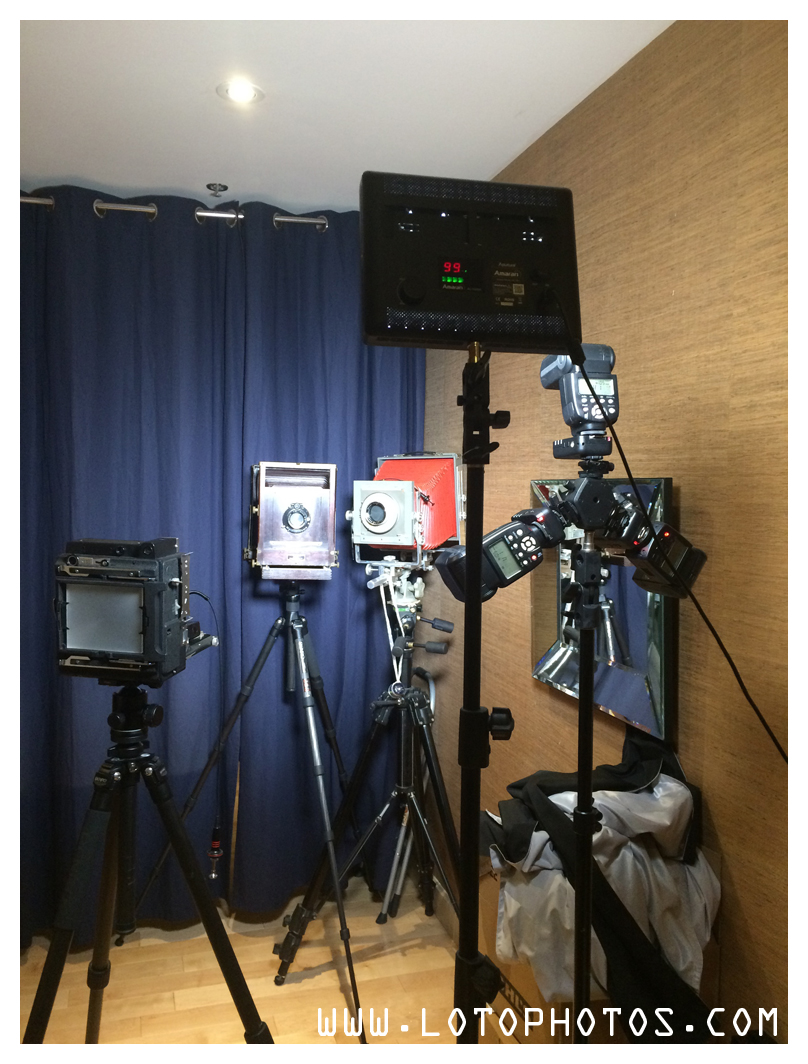
I mounted three flashes at full power (1/1, 105mm) and an LED panel (1000 LED) at full 99%. I metered it at ISO of 3 and showed F8 at 1 sec. I have read that you need to put in a blue filter in front of the meter to get an accurate reading. I don’t have a blue filter handy but I will give it a try later to see if there are any difference. I setup my Graflex Speed Graphic with a Fujinon 135mm f5.6 lens shooting wide open. The light was blinding and I took the tintype to my darkroom.
I pour the Rockland reversal developer onto my Paterson 5×7 trays and started to agitate the plate. The instruction says a development time of at least 3 minutes. After 3 minutes, I can still white spots on the plate. Finally after 6 minutes, the plate turned completely black and then an image started to emerge. I developed the plate for another 4 minutes to a total 10 minutes. Instead of using Rockland’s powdered fixer, I just dump it in my Ilford Rapid Fix bath for 6 minutes before rinsing out with water.
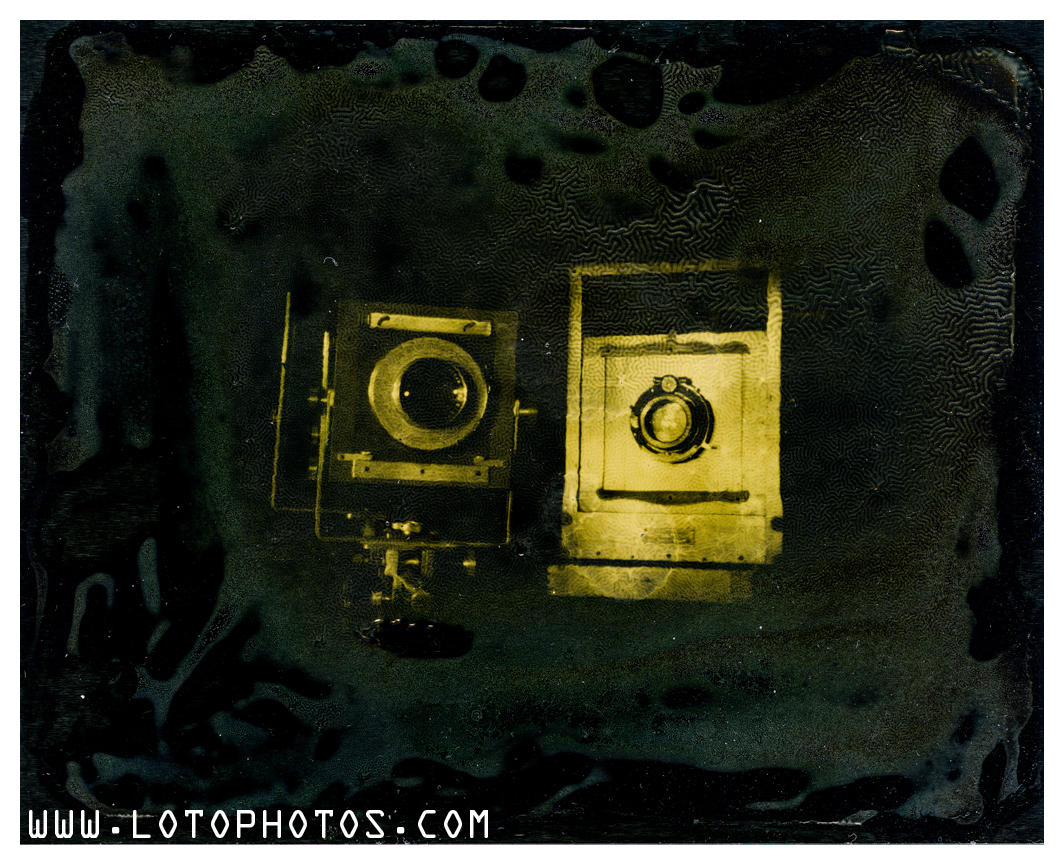
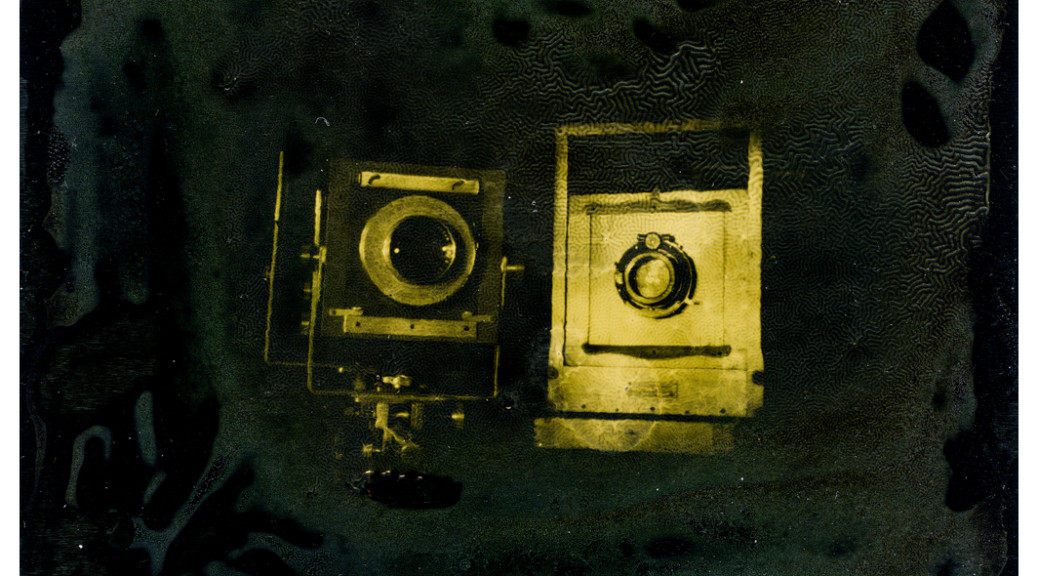
I see an image!! and better yet, I can recognize they’re my 8x10s! The long development time tells me that there might be issues with my developer or my emulsion. The fact that it took so long for my plate to turn completely black tells me that my coating of emulsion might be too thick. The reversal developer in the bottle is also not clear but already slightly brownish when I opened the package. This tells me that the developer might be bad, hence hindered the development. I did a second test shot with the same lighting setup by with my Kodak Aero Ektar 178mm lens wide open at f2.5. When I developed it, even after 13 minutes, only a faint image surfaced. Again, I need to explore rather it’s my developer that’s gone bad or my emulsion is too thick. I was quite shocked that the first tintype turned out as well as it did and this is really encouraging.

I did some research online and found a formula for this reversal developer, which is 120mL stock undiluted Dektol with 4g Ammonium Thiocyanate. I will make my own batch and see how it works out.