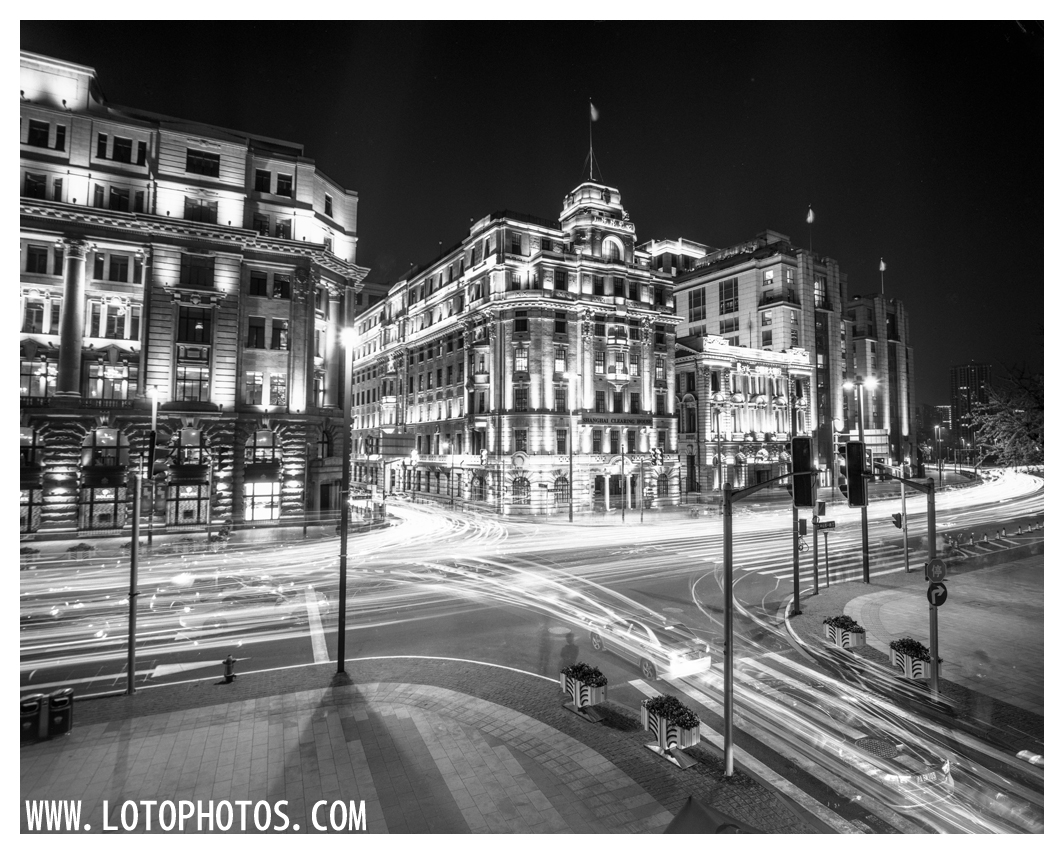
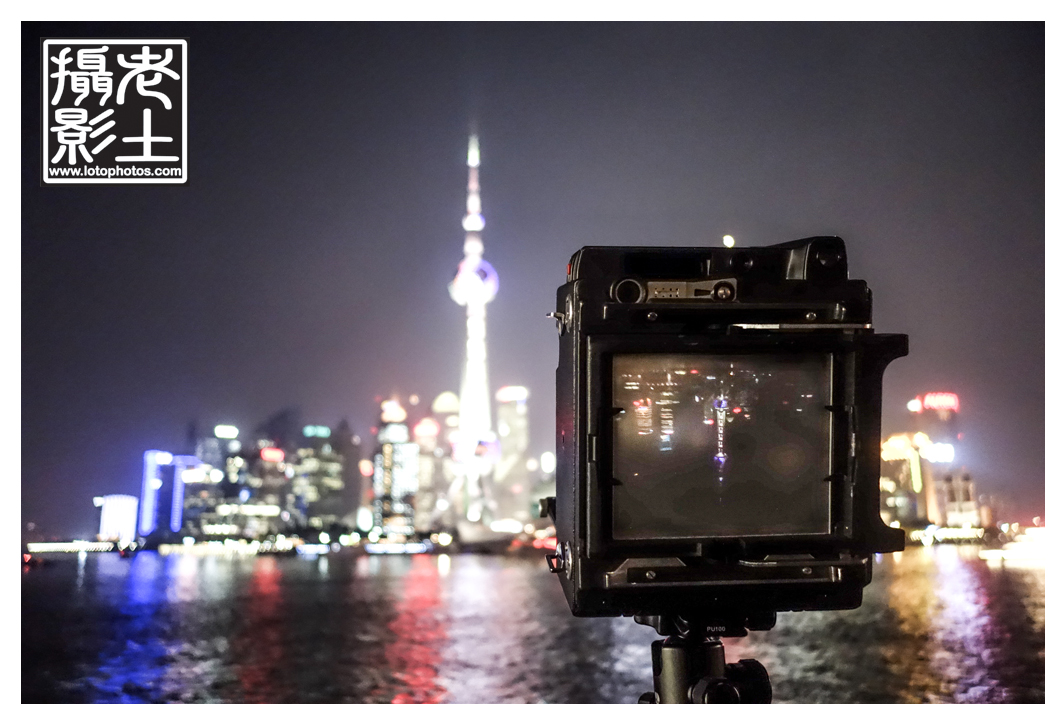
Day 4 of 5 of black and white photo challenge. Each day I am trying to post a photo that is taken from a different camera and a different medium. Today I am back on large format but with a different lens and film from day 1. This was shot at the Bund in Shanghai, China. Photo taken with Graflex Speed Graphic + Fujinon 65mm f5.6 lens + Shanghai GP3 film. Developed with Guan long d76 + Guan long F5 Fix, scanned with Epson Perfection V700. Today i nominate Pouya Ash for the BW photo challenge, in which to post one BW photo per day for 5 days and also nominate someone each day because it’s fun.
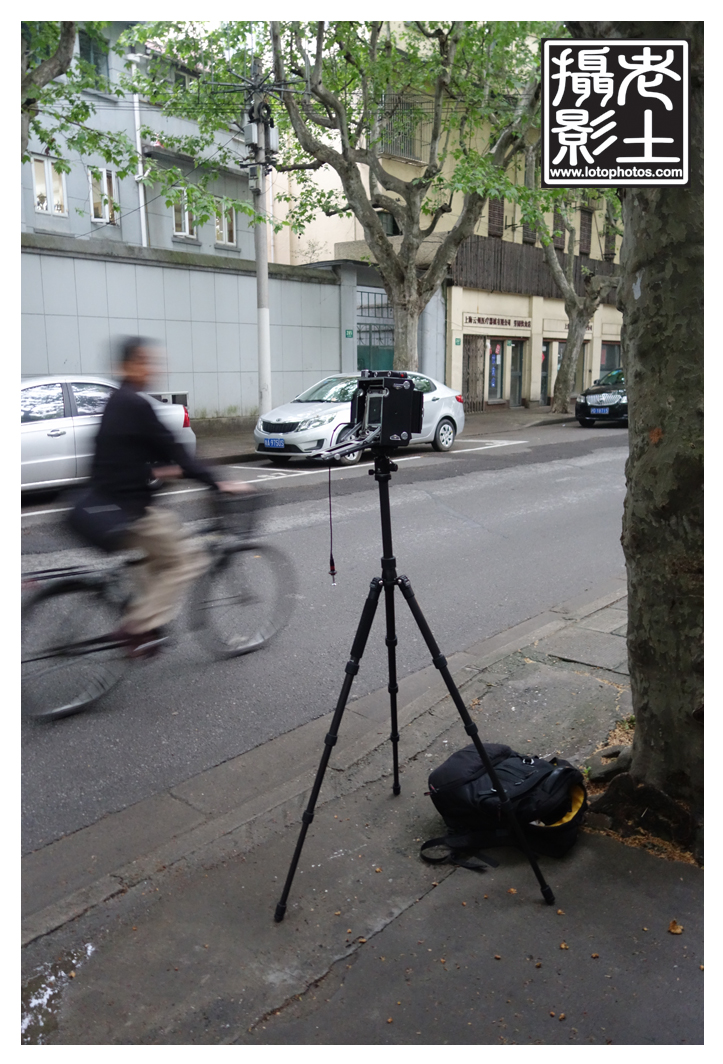
I haven’t done pinhole in the longest time and WPPD was a great excuse for me to start again. I was in Shanghai and faced with less than ideal weather conditions, drizzling on and off all day, windy and cold. Nevertheless, I managed to get a few shots in. It was quite a challenge to do long exposure in Shanghai because everyone is wondering what you are doing and in times stood right in front of my camera, ruined many shots.
I tried to do this as scientifically as possible. I will measure my film to hole distance and divide by 0.6 to get my f ratio (I usually stuck with f128) then I will use that in my meter. I didn’t want to use my expensive Acros for the job and used my el cheapo Shanghai film instead. The reciprocity is super crappy with that film. A shot that is meter to be one minute will take eight minutes to complete! The lighting was also bad as it was dark and gloomy most of the day and most conditions were metered to be 1 to even 30 minutes! I ended up taking a lot more Polaroids as it was rated at 3000 iso. The reciprocity is also quite bad with these Polaroids and a 30 second exposure will span into a 2.5 minutes shot.
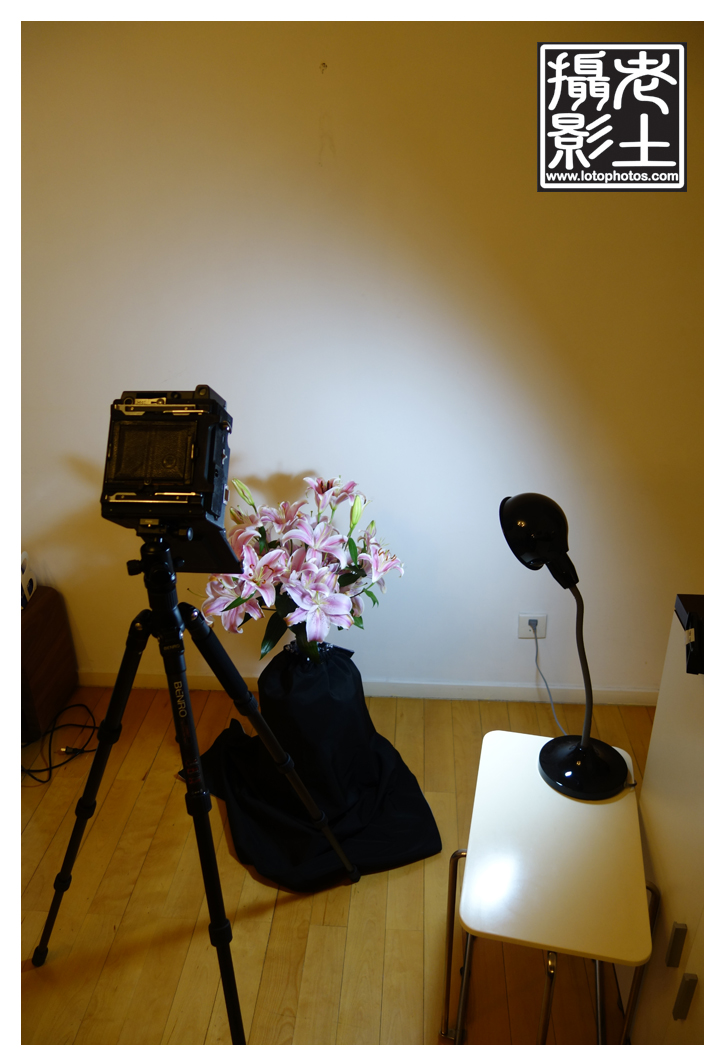
With all the rain and chaos, I ended up at home and made a few shots of the beautiful tiger lillies in a more controlled environment. The following is a photographic diary of today’s shoot.
Test shots at home before heading outIt was raining and found a covered spot for long exposureResulting Polaroid.Waiting and rainingMy ghetto pinhole setupBusy road shootingPeople stopping in front of the cameraNice door but unfortunately people are always going in and out!Home sweet home.
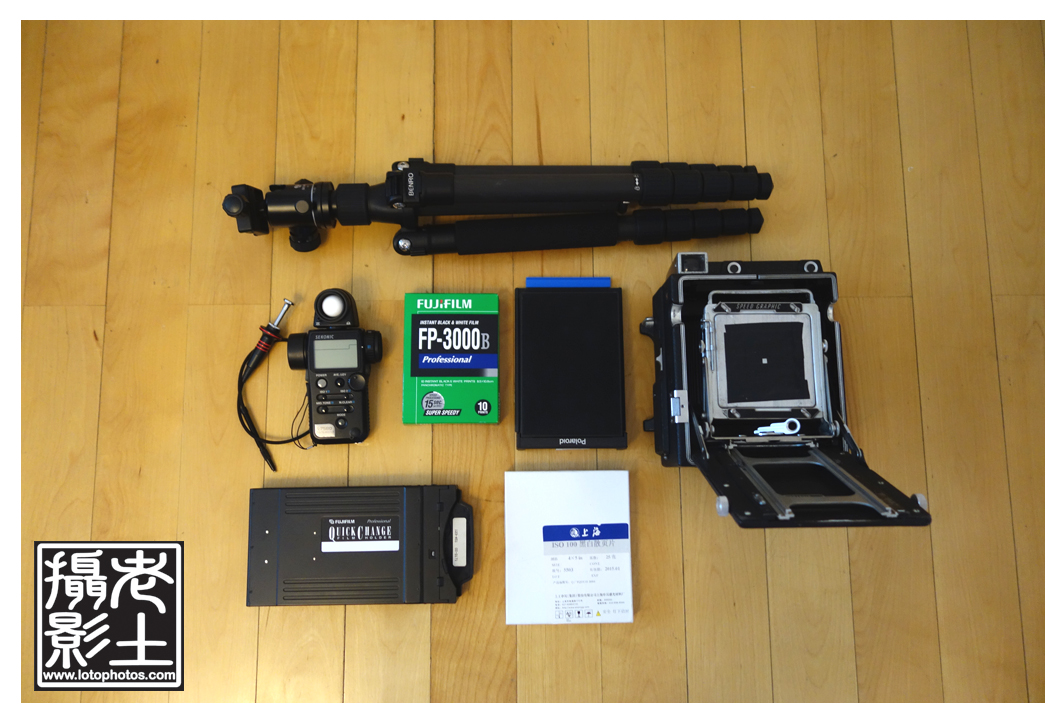
Getting my equipment ready for WPPD (http://www.pinholeday.org/)
Ready.
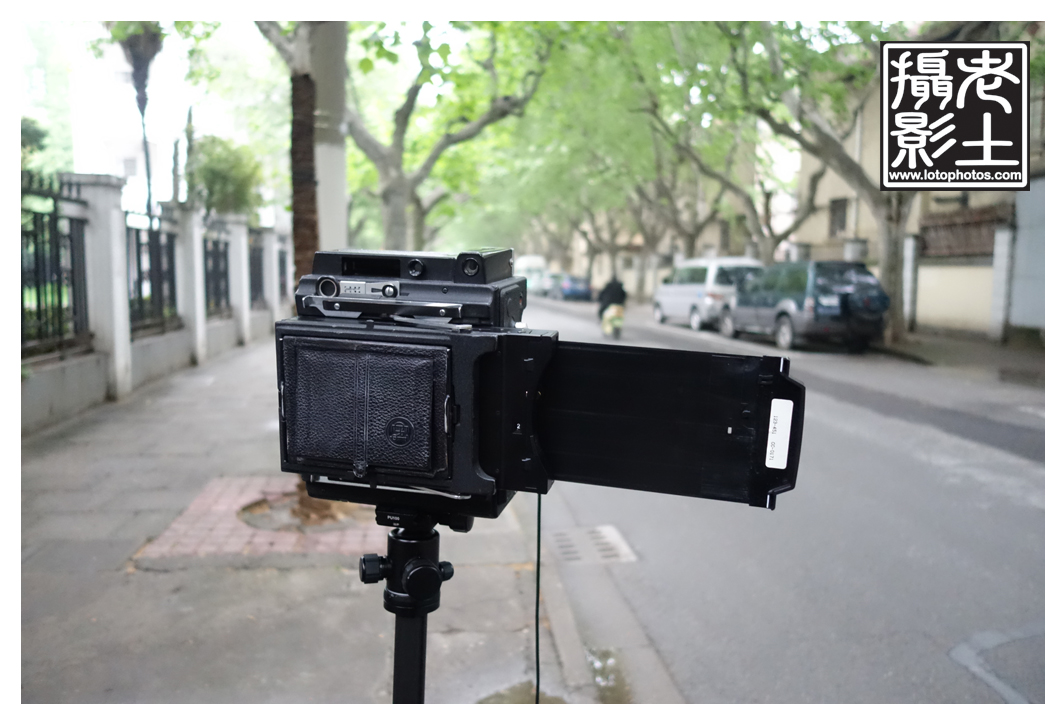
Speed graphic with pin hole board + FP3000b + Shanghai film. Special thanks to Kirk Lau for his assistance with the making of the pinhole! It’s extremely precise at 0.6mm!
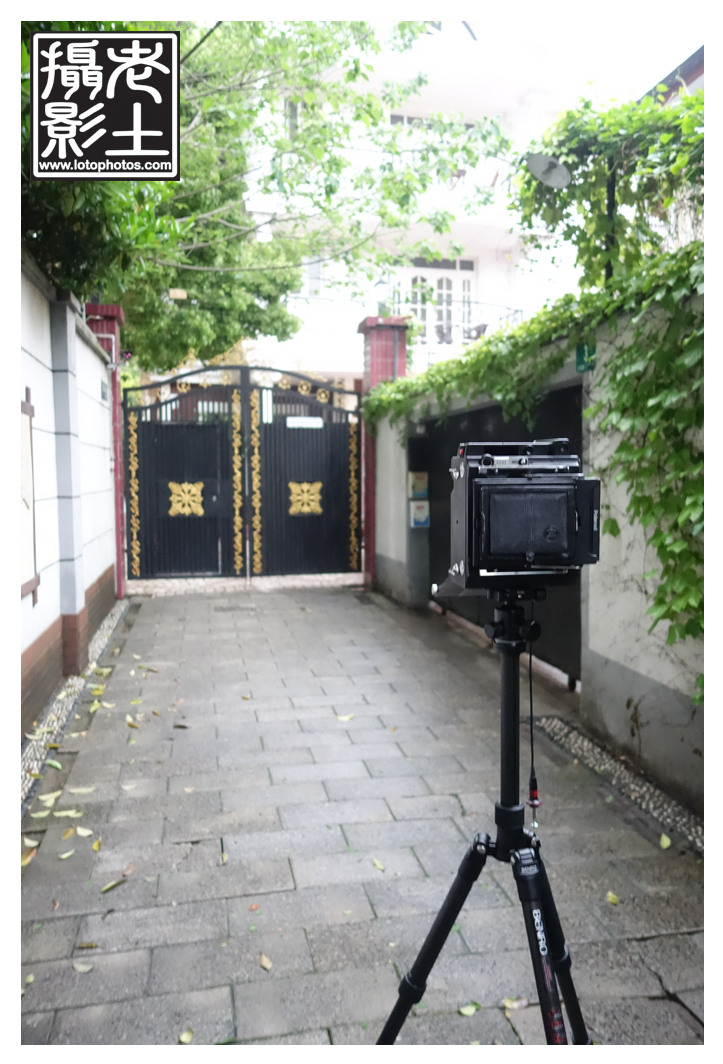
After a weekend of crappy weather, Monday was a complete opposite. Kirk Lau and I couldn’t resist on the amazing weather and took our Grapflex Speed Graphics to the Shanghai Bund for some night photography. Knowing how bad the reciprocity of the Shanghai 4×5 film, we decided to give it a go away. I was armed with only two lenses, the Fujinon 65mm f5.6 SWD and a Leica Dimaron 150mm f2.8. I only took 4 slides of Shanghai 100iso 4×5 film in two film holders. Here is a shot taken with my RX100 II on my shot.
Large format photo session at the Shanghai bund.
Let’s see how the photo will do. I am stand developing them with Kodak HC110.
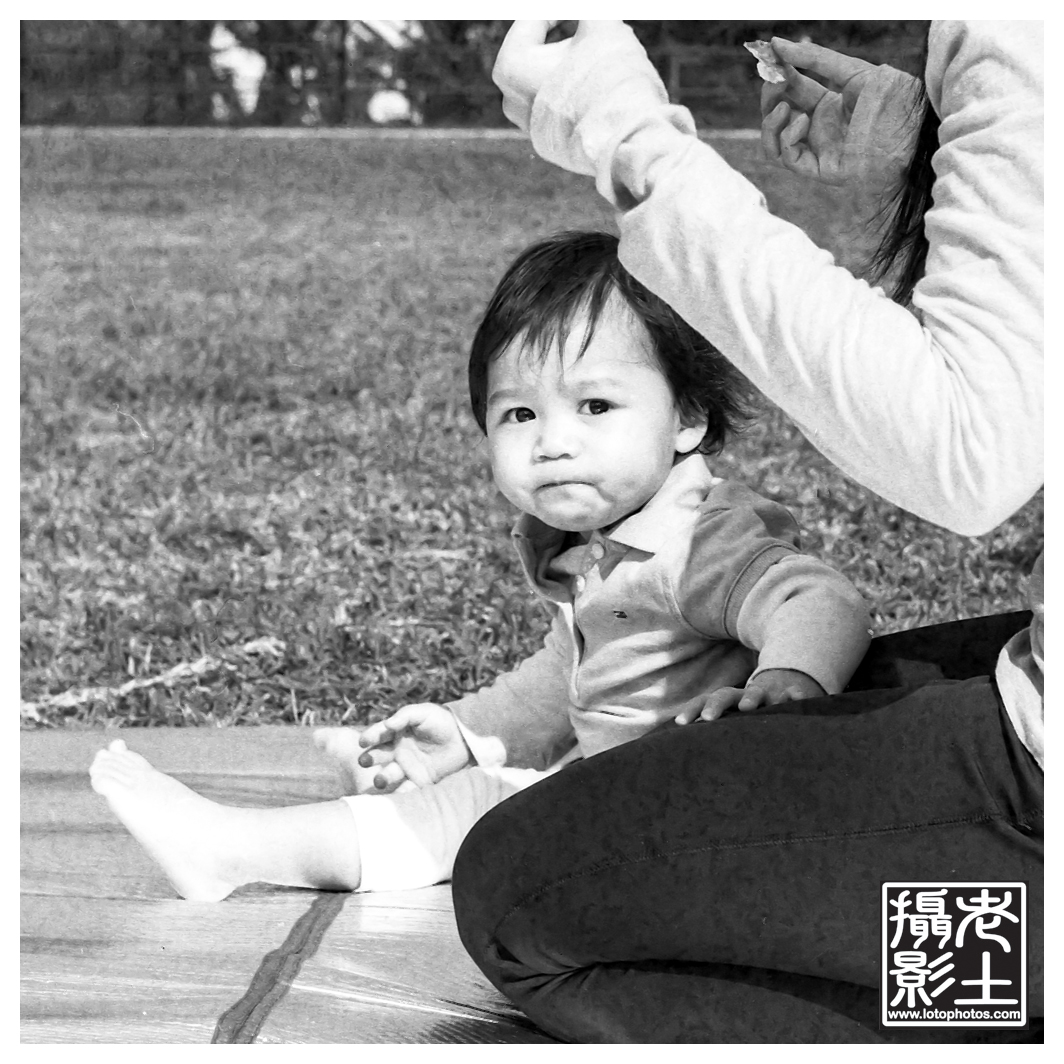
It was a sunny day during Gordon, Vicky and Cailey’s photo shoot. Ever since I got my Zeiss Ikonta B 532/16, I have been neglecting my Seagull TLR. Here are a couple of shots from the shoot, Seagull 4A-103 TLR + Shanghai GP3 film. Developed stand, Rodinal 1:100 for 1.25 hours, inversion first two minutes, then one turn every 30 minutes. Fixed with Kodak Rapid Fix, scanned with Epson Perfection V700.
Looking cute!Cailey hiding behind mom. There is a very 1960s feel to this photo!
Honestly, not too happy with the grain size, perhaps it’s time to go back to D76! Always hit and miss with these shanghai film.
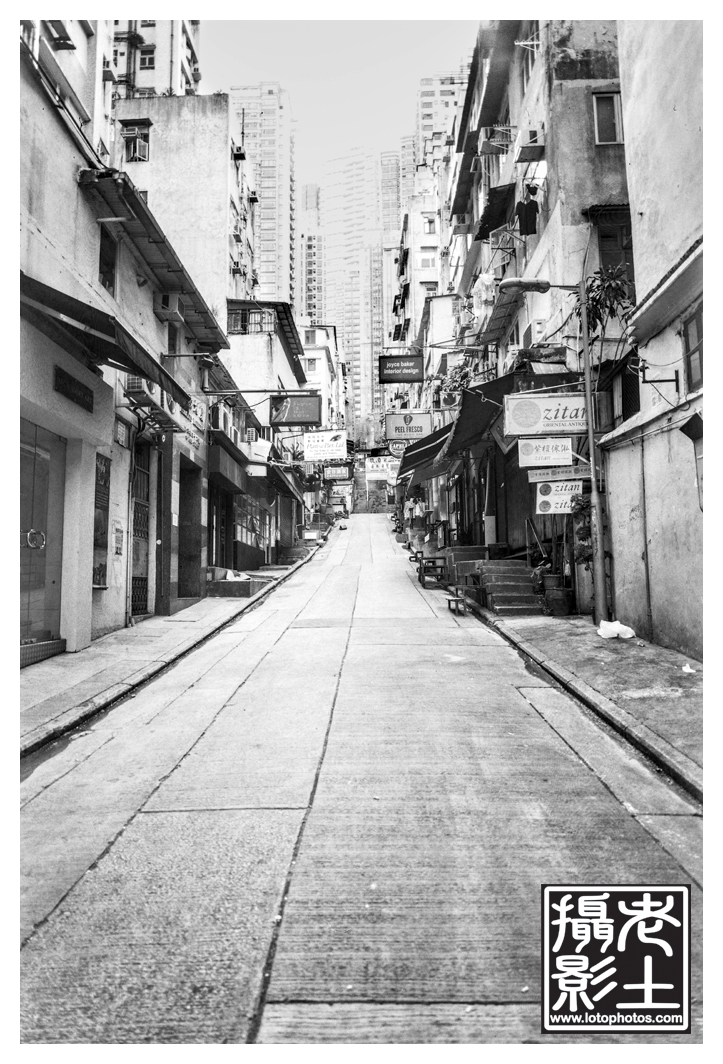
Taken with Mamiya Universal + 50mm f6.3 lens + 6×7 film back. Developed Rodinal 1:65 stand 2 hours. First two minutes agitation, then one flip at 1 hour mark. Fixed with Kodak rapid fix. Scanned with Epson Perfection V700.
The result was not bad at all, this photo taken on Peel St. Central, Hong Kong.
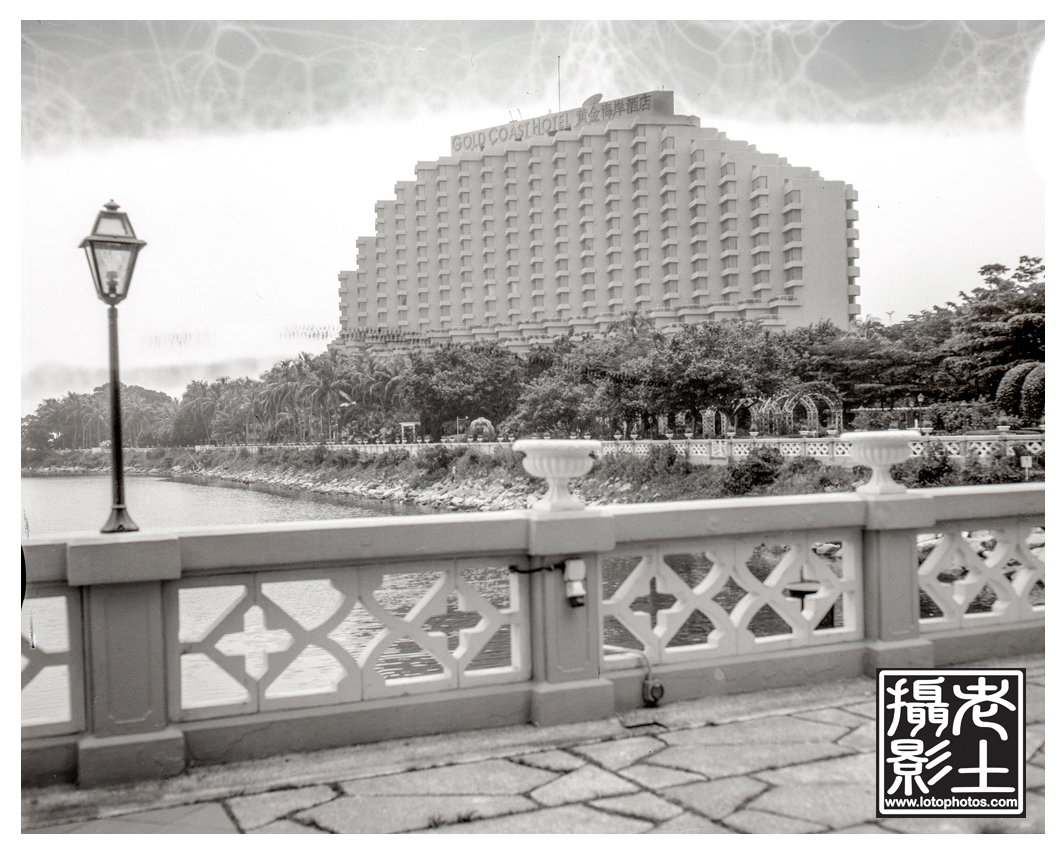
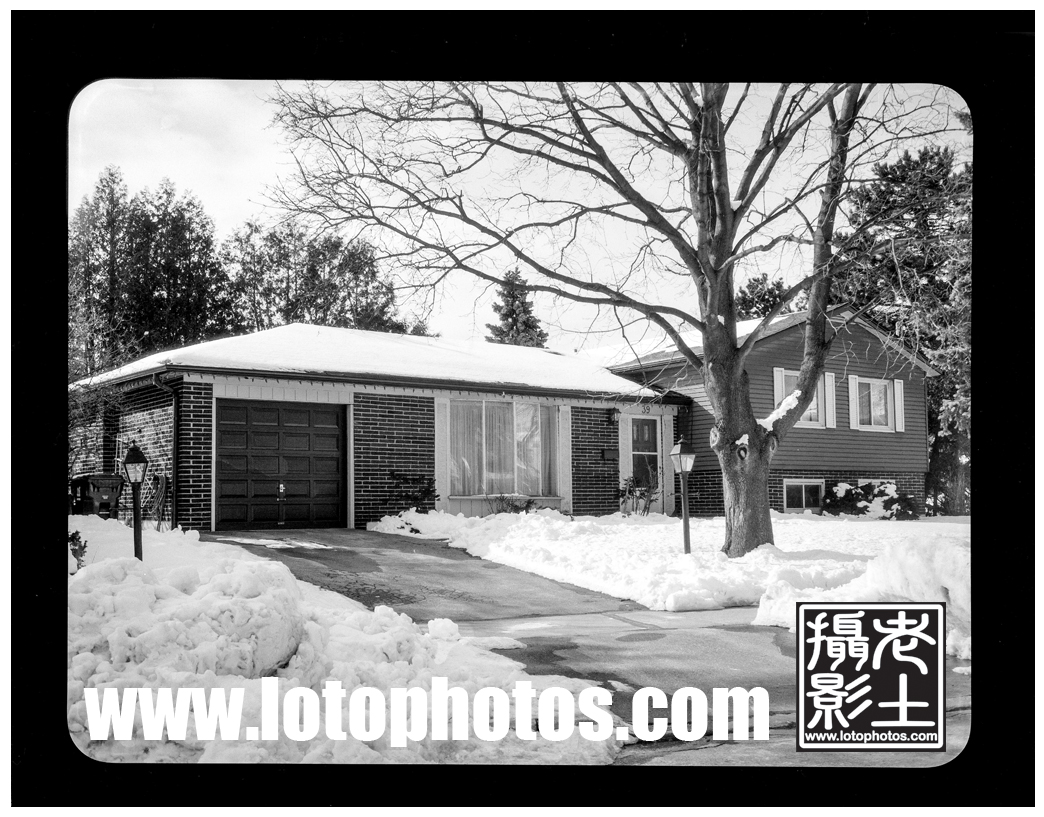
Two weeks ago, I took the Graflex Pacemaker Speed Graphic for a spin in the Gold Coast. It was a bright sunny day and I thought would be perfect to try out the machine with some el cheapo Shanghai film. Pointing towards the hotel as shown below, I was shooting at f11, 1/50. From my experience with the Polaroid 800, these Shanghai 4×5 film is light hungry. Even though it’s rated at iso 100, you have to compensate this by at least one click (shoot this at iso 50). Most cases, I even have to shoot at iso 25 for low light conditions. I got the most success when I compensate this by 1.5 clicks.
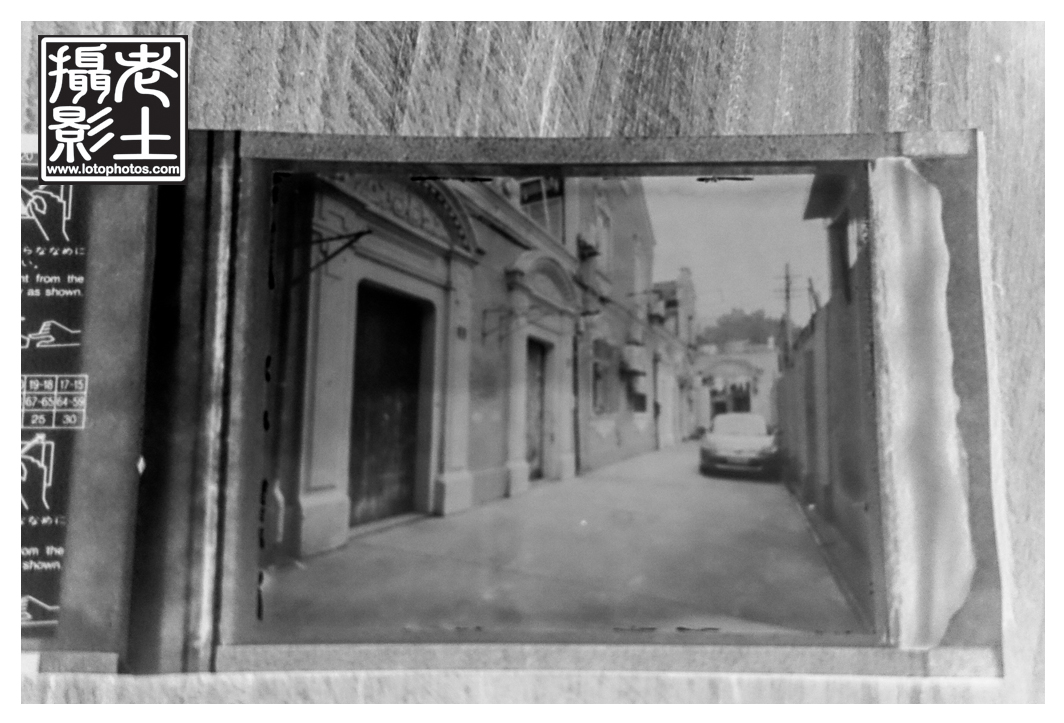
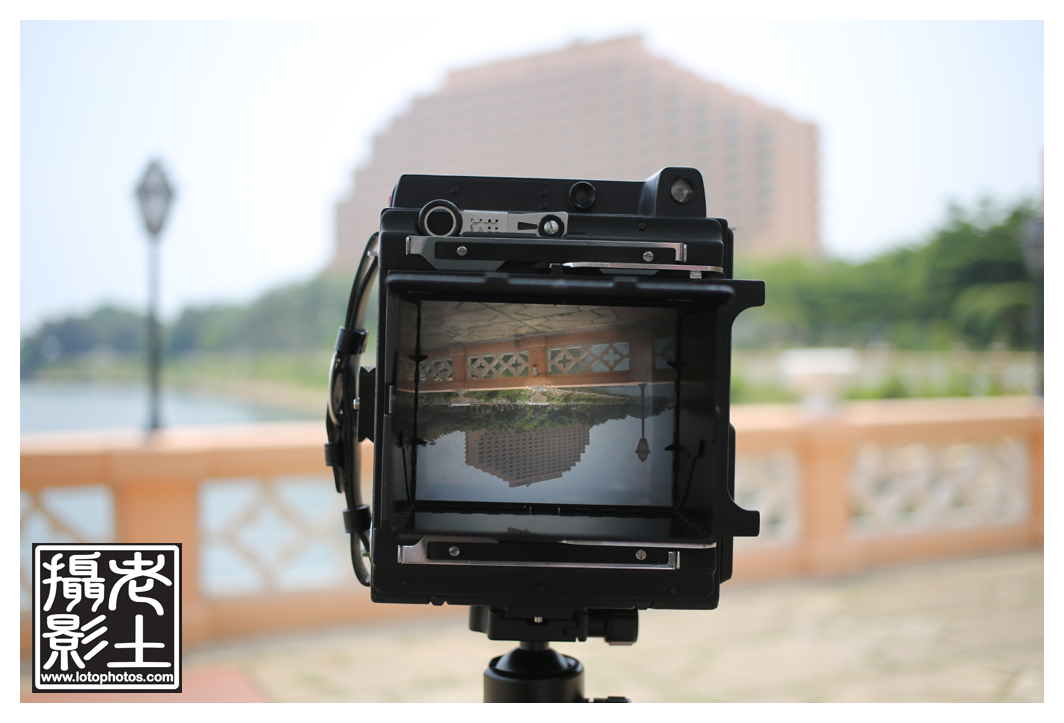
My view through the ground glass.
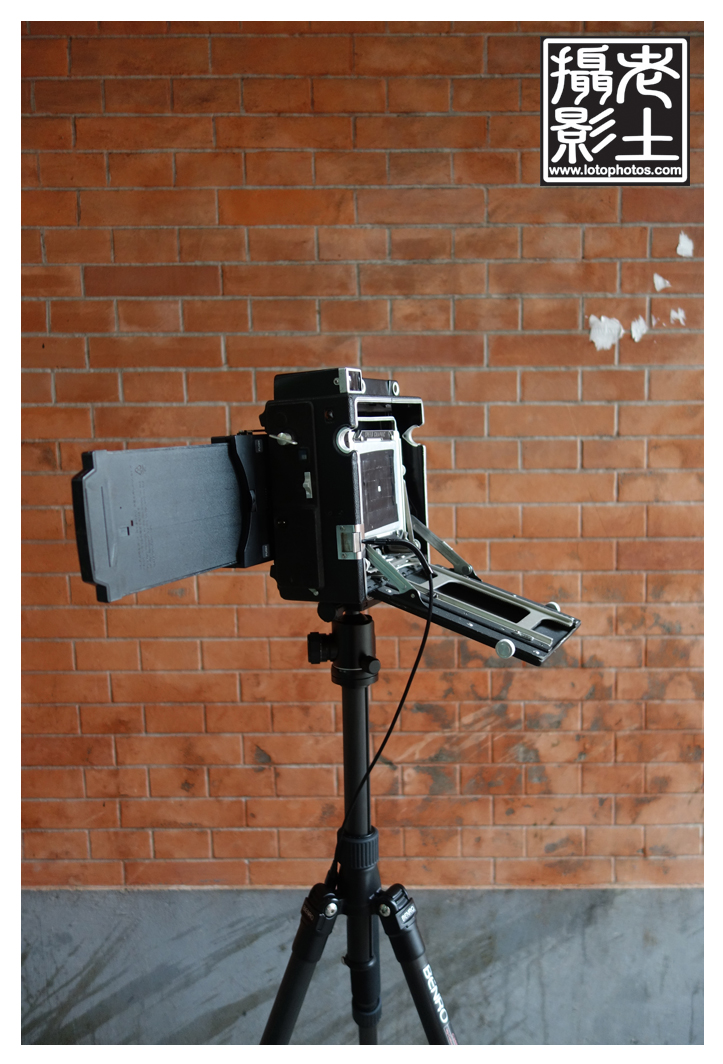
This unit is from 1955 and the ground glass is full of dirt. Right in the middle of the glass, the fresnel is coming off. I need to take the ground glass out and have a good cleaning of it and maybe replacing this. I didn’t have a focusing cloth and I just used my dark bag which worked ok. It was tough to focus in the 35C weather and the sun shining right at you. On top of that, you have to bandage your head with the focusing cloth. I should look at an angled viewfinder! The Graflok worked perfectly and so did the Grafmatic film holder.
After the shoot, I quickly developed the film at home with my Paterson system 4 tank which came with my Paterson Colourtherm machine. It was a really hot day and the water was at 28C. I developed the Shanghai film with Kodak HC110 dilution H in 14mins and Kodak Rapid Fix for another 4mins. I scanned the photo with my Epson V700.
The developed photo!
When I looked at the negatives, it was fine. When I scanned it, I looked at the top part and I was like, it looks a lot more cloudy than it should? It was a bright sunny day. Looking closely I can see water bubbles! This was the first time I developed 4×5 with the taco method in the Paterson tank. The Paterson tank top is slanted, which allowed some movement of the 4×5 while developing. The AP tank that I used before, the top part was relatively flat and it was fine. Next time if I am using the Paterson tank, I have to use 900mL of solution rather than 650mL. It’s these unexpected “boo-boo”s that makes analog film interesting. The photo really has a vintage feel to it. I look forward to another shoot soon!
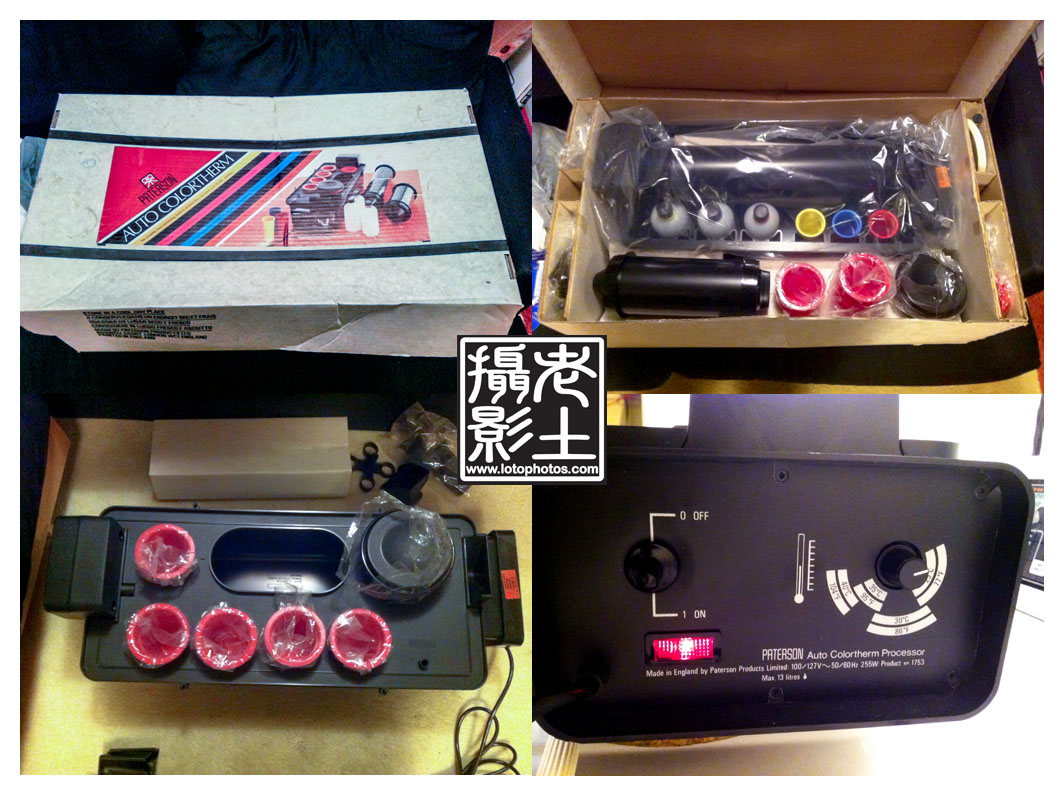
Breaking free from the many issues I had with photo development places in Hong Kong and Shanghai, I started to develop my own film again recently. I have done a lot of BW development in the past. Color, however, I have never done before and had always been at the back of my mind. A temperature controlled water bath (at 38C) for the chemicals is a must for color. When I was back in Toronto, I was lucky enough to find an unused Paterson Auto Colortherm machine from a really nice lady named Linda Power. It was sitting in her basement for years and she was willing to let it go. I was ecstatic about the find and it just barely fitted in my suitcase back to Hong Kong.
Paterson Auto Colortherm machine
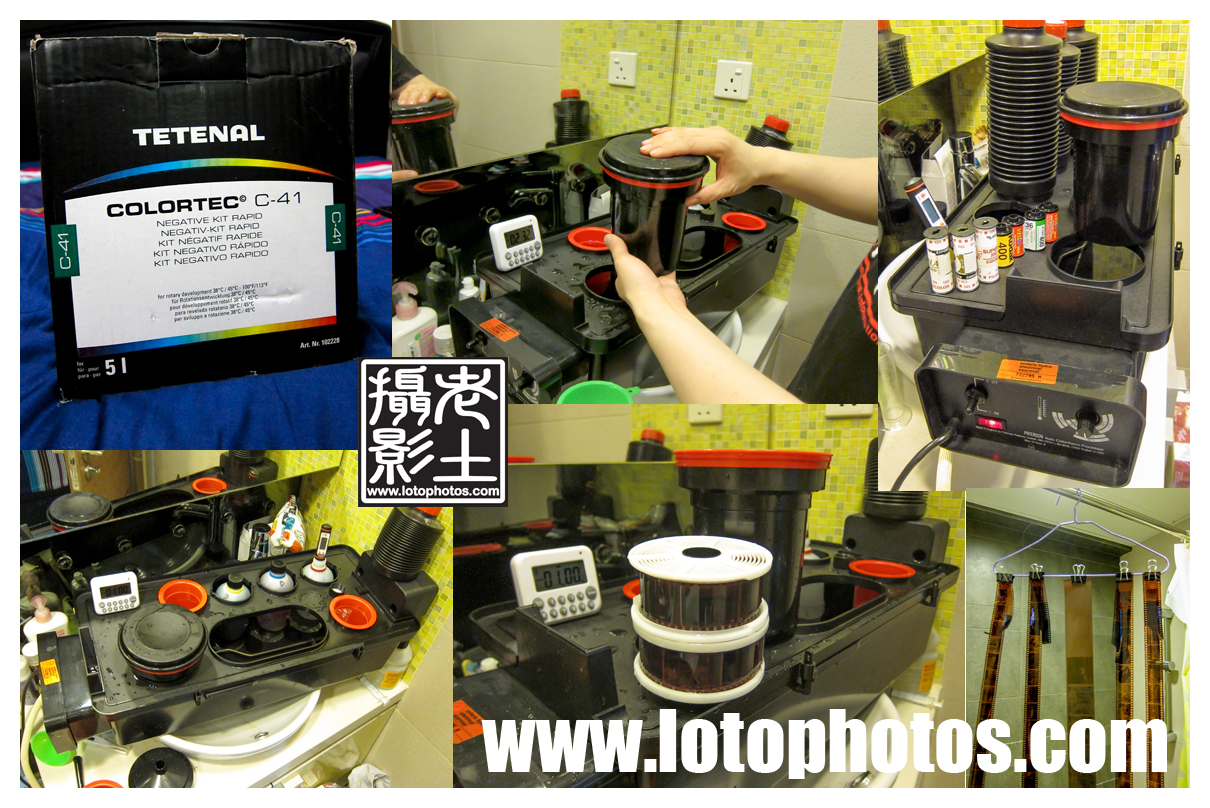
It was rather difficult to get home color development chemicals in Hong Kong, so I picked up a C41 Tetenal kit from Shanghai. It was not cheap but nevertheless a good practice kit for the first run at this. My Paterson tank can develop up to two 135 rolls or one 120 roll with about 600mL of chemicals. I prepared the developer, blix and stabilizer all at 600mL volume. With this, I can either develop 4 to 5 rolls of 120 or 8 rolls of 135. With the 5L kit I got, I basically can develop about 64 rolls of 135.
I turned on the Paterson Auto Colortherm and set the water bath to the correct 38C temperature. You need to wait about an hour until all the chemicals are at the stable temperature. I started with a 5 minutes water bath, then developed for 3 minutes 15 seconds, blix for 6 minutes, water rinse for 3 minutes and ended it with stabilizer for 1 minute. Viola, the negatives showed up nicely and I waited for them to dry.
I scanned them with my Epson V700 and they turned out great. However, dust is never my friend when it comes to development and scanning and a lot of care has to be taken.
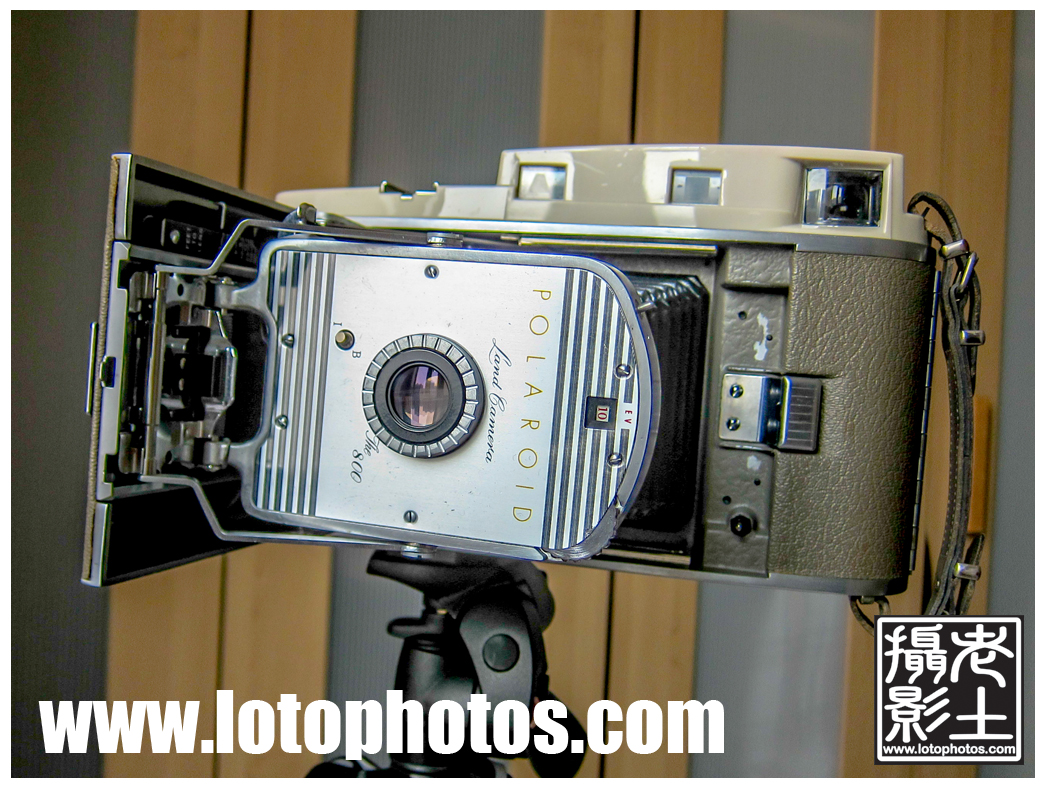
These cameras were produced from 1957 to 1962. Since the disappearance of roll film in the 90s, this camera had been abandoned as trash since.
I picked up a couple of these units when I was back in Toronto a few months ago. Both were in perfect condition and all the accessories intact. This camera features an EV lighting system with fixed aperture and shutter speed.
The pairing is as follows:
EV 10 f/8.8 1/12
EV 11 f/8.8 1/25
EV 12 f/8.8 1/50
EV 13 f/8.8 1/100
EV 14 f/12.5 1/100
EV 15 f/17.5 1/100
EV 16 f/25 1/100
EV 17 f/35 1/100
Initially getting these two cameras, I wanted to modify it so that I can use it as a medium format panoramic camera. I wanted to put in a roll of 120 and see if I can get 6×10 or 6×12 shots out of this.
Walking in the camera market in Shanghai prior to my trip back to Toronto, I saw some really cheap Shanghai 100 ISO 4×5 film. Doing medium format for years, I am always itching to move onto large format. So I picked up a box of el cheapo Shanghai 4×5 film and off I went.
Honestly, it’s a pain to insert the 4×5 film into these Polaroid 800 cameras in a dark bag. Basically, I have to do this once for every shot. This work flow is extremely not portable, but hey, reminding myself, it’s large format, it’s not supposed to be that portable.
On this camera, there are two viewfinders, one for focusing and one for framing. I was impressed with the rangefinder. It was crisp and accurate and with a maximum aperture of only F8.8, I experienced no focusing issues.
My first two shots with this camera, however, was a disaster. The photos came out totally underexposed. This can be traced back to two mistakes I made. First, I used the Polaroid light meter that came with the cameras. Bad call. Second, reading in the many forums, a lot of people are over exposing this film and shooting it like a ISO 50 film.
The second and third trials got better and basically I needed to overexpose the original settings by about 1.5 EVs.
Polaroid Land 800 and Shanghai 4×5 ISO 100 Film
The details were amazing. The Polaroid land 800 has a mask with rounded corners. The exposed area of of the photo is not 4×5 but a bit smaller than that.
My film development process. All chemical temperature @20C. Water bath one minute. Guan Long (冠龍) D76 1+1 14 minutes. Water Stop Rince 3x + 2 mins. Guan Long F-5 Fix 8 mins. Water Rince 3x + 2 mins and Kodak Photoflo. Scanned with Epson Perfection 4870.
The first experience with the Polaroid Land 800 was quite successful and I finished the whole box of 25 shots in within the first two weeks.
Why Polaroid Land 800? Simple. It’s cheap, readily available, full manual and has no electronic components.