First Shot at Stand Development

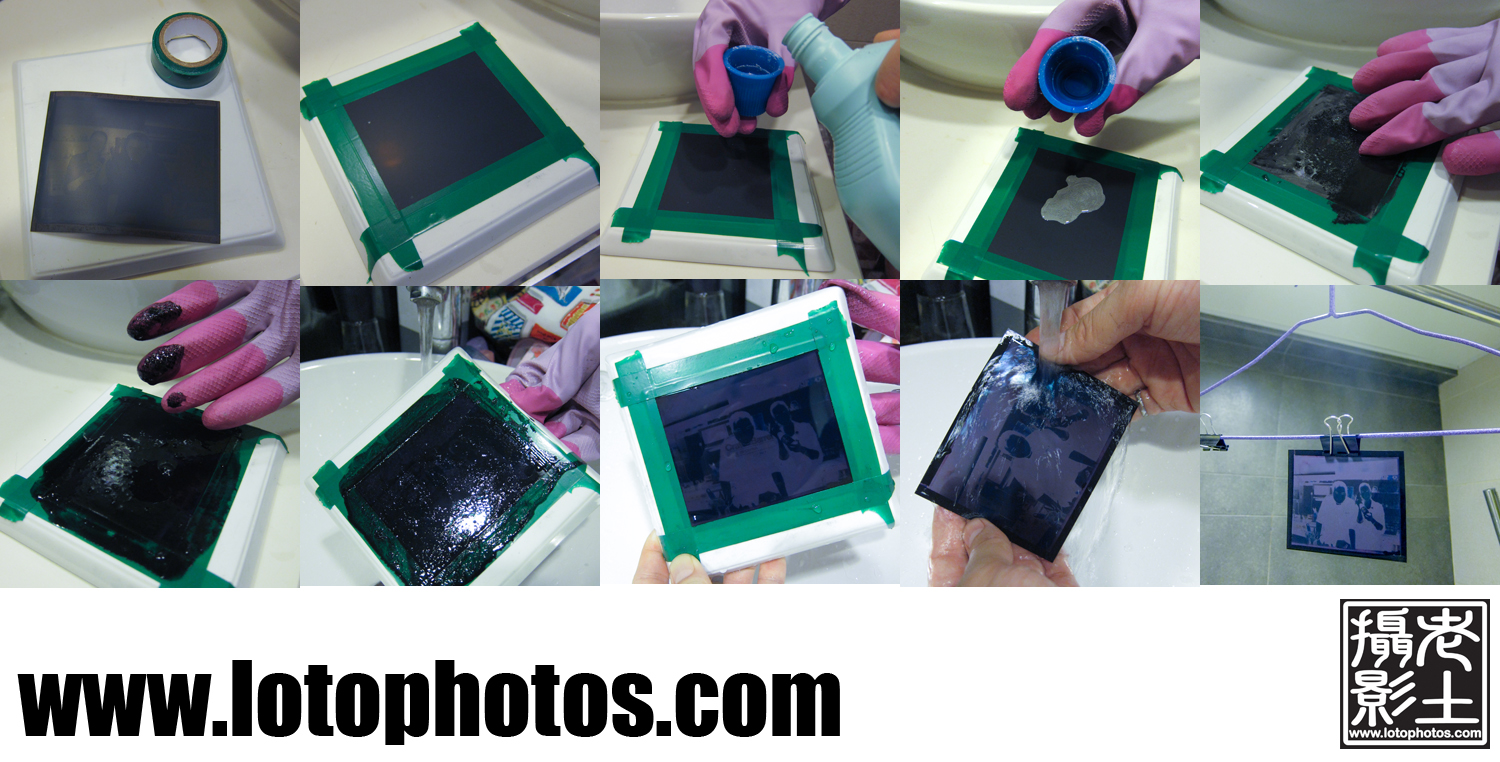
A recent discussion with Kirk Lau with the boiling water temperature of our taps converged on the topic of stand development.  Basically stand development involves throwing away everything that I have learned so far about film processing.  Stand development is simply develop your film in diluted developer and after initial agitation, leave it to develop for (almost) infinite time.  You rely on the amount of chemical to natural develop your film, rather through agitation.

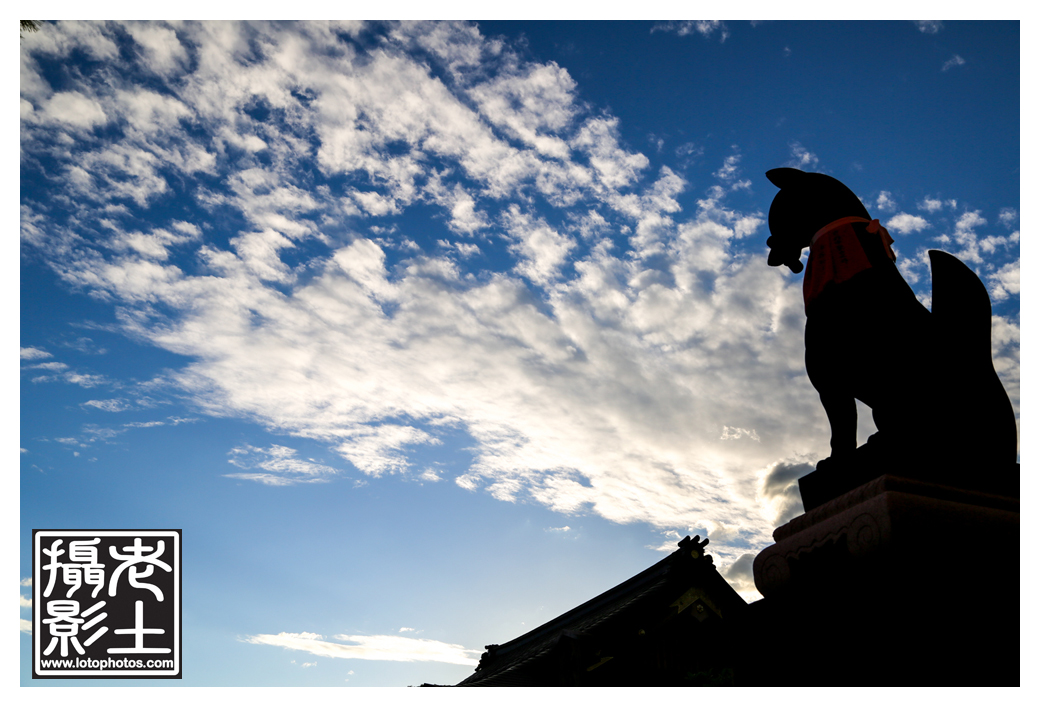
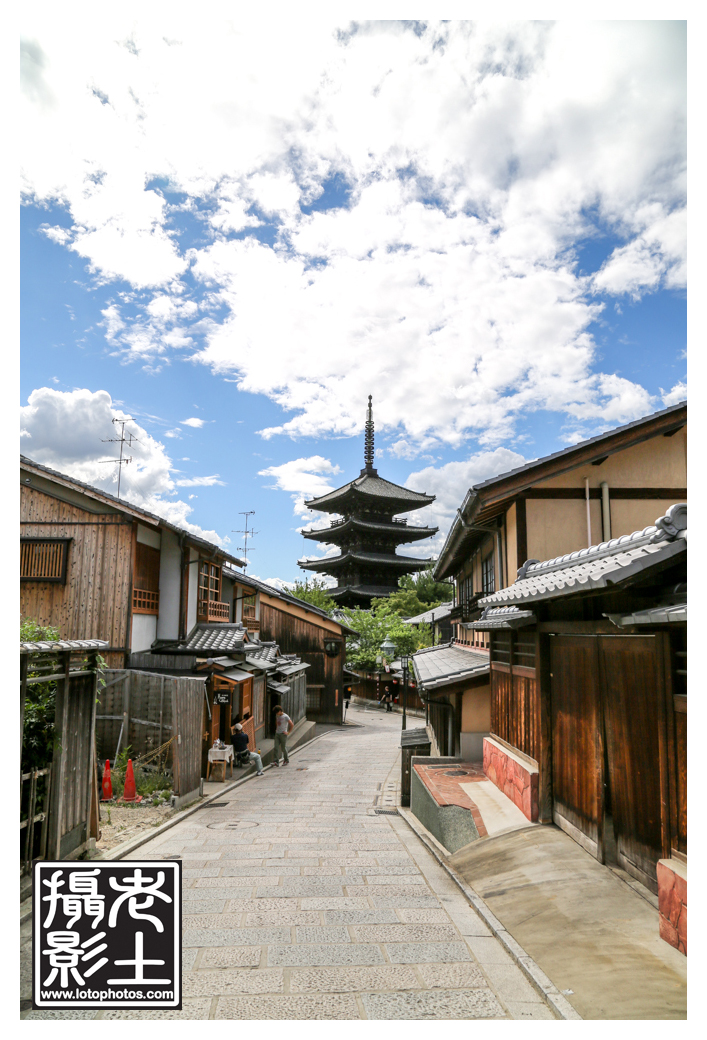
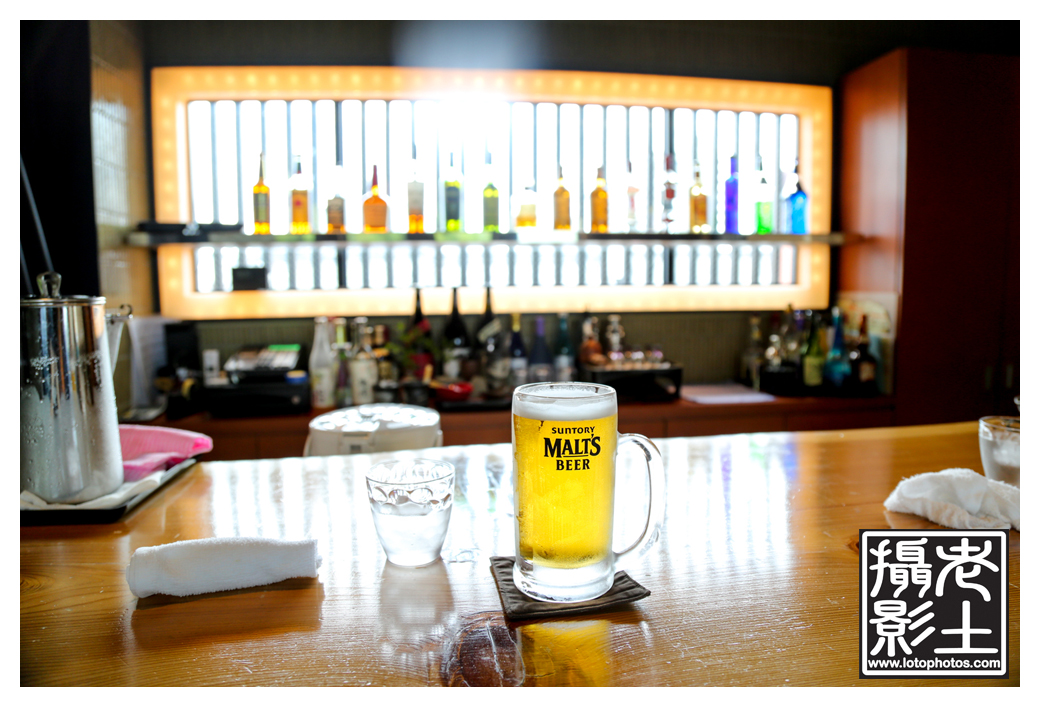
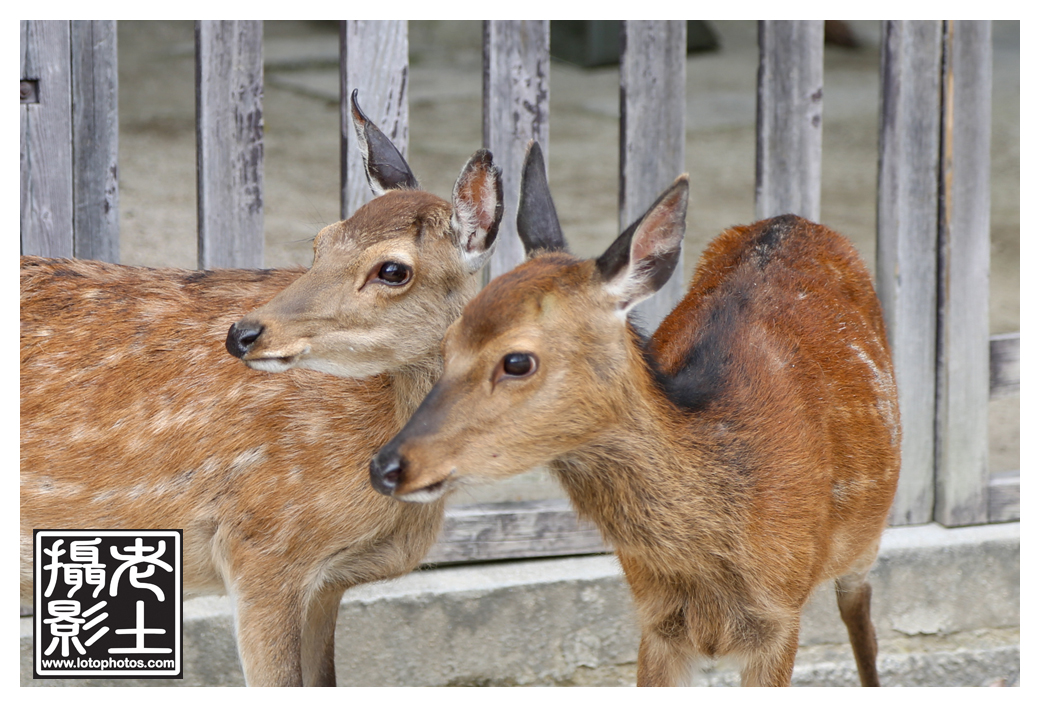
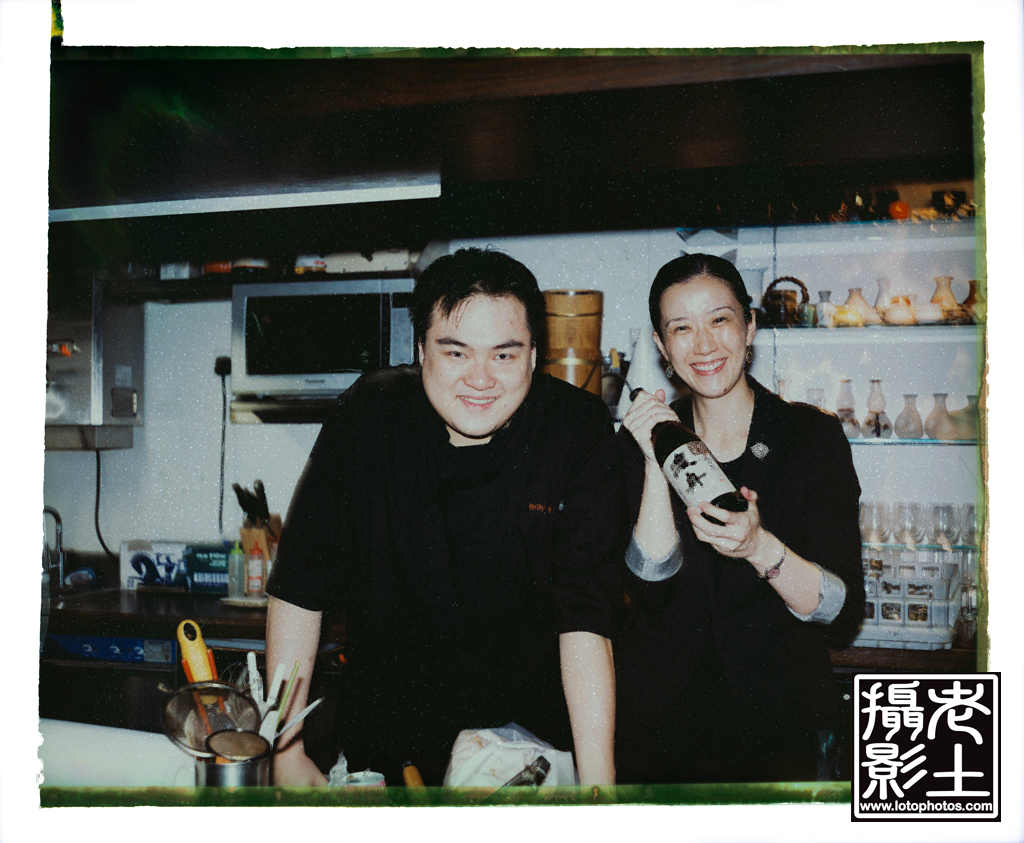
I still have six rolls of Tri-X 400 that I snapped in Japan back in June that still need to be developed.  I haven’t done so not because I am lazy but recently in the development with HC110 dilution H, the grain size appears to be large.  I suspect the culprit is the water temperature.  Both the tap water in Hong Kong and Shanghai measured to be well above 28C.  Even though I have compensated that with less development time but the grain size seems larger than before.  I am holding onto these rolls until I figure out what’s wrong.

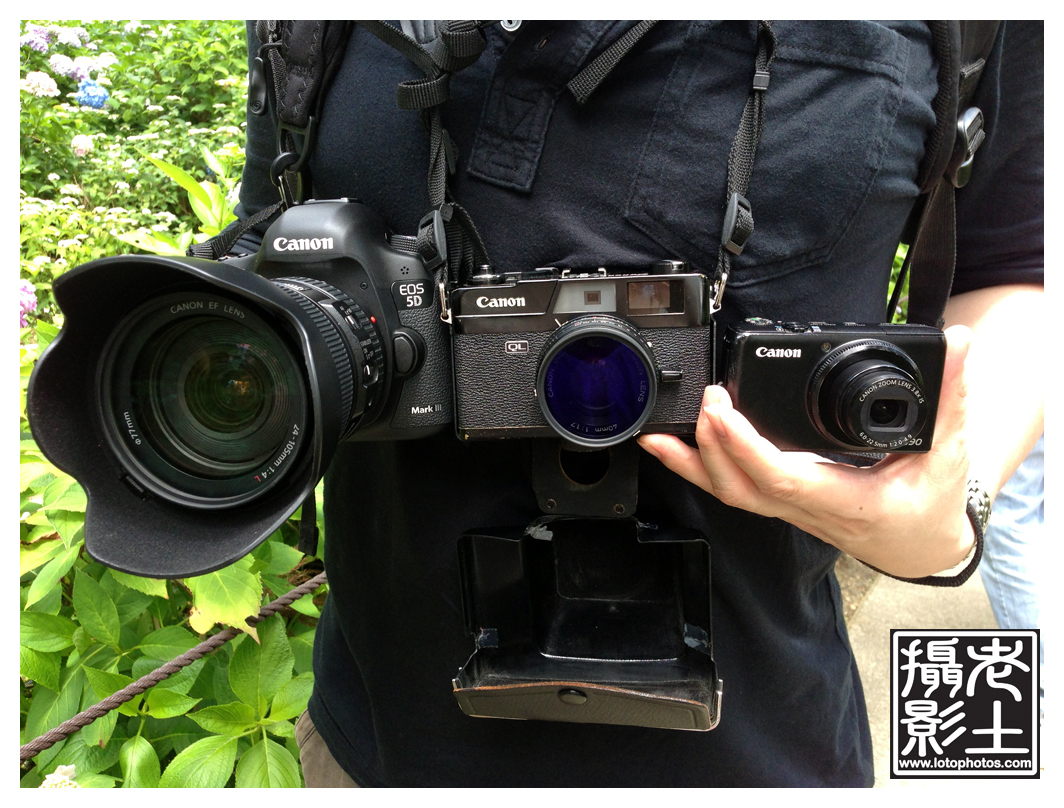
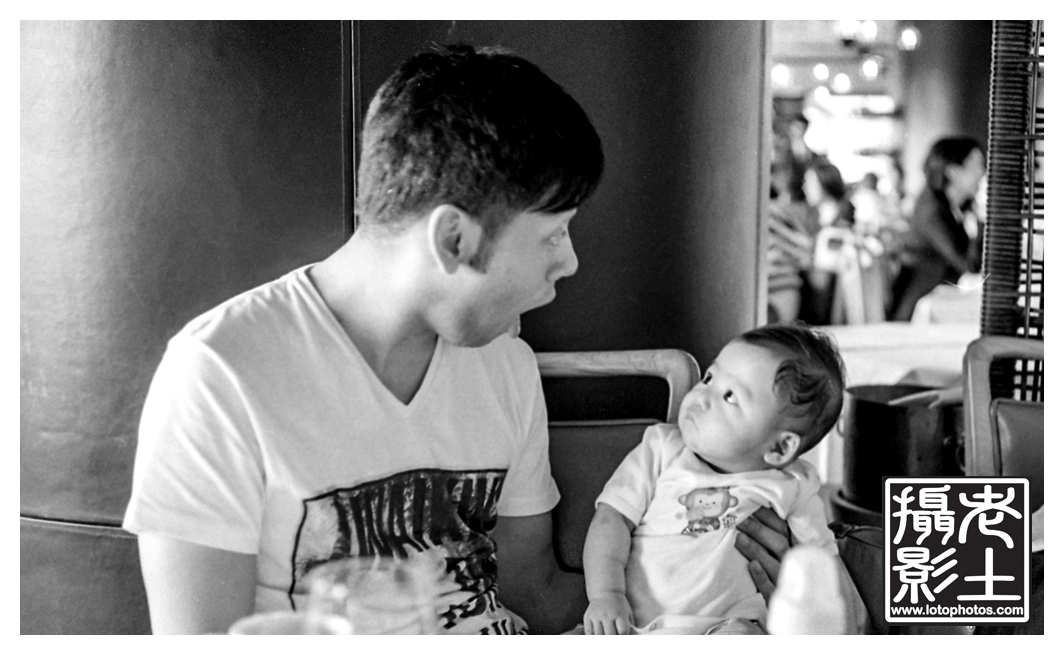
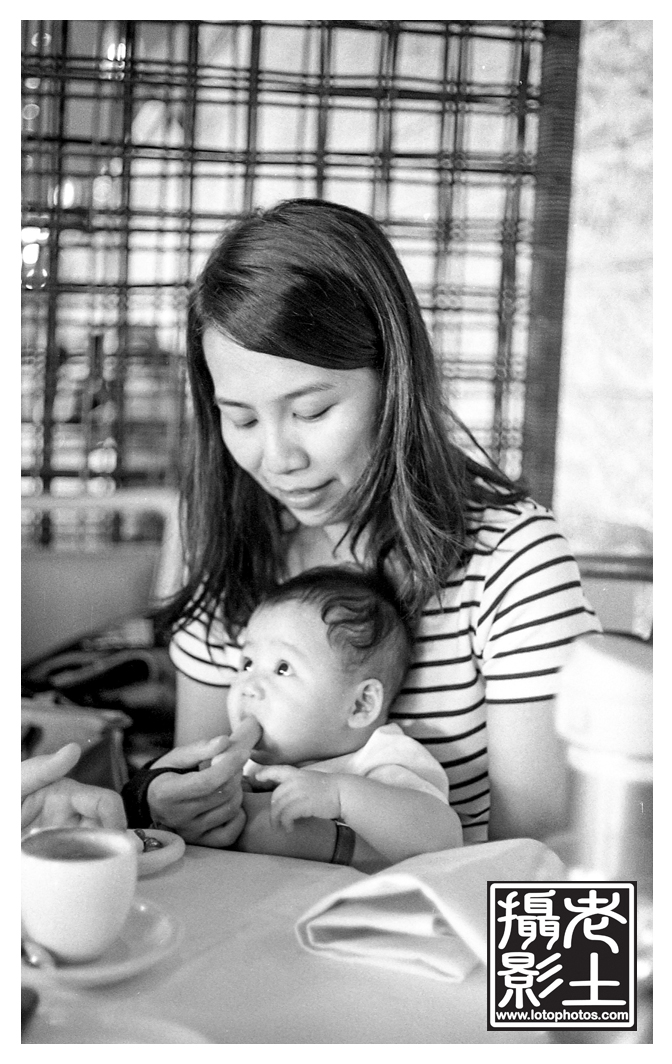
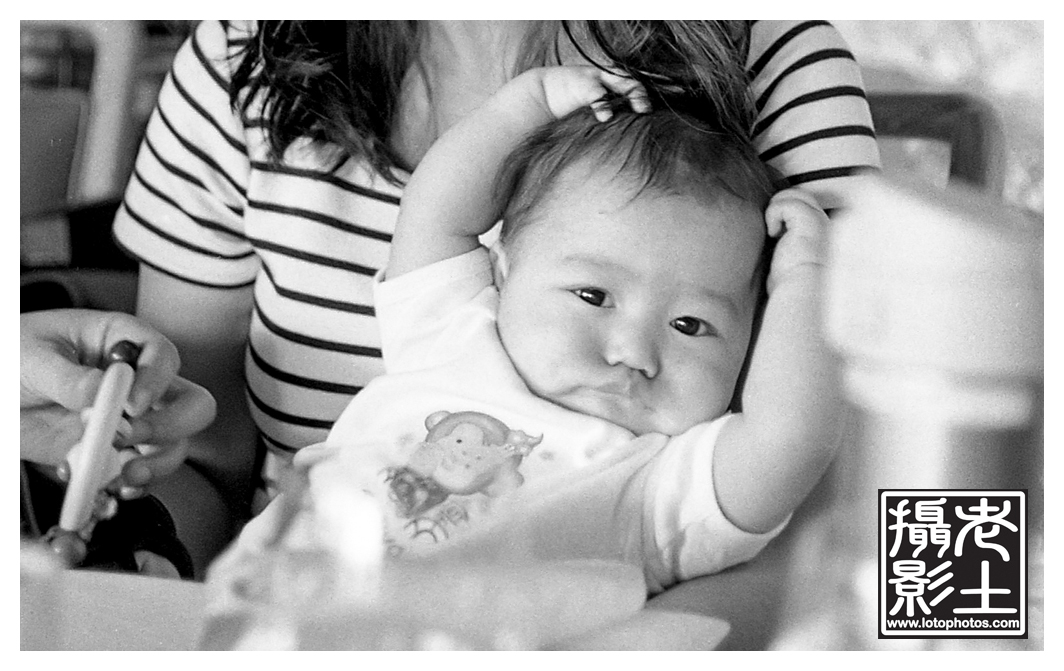
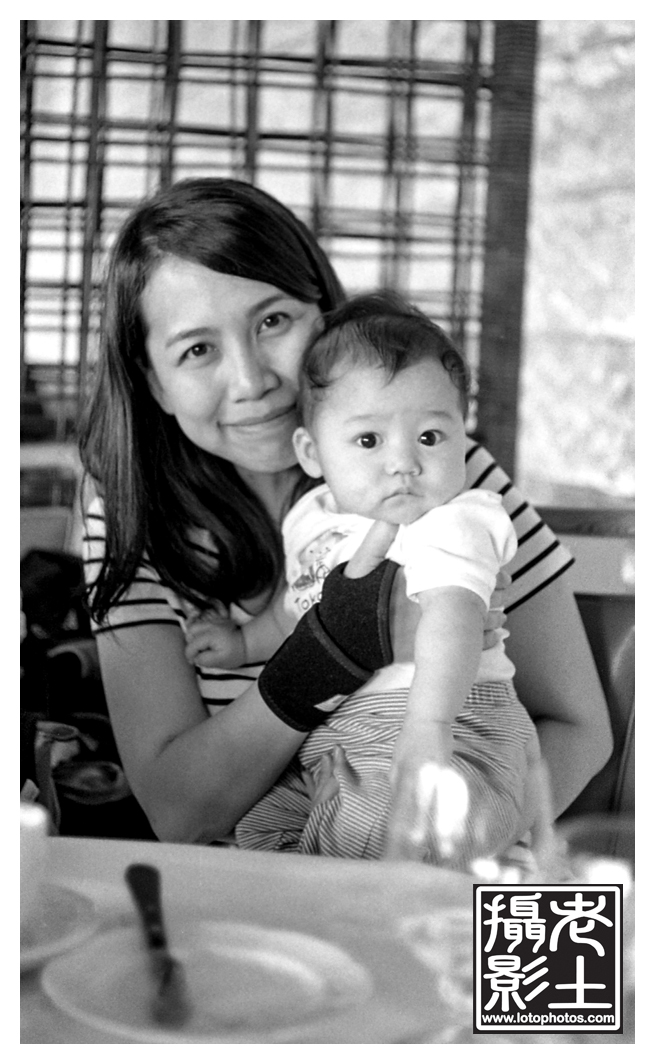
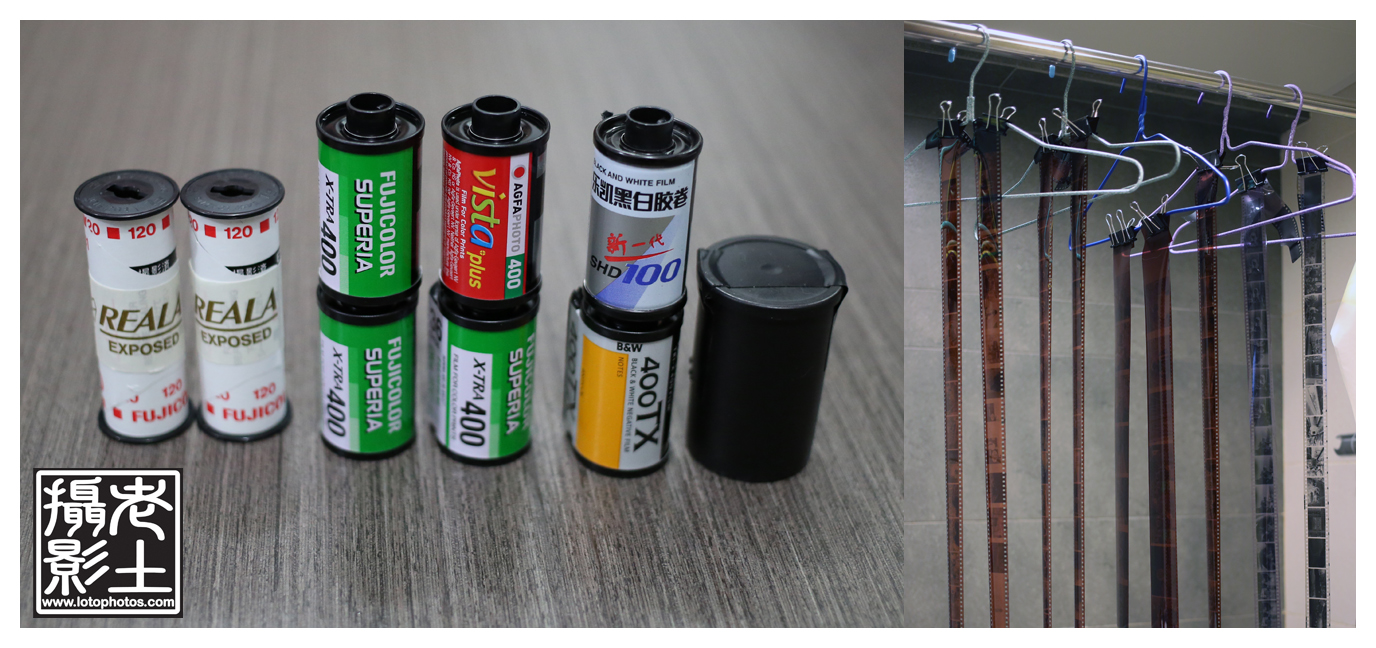
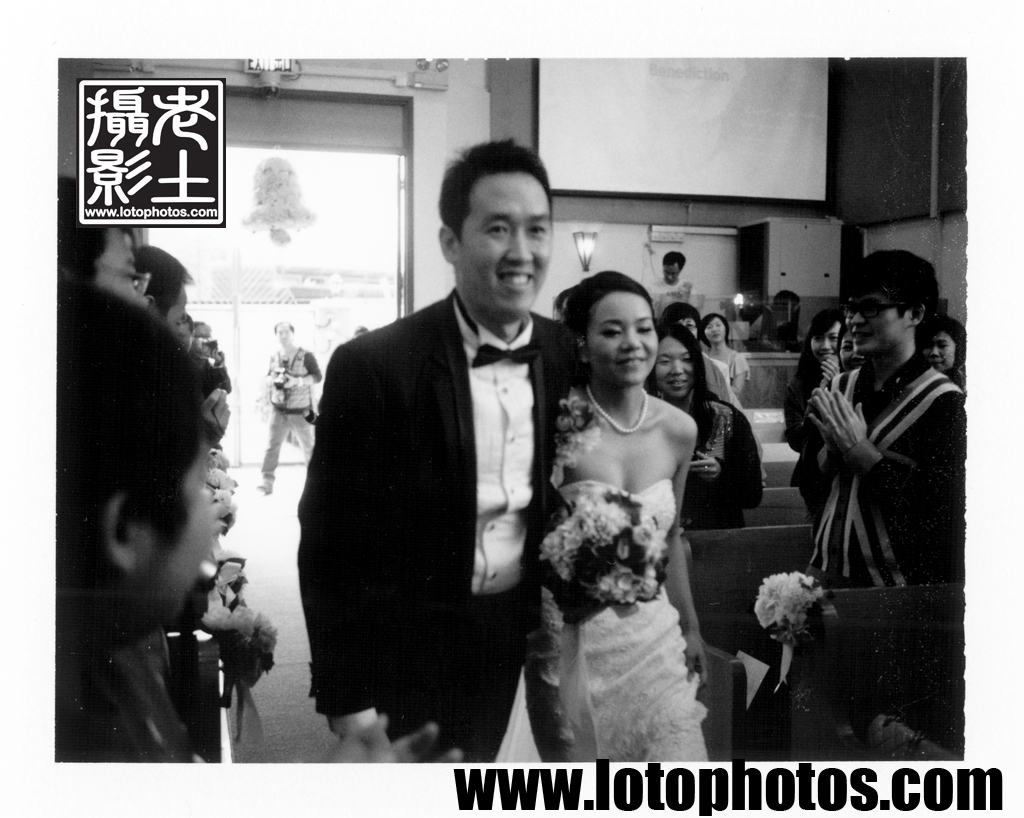
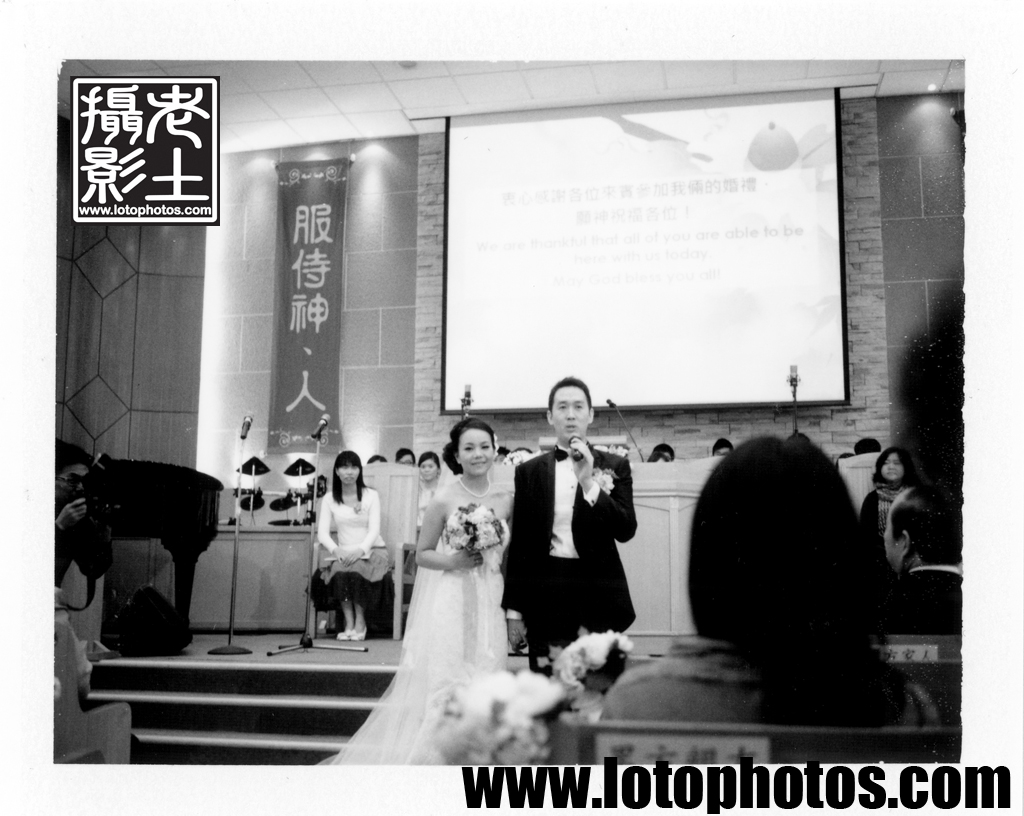
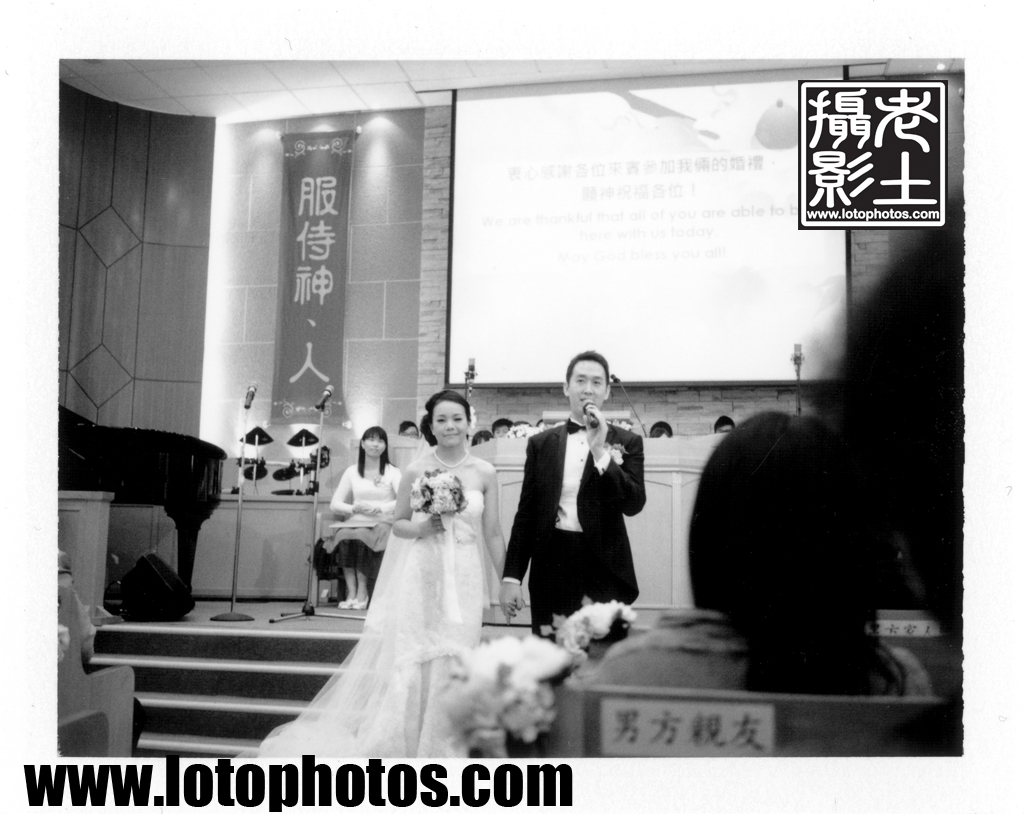
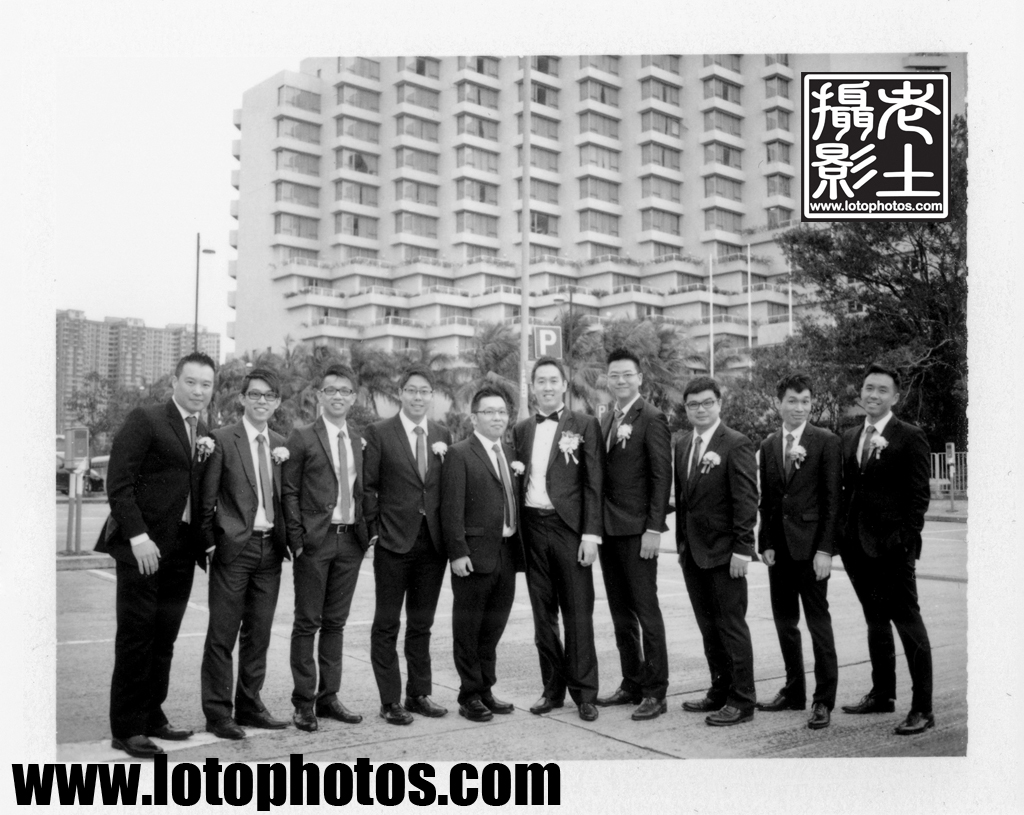
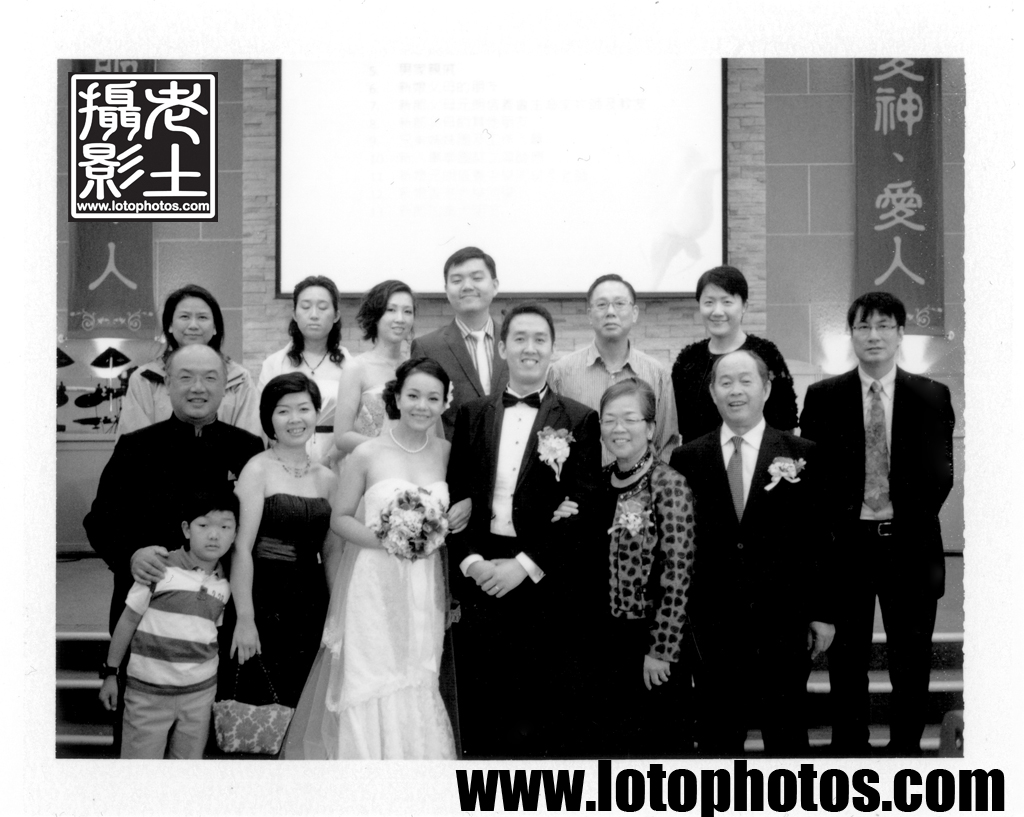
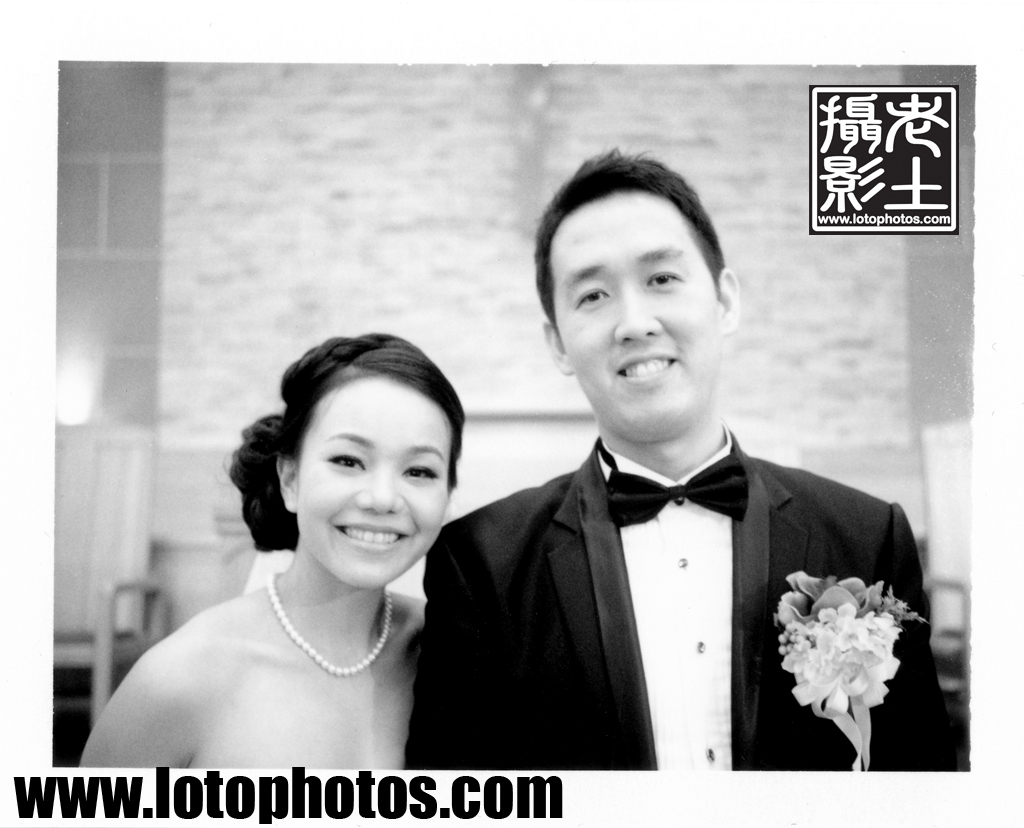
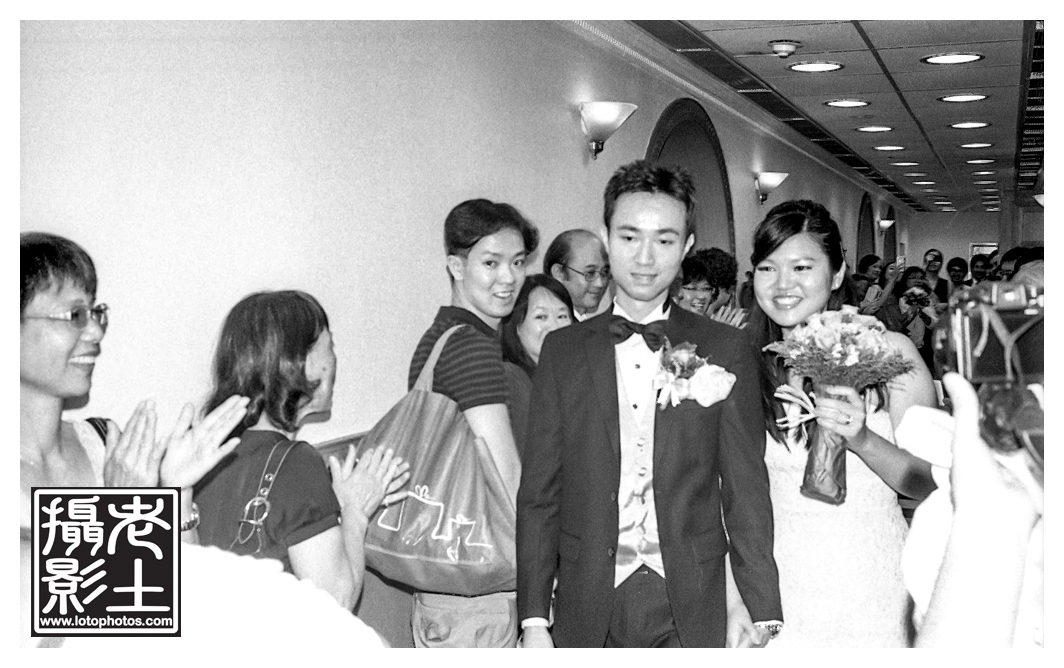
I attended Herbert and Elaine’s wedding ceremony recently and prepared to shoot the event with my Canon QL17, my Canolite D flash and a roll of Kodak Tri-X 400.  The idea of stand development came back to me after the shoot and I figured I will give it a shot.  I developed the Kodak Tri-X with Kodak HC110 (1:100) dilution.  I did initial agitation of front, back, left, right, each 10 times, then gave the tank a good tap on the ground to avoid any possible bubbles.  I then left it to develop in 25C room temperature for 60 mins, followed by a 5 mins water bath.  Then I fixed it in Kodak Rapid Fix for 4.5 mins before rinsed in water again and wrapped it up with Kodak Photoflo.

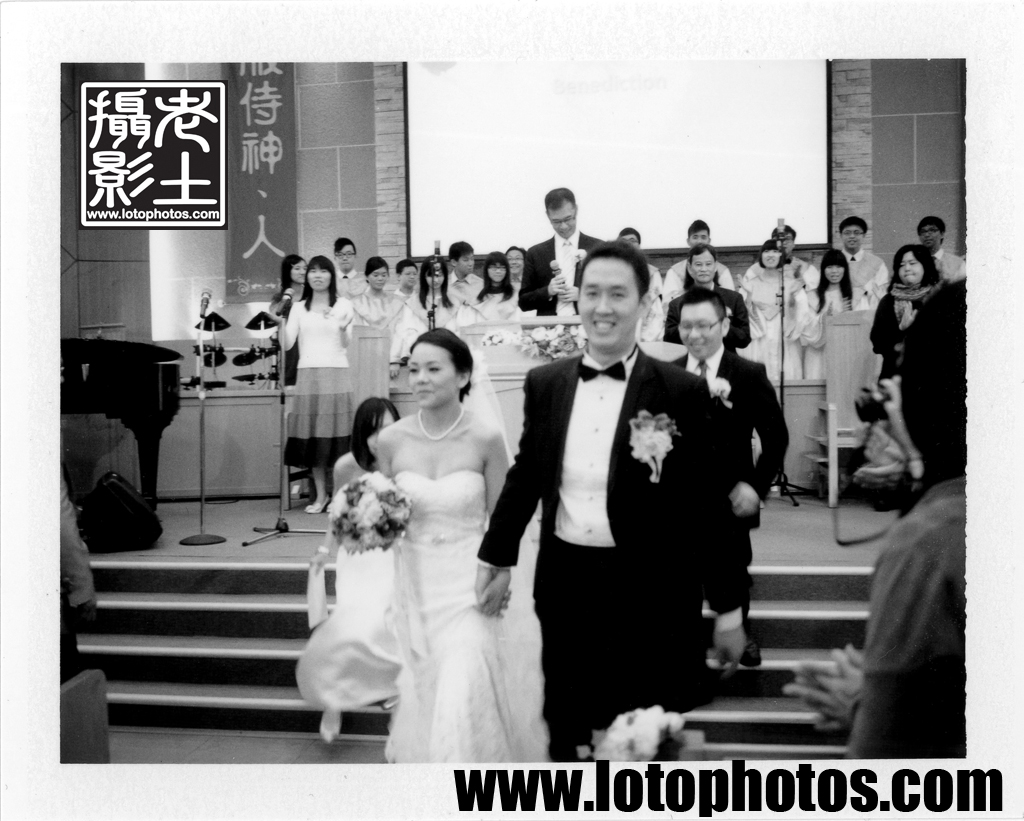
The result was mostly successful.  The film developed fine except again for the large grain size.  I blame it on the tap water temperature again.  I need to put in ice and prepare the developer and rinse water to be around 20C next time! Nevertheless, the shots at the wedding ceremony was super loto and turned out super classic!  Totally reminded me of the ones in the dusty wedding albums of my parents.

Super classic!
Super loto, super classic!

Large format trials part one

Two weeks ago, I took the Graflex Pacemaker Speed Graphic for a spin in the Gold Coast.  It was a bright sunny day and I thought would be perfect to try out the machine with some el cheapo Shanghai film.  Pointing towards the hotel as shown below, I was shooting at f11, 1/50.  From my experience with the Polaroid 800, these Shanghai 4×5 film is light hungry.  Even though it’s rated at iso 100, you have to compensate this by at least one click (shoot this at iso 50).  Most cases, I even have to shoot at iso 25 for low light conditions.  I got the most success when I compensate this by 1.5 clicks.

My view through the ground glass.

This unit is from 1955 and the ground glass is full of dirt.  Right in the middle of the glass, the fresnel is coming off.  I need to take the ground glass out and have a good cleaning of it and maybe replacing this.  I didn’t have a focusing cloth and I just used my dark bag which worked ok.  It was tough to focus in the 35C weather and the sun shining right at you.  On top of that, you have to bandage your head with the focusing cloth.  I should look at an angled viewfinder!  The Graflok worked perfectly and so did the Grafmatic film holder.

After the shoot, I quickly developed the film at home with my Paterson system 4 tank which came with my Paterson Colourtherm machine.  It was a really hot day and the water was at 28C.  I developed the Shanghai film with Kodak HC110 dilution H in 14mins and Kodak Rapid Fix for another 4mins.  I scanned the photo with my Epson V700.

The developed photo!

When I looked at the negatives, it was fine.  When I scanned it, I looked at the top part and I was like, it looks a lot more cloudy than it should? It was a bright sunny day.  Looking closely I can see water bubbles!  This was the first time I developed 4×5 with the taco method in the Paterson tank.  The Paterson tank top is slanted, which allowed some movement of the 4×5 while developing.  The AP tank that I used before, the top part was relatively flat and it was fine.  Next time if I am using the Paterson tank, I have to use 900mL of solution rather than 650mL.  It’s these unexpected “boo-boo”s that makes analog film interesting.  The photo really has a vintage feel to it.  I look forward to another shoot soon!


Graflex Speed Graphic

After some practice with the Polaroid Land 800, I was at a point of no return.  I finally drown myself in the Large Format world.  After seeing some photos from the Kodak Aero Ektar lens, I have decided to get a Graflex Speed Graphic.  A couple of months ago, I was lucky enough to acquire a 1955 Graflex Speed Graphic from the US.  In the original box of goodies, from the expired pack film inside, it seems like the machine had not been used since 1967.

The machine was in mint condition and was definitely taken care of.  From the warranty card inside, I traced back to the original owner named Charles H Marshall, whom purchased this from McCurry Foto Co in Sacramento, CA.

Prior of receiving this brick, I purchased a Polaroid back which was proven to be super handy for testing out this beast.  When I was back in Toronto early this year, I attended the yearly auction from the Photographic Historical Society of Canada.  There, I picked up three Grafmatic sheet film holder for a great bargain!

When the camera arrived, I was faced with another issue, a super solid tripod for focus and film pack insertion. The Speed Graphic, I weighted it on the scale to be 3kg.  The film back adding another 0.5kg.  The Kodak Aero Ektar lens (which will arrive soon!) coming in at 1.5kg.  This totals to 5kg.  My old Manfrotto tripod can only support 2.5kg and a new tripod has to be purchased before I can go out and shoot!  After some research, Gitzo is out since what I needed cost around $7k HKD.  My beloved Manfrotto was also out since it will cost around $5k HKD.  I am not too kind to my tripods and I can’t justify spending so much on it.  Finally I settled on the Benro C-2570T + B-2 head.  The tripod itself only has three sections and can support up to 12kg.  The B-2 head supports 20kg.  This combination is rock solid and the carbon fiber tripod only weight in at roughly 2kg.

1955 Graflex Speed Graphic in Mint Condition

I need a cloth for focusing badly in bright outdoors.  I substituted that with my film dark bag for the time being.

Focusing in the bright outdoors!


First Impression of Canon 5D3

In my last post, I wrote about the change of my travel gear.  Recently I had an upgrade of my digital equipment as I had an important shoot.  I did some research and finally settled on the Canon 5D Mark III.  It was really between that and the Nikon D800 which my brother had been persuading me to get.  Both machines are great and will be sufficient for me.  It came down to lenses.  Nikon did not make a pancake lens.  Canon on the other hand made an excellent low costing yet high performance 40mm f2.8 lens.  I wanted the new camera to be also used as an everyday camera and even a 50mm f1.8 lens on either of these cameras is proven bigger than what I wanted to bring to happy hour.  I really loved my Canon QL17 which is also 40mm and it didn’t take much for me to steer onto that direction.

I also decided to get the stock 24-105mm f4 IS L lens which is an excellent lens for the money you paid when you purchase together with the 5D3.  I figured, most of the photos that I will use this lens for involves architecture (infinity focus anyway) and group shots (more than 2 people so I would be using f5.6+ anyway).  For detail bokeh work, I can use my 40mm f2.8 for now and get another prime after (say 50mm f1.4).  One lens that I considered was the ever so popular 24-70mm f2.8.  It was a lot of money for that piece of glass and I don’t see a lot of usage for it at this moment.

My first shoot was a big family birthday dinner and overall the shoot was successful.   While tuning the photos after the shoot, I noticed my LCD screen’s color was way off.  I took the dive and got the Datacolor Spyder.  After calibration, the prints matched quite well with what I see on the screen now.

The second job was a lotophoto family shoot, which is what I love to do.  The Yongnuo YN568 ETTL worked amazingly well with the 5d3, especially as a fill flash for the gloomy outdoor shoot.  Indoors, I setup two Yongnuo YN560II flashes on remote triggers.

Cailee taken with my Canon 5d3

I really love this shot with Cailee, it’s such a lotophoto.  In the old days without cell phones and digital cameras, parents will always take their children to a local photo studio to have these photos taken.

The first two sessions were a blast and I have to say that the Canon 5d3 worked as it promised.  No wonder why this is one of the most preferred work horses for the digital photography world today.


Change of Travel Camera Gear

For a while, my travel photo gears includes: Canon Powershot S90, Canon QL17 GIII + Canolite D flash and Zeiss Ikon Super Ikonta B 532/16.  The S90 serves as the all purpose camera, QL17 mainly for street photography and the Zeiss Ikon for portraits.  For 135, I mainly use Kodak TriX 400, Fuji Xtra 400 and Agfa Vista 400.  For 120, I use mainly Fuji Reala 100 which are excellent for portraits.  All of these fits nicely in a small Crumpler camera bag.

Recently I went to Japan for a week and I was debating what to bring.  I have upgraded to a Canon 5D Mark III recently and really wanted to try this out during this trip, but the sheer size of it gave me second thoughts.  Since I am going for a week, the Zeiss Ikon also didn’t seem feasible.  This medium format beauty can only produce 11 shots per roll, this means I will need to bring a dozen of 120s.  Weight is not an issue, I am more worried about how the Fuji Reala will perform under hot temperature (30C+).

The final verdict, I took the dive and brought the 5D, along with the stock 24-105mm F4 L lens, 40mm F2.8 pancake lens and a Yongnuo YN-568EX flash.  I decided to drop the Zeiss Ikon and brought the QL17 and S90.

Travel Gear for Japan

I didn’t realize until I took the photo above that I have a complete Canon lineup.  I swear that it wasn’t intentional, just happened that way.  The S90 continued to perform well, especially for food closeup shots.  I shot six rolls of Kodak Tri-X with the QL17 (awaiting for development).  For the QL17, during the day, I often use a Kenko ND4 filter so I can use ISO 400 during the day.  Nothing can beat the QL17 for street photography in my lineup, it’s small, non-intrusive, quiet and fast focusing.  The 40mm F1.7 lens is perfect for that.

How did I find the 5D for traveling? It’s heavy but worth it.  With the 40mm pancake lens, this is basically the same setup as my QL17 but with one huge advantage.  That’s high ISO.  I can shoot at up to ISO3200 without a lot of noise which makes this camera a winner for taking photos indoors and at night.  The stock 24-105mm F4 L lens with IS gave a good working range for most travel shots, from architecture to far away objects.  It is also quite a bit lighter than the 24-70mm F2.8 lens which makes this a bit more desirable for traveling.  Did I need the flash? Yes! I actually used it often as a fill flash especially during late afternoon around sunset time.

All the equipment fitted in my Kata backpack.   The new selection of travel gear added another few kilos compared to before but the 5D took beautiful photos and was worth it at the end.

Sample photos to follow!


Sunday Afternoon Tea with Cailey

A relaxing Sunday afternoon with baby Cailey.

All photos taken with Canon QL17 GIII, Kodak Tri-X 400, self-developed, Kodak HC110 dilution H (5 minutes at 28C), Kodak RapidFix (4 minutes), water stop and Kodak Photoflo.  Scanned with Epson Perfection V700.

Cailey: My father is crazy. (with Gordon)
Cailey: “My father is crazy” (with Gordon)
Cailey: "I am eating again?"
Cailey: “I am eating again?”
Cailey: "What's going on here?"
Cailey: “What’s going on here?”
Cailey and Mama Vicky.


Film Development Day

Film Development Day

For color film, I generally will save up at least six rolls before I develop them.  This is because I need to setup the water bath in my Peterson Auto Colortherm machine and it’s always a good idea to exhaust the color chemicals in one go rather than several (due to oxidation).

This weekend’s lineup, two rolls of medium format Fuji Reala 100, four rolls of 135 Fuji Xtra 400 (one roll inside the film case because it was removed from a 126 cartridge), one roll of Agfa Vista 400, one roll of Kodak TriX 400 as well as a roll of Lucky SHD 100.

The color film are developed with the Tetenal kit.  Chemical and water temperature are preheated at 38C.  First wet the film with water for 5 minutes, developer for 3:15 minutes, blix for 4 minutes, rince with 38C water for 3 minutes and stabilizer for 1 minute.  Both developer and blix agitation for first 30 seconds, then one inversion every 30 seconds.

Hong Kong is hot these days and water temperature sits at 28C.  This is difficult for BW development.  For Kodak TriX 400, first wet the film with water for 2 minutes.  Kodak HC110 (dilution H) for 5 minutes, water stop for 2 minutes, Kodak Rapid Fix for 4 minutes, wash with water for 2 minutes and finish with Kodak Photoflo.  Agitation for developer and fixer is the same.   Agitation by inversion for the first 30 seconds, followed by two inversions every 30 seconds.

For developing Lucky SHD 100 film, first wet the film with water for 2 minutes.  Kodak HC110 (dilution H) for 14 minutes, water stop for 2 minutes, Kodak Rapid Fix for 4 minutes, wash with water for 2 minutes and finish with Kodak Photoflo.  Agitation for developer and fixer is the same.   Agitation by inversion for the first 30 seconds, followed by two inversions every 30 seconds.

Nine rolls of film drying in my washroom, what a scene!

Results of the developed photos to follow.


Polaroid Land 250 + FP3000b + Wedding = Lotophotos

A little while back, I attended Dennis’ and Rachel’s wedding.  As usual, I planned to shoot some lotophotos with my vintage equipment.

In my bag was a Canon QL17 + Canolite D flash + Ilford XP2 film, Canon Powershot S90, Mamiya Universal + 127mm F4.7 lens + Polaroid back with FP3000b and a overhauled Polaroid Land 250 (I just fixed this and wanted to test it out) + Portrait Lens kit.

My Mamiya Universal had not seen light for a while and I figured will be the perfect camera to shoot during the ceremony.  Manual exposure, F4.7 lens, nice shutter release and hand grip, everything ready.  Just before the bridal party started the march in, I took the Universal for a test shot at the groom’s family.  Weight lifting the 15 pound machine, I clicked the shutter.  I hear no “click” sound, crap.  I knew somehow the shutter didn’t go off and somehow it was stuck.  I dashed back to my seat, pulled the film out and just as I suspected, it was completely black.

Frantically, as the bridal party started to march in, I took the film pack out of the Mamiya Universal and inserted it in the Polaroid Land 250.  I did not have my dark bag with me nor did I had time to waste.  By taking the pack of film out like this, I openly exposed one shot.  I pulled the dead shot from the Polaroid Land 250 and it was ready to go.  Life is good again.

The church was well-lit and the FP3000b film was good enough for hand held shots.  Here are the lotophotos taken with the Polaroid Land 250 that day.

Even with ISO 3000 film, action shots were proven difficult with the wide opened f8.8 aperture.  Both of the following shots were slightly blurred but exhibited strong sense of movement.

Action Shot 1
Action Shot 1

This shot I particularly liked the flower bell bokeh.

Action Shot 2
Action Shot 2

Semi-still shots were acceptable, given the couple weren’t moving too much.

Semi Still Shots 2
Semi Still Shots 1
Semi Still Shots 1
Semi Still Shots 2

With still shots, this is when the Polaroid Land 250 performed the best.  These cameras were made for still shots and the resulting photos were all super sharp.  The following shot was taken with a tripod and a modified Polaroid self timer #192.  I will post another blog featuring this timer and why it has to be modified in the near future.

Still Shot 1
Still Shot 1

Family photos are among my favorites and below is a lotophoto that I took of Dennis’ family.  Always loved to see some people with their eyes closed.  With film, this was the way it was.  You won’t be able to see the result until you develop it, long after the event.  With that mentality, I didn’t even bother taking another shot with my Polaroid.

Family Lotophotos
Lotophoto of Dennis’ Family

I attached the portrait lens kit with the following two lovely shots.  Here is Joseph, the best man and the groom.

Joseph and Dennis
Joseph and Dennis looking sharp

The last and certainly my favorite shot of the day.  I was delighted to capture the genuinely happy couple in this photo.

Happy Bride and Groom!

The shoot was proven successful.  It’s amazing what you can achieve with simply a pack of film and an old camera.  The overhauled Polaroid Land 250’s exposure was dead on.  Particularly the last shot, totally reminded me of the 2R sized photos of my parents of their wedding day that are still in their wallets.  With the Polaroid Land 250, a camera that was made in the mid 1960s, even after almost half a century later, continues to capture the special moments for the reason of its first existence.  Looking at the eight shots I made, reminded me of my parents’ lotophotos of their wedding day and the dusty albums that I loved going through when I was a child.  I hope one day, the children of the happily wedded couple will enjoy them the same way as I did with the ones of my parents.

Processing Fuji Pack Film negatives

Not only can Polaroid land cameras produce an instant print, with the wonderful modern technology of scanning, the once throw-away negative can now be processed into a digital photo. For Fuji FP-3000b, the negative is actually a paper negative. There is no need to do anything with it, simply let it dry and you can scan it on a normal positive scanner. However, I had a lot of issues with these negatives, as it is virtually impossible to keep them dust free. They had to be laid flat or the chemicals (also called goop) will slide around and distort the image. The only reliable way to keep this as a useable negative is to blow dry it immediately after peeling, which proven to be difficult in the field.

FP3000b processed negative

See the above photo, the goop moved around and you can see clearly the straight lines are bent.  The clock arms also disintegrated.  The FP3000b negatives are quite unpredictable.

FP-100b film however is a different technology. The negative is actually plastic. They hold up a lot better than its FP-3000b counterpart.  The goop however sometimes will continue to develop and all sort of wonderful things (depends how you look at it) like color distortion or image fuzziness will occur.  Like FP-3000b, one side is the goop but the other is an opaque black dark side. Both of these sides had to be processed before you can scan this on a negative scanner. If you look online, there are many ways to do this. Below is my version of it, shown in the photo below.

FP100c negative processing

1. Wash the goop off the negative with clean running water, then you will need two things, a piece of tile and a roll of electrical tape.
2. With dark side up, tape up the four sides nicely (make sure no leaks).
3/4. With care, pour household bleach on the dark side.
5. Spread the bleach completely over the dark side.
6. Wait for a couple of minutes and the black nasty stuff will come off.
7. Wash the nasty black stuff off with running water.
8.  With the black stuff washed out, you should be able to see a clear image in the negative.
9.  Take the negative off the tile, wash thoroughly with water.
10. Hang the negative to dry.

Since the negative is huge (3.25″x4.25″), most negative scanners won’t be able to process this.  Before I got my Epson V700, here are two ways how I digitized my negatives.  The first one is to put the negative on your window during the day and use your digital camera to take a photo of it.  The other is to place the negative on a positive scanner with a piece of white paper on top, shine a big lamp on it and scan.  Both of these methods will then require some post processing work in some kind of photo utility for color inversion.

Here is an example result from my work flow.  The happy campers are Ayuchi and Billy at the Sake Bar Ginn in LKF.

Ayuchi & Billy at Sake Bar Ginn at LKF
Ayuchi & Billy at Sake Bar Ginn in LKF


where avant-garde is the passé