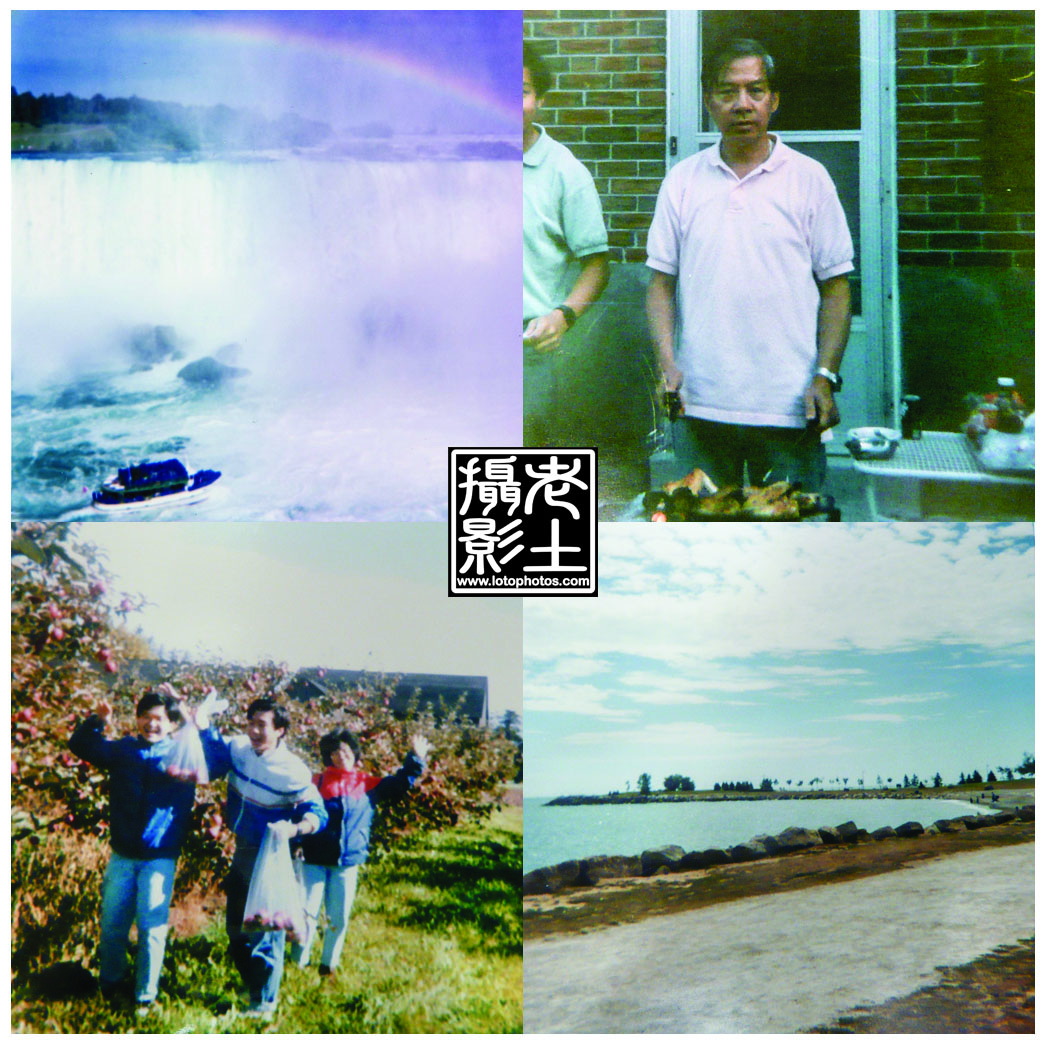
Photo shot during Rachel’s birthday party. Taken with Canon 5D3, 24-105mm F4 L lens + Yongnuo YN568EX flash.


Photo shot during Rachel’s birthday party. Taken with Canon 5D3, 24-105mm F4 L lens + Yongnuo YN568EX flash.
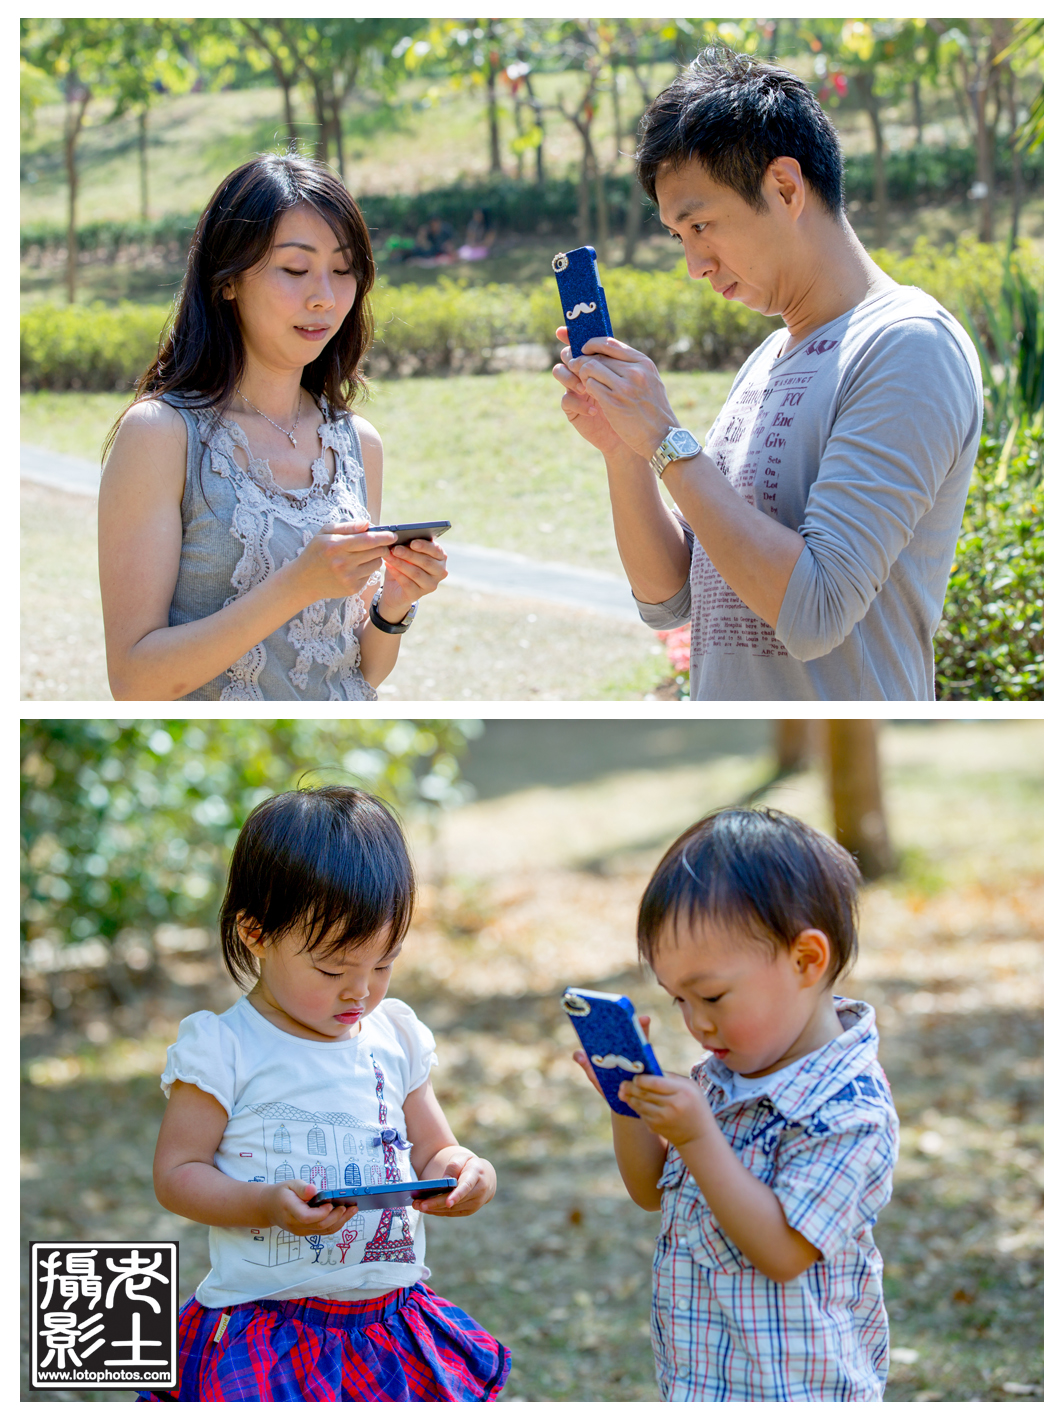
Kids really learn fast! Below photo taken during Jonathan and Clara’s Family Shoot.

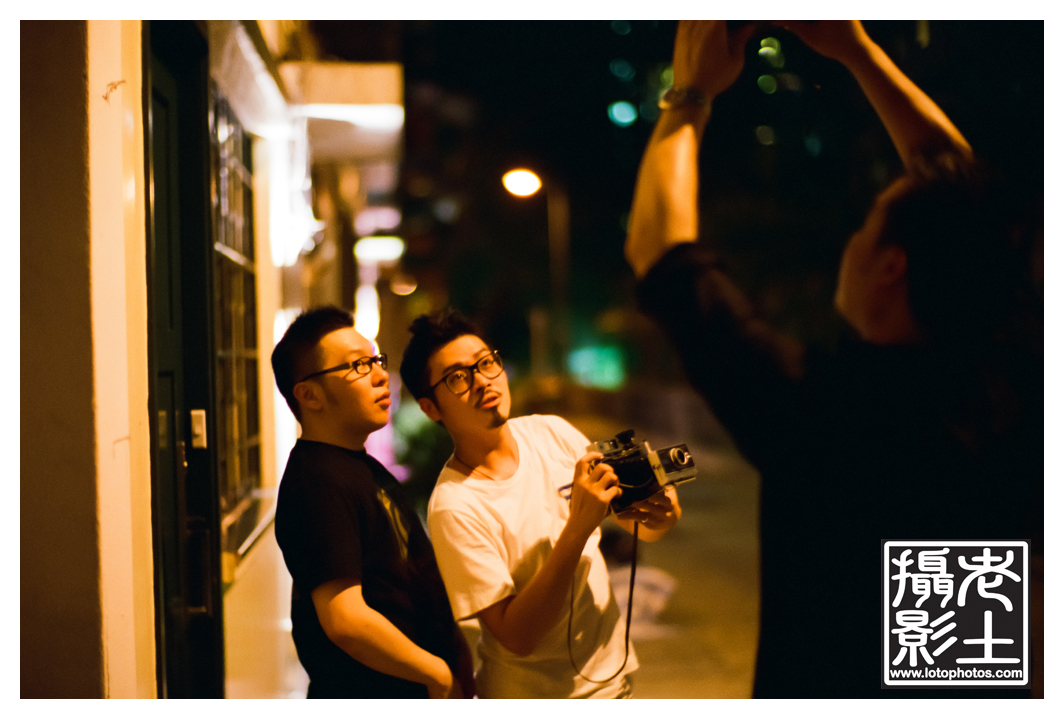
Just had dinner one summer night with Tung Tang, Peter Yen, Joseph Wei and myself near Soho. After dinner, Tung and Peter were already armed with their Leicas + 50mm f1.0 lenses! We strolled around Soho and we settled on a spot to shoot some photos.
I didn’t picked the proper equipment for the night shoot and I only had my Polaroid Land 250 with me. It was loaded with a pack of FP100c. I also brought a flash, an old Sunpak 411 flash which I think works perfect with the Polaroid cameras. After a quick look in the area, we quickly settled a spot in front of an old door. Joseph is the model. Tung is the photographer. Peter was taking some action shots and was holding two iphone LED lights on the right of the subject. I was the flash light remote and stand.
Tung checking the lighting here.
Here is the setup.
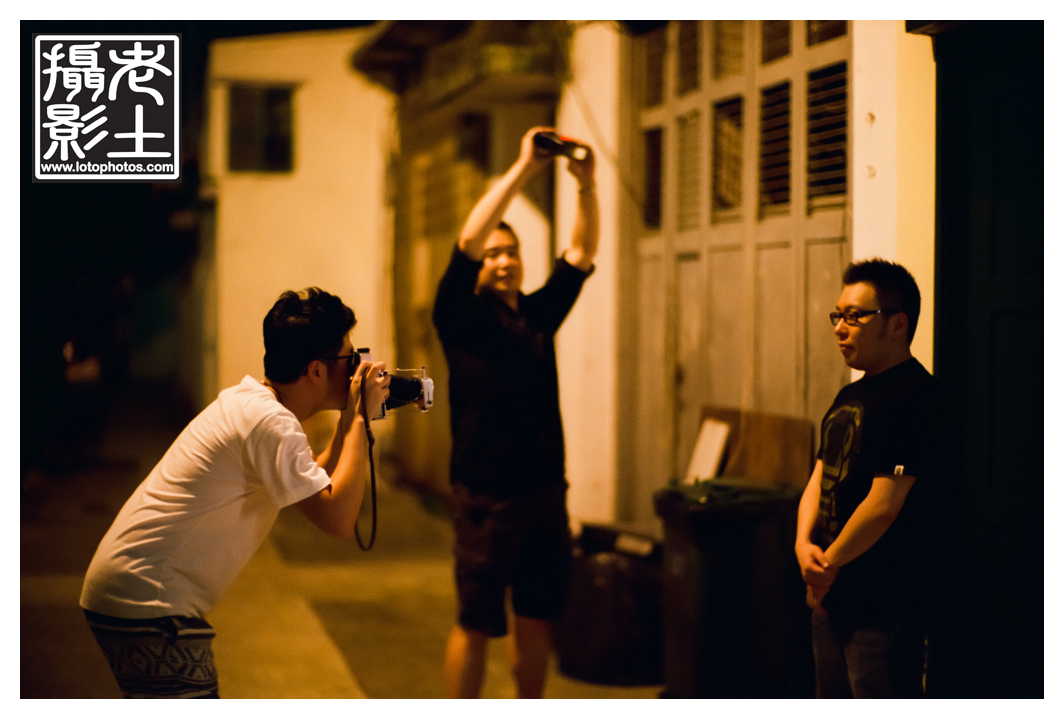
Not shown on the above shot was Peter, who was holding two iphones with LEDs opposite of the flash. Here is the flow of the shot. Tung will start the trigger. I will hear a click, then I press the test fire button on the Sunpak flash. Tung sees the flash and will let go of the trigger and completed the shot. The whole process is very raw and manual.
To our surprise, the shot turned out quite nice.

It was a lot of fun and I look forward to more shoots!
Thanks Terry Lo for this lovely photo illustrating our products!

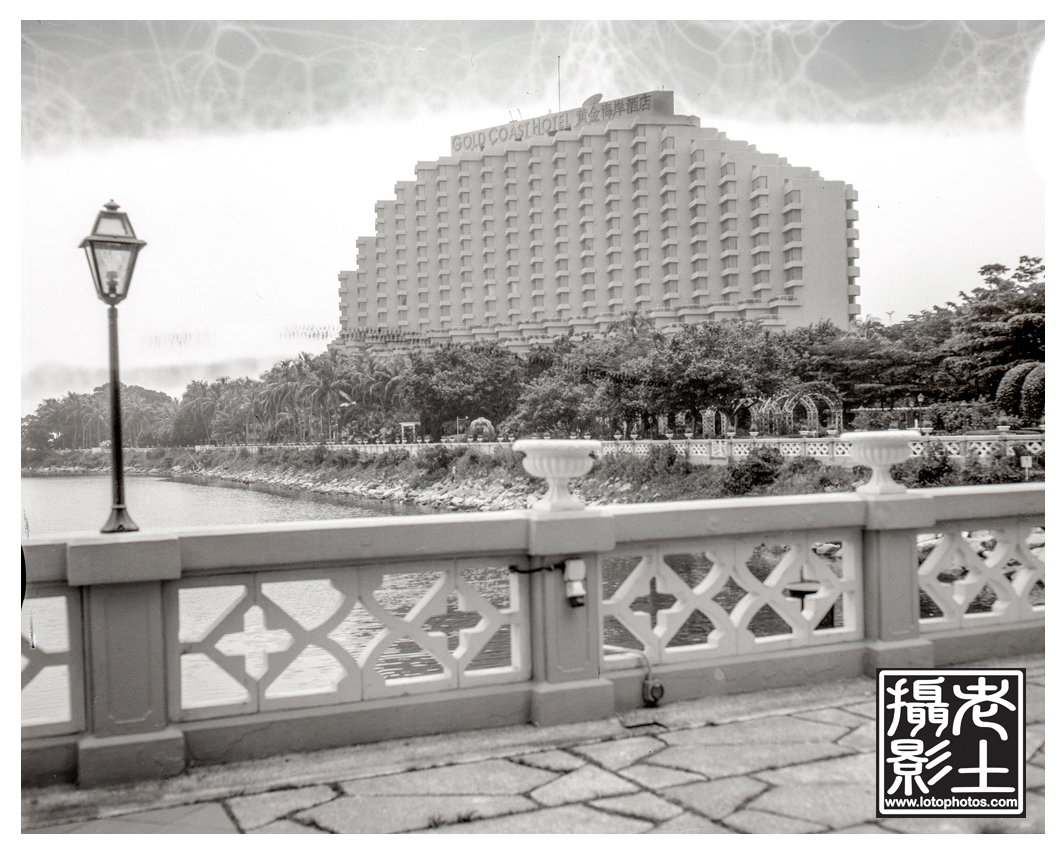
Two weeks ago, I took the Graflex Pacemaker Speed Graphic for a spin in the Gold Coast. It was a bright sunny day and I thought would be perfect to try out the machine with some el cheapo Shanghai film. Pointing towards the hotel as shown below, I was shooting at f11, 1/50. From my experience with the Polaroid 800, these Shanghai 4×5 film is light hungry. Even though it’s rated at iso 100, you have to compensate this by at least one click (shoot this at iso 50). Most cases, I even have to shoot at iso 25 for low light conditions. I got the most success when I compensate this by 1.5 clicks.
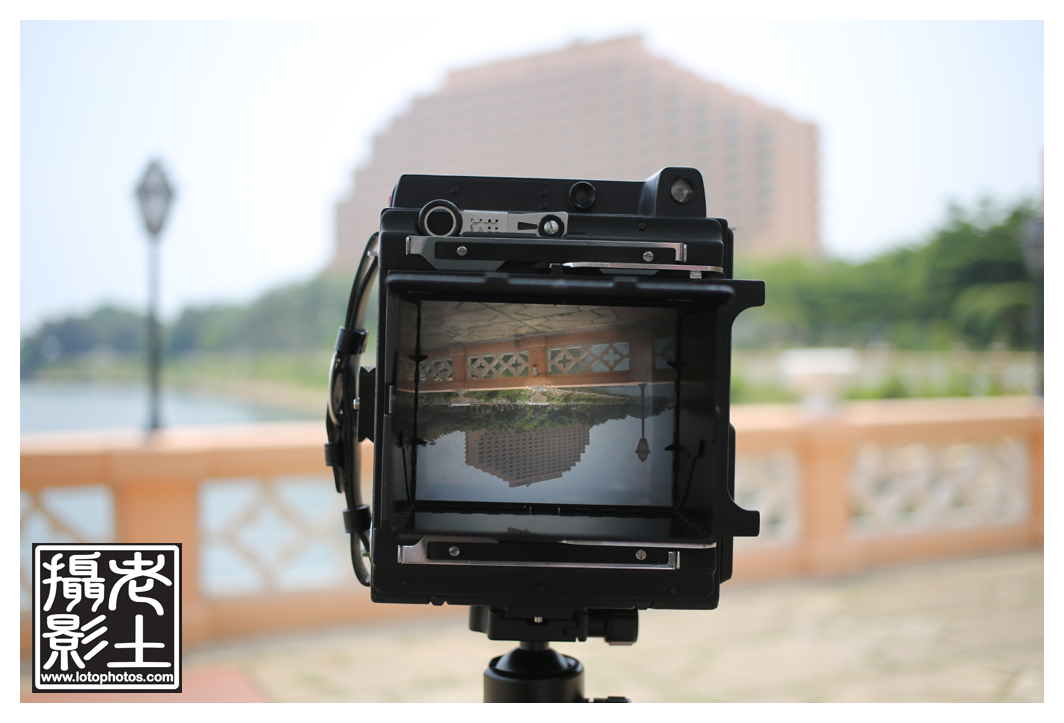
This unit is from 1955 and the ground glass is full of dirt. Right in the middle of the glass, the fresnel is coming off. I need to take the ground glass out and have a good cleaning of it and maybe replacing this. I didn’t have a focusing cloth and I just used my dark bag which worked ok. It was tough to focus in the 35C weather and the sun shining right at you. On top of that, you have to bandage your head with the focusing cloth. I should look at an angled viewfinder! The Graflok worked perfectly and so did the Grafmatic film holder.
After the shoot, I quickly developed the film at home with my Paterson system 4 tank which came with my Paterson Colourtherm machine. It was a really hot day and the water was at 28C. I developed the Shanghai film with Kodak HC110 dilution H in 14mins and Kodak Rapid Fix for another 4mins. I scanned the photo with my Epson V700.

When I looked at the negatives, it was fine. When I scanned it, I looked at the top part and I was like, it looks a lot more cloudy than it should? It was a bright sunny day. Looking closely I can see water bubbles! This was the first time I developed 4×5 with the taco method in the Paterson tank. The Paterson tank top is slanted, which allowed some movement of the 4×5 while developing. The AP tank that I used before, the top part was relatively flat and it was fine. Next time if I am using the Paterson tank, I have to use 900mL of solution rather than 650mL. It’s these unexpected “boo-boo”s that makes analog film interesting. The photo really has a vintage feel to it. I look forward to another shoot soon!
In my last post, I wrote about the change of my travel gear. Recently I had an upgrade of my digital equipment as I had an important shoot. I did some research and finally settled on the Canon 5D Mark III. It was really between that and the Nikon D800 which my brother had been persuading me to get. Both machines are great and will be sufficient for me. It came down to lenses. Nikon did not make a pancake lens. Canon on the other hand made an excellent low costing yet high performance 40mm f2.8 lens. I wanted the new camera to be also used as an everyday camera and even a 50mm f1.8 lens on either of these cameras is proven bigger than what I wanted to bring to happy hour. I really loved my Canon QL17 which is also 40mm and it didn’t take much for me to steer onto that direction.
I also decided to get the stock 24-105mm f4 IS L lens which is an excellent lens for the money you paid when you purchase together with the 5D3. I figured, most of the photos that I will use this lens for involves architecture (infinity focus anyway) and group shots (more than 2 people so I would be using f5.6+ anyway). For detail bokeh work, I can use my 40mm f2.8 for now and get another prime after (say 50mm f1.4). One lens that I considered was the ever so popular 24-70mm f2.8. It was a lot of money for that piece of glass and I don’t see a lot of usage for it at this moment.
My first shoot was a big family birthday dinner and overall the shoot was successful. While tuning the photos after the shoot, I noticed my LCD screen’s color was way off. I took the dive and got the Datacolor Spyder. After calibration, the prints matched quite well with what I see on the screen now.
The second job was a lotophoto family shoot, which is what I love to do. The Yongnuo YN568 ETTL worked amazingly well with the 5d3, especially as a fill flash for the gloomy outdoor shoot. Indoors, I setup two Yongnuo YN560II flashes on remote triggers.

I really love this shot with Cailee, it’s such a lotophoto. In the old days without cell phones and digital cameras, parents will always take their children to a local photo studio to have these photos taken.
The first two sessions were a blast and I have to say that the Canon 5d3 worked as it promised. No wonder why this is one of the most preferred work horses for the digital photography world today.
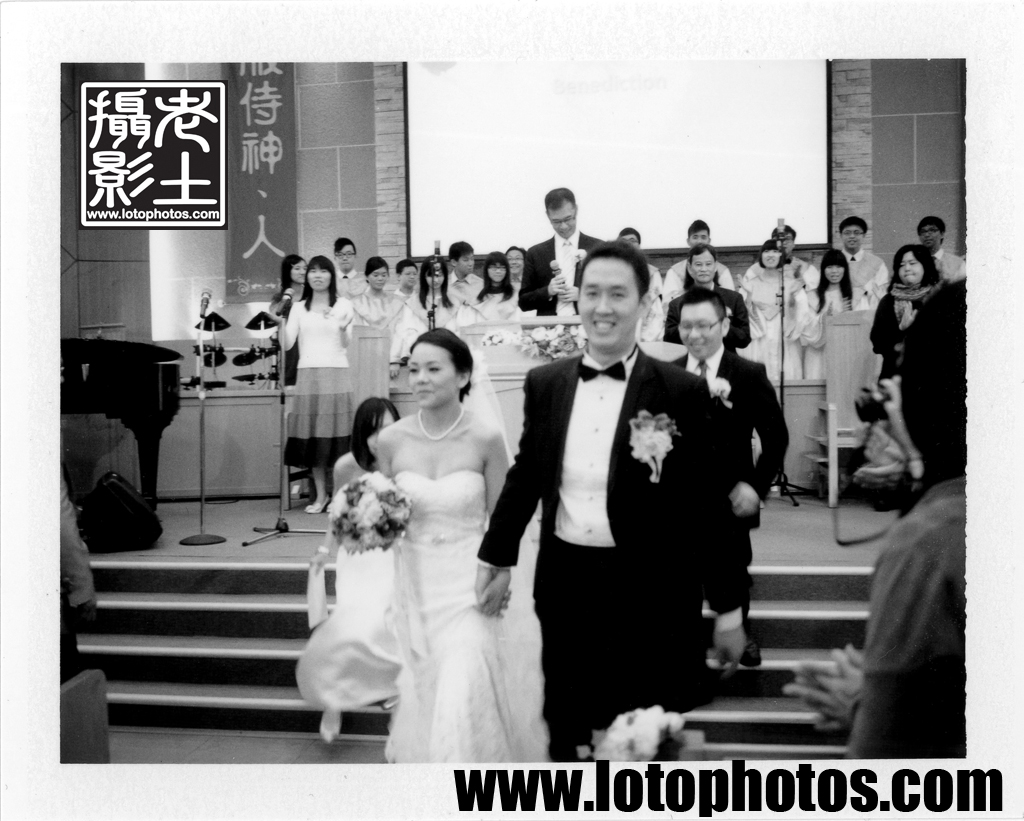
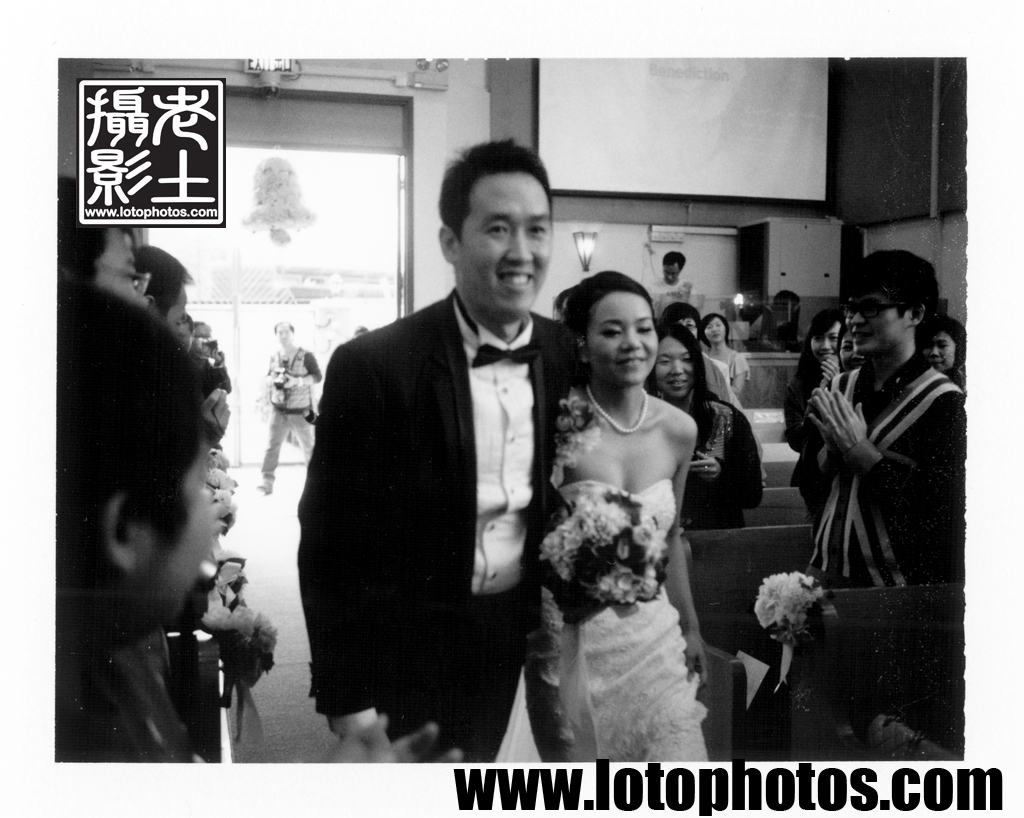
A little while back, I attended Dennis’ and Rachel’s wedding. As usual, I planned to shoot some lotophotos with my vintage equipment.
In my bag was a Canon QL17 + Canolite D flash + Ilford XP2 film, Canon Powershot S90, Mamiya Universal + 127mm F4.7 lens + Polaroid back with FP3000b and a overhauled Polaroid Land 250 (I just fixed this and wanted to test it out) + Portrait Lens kit.
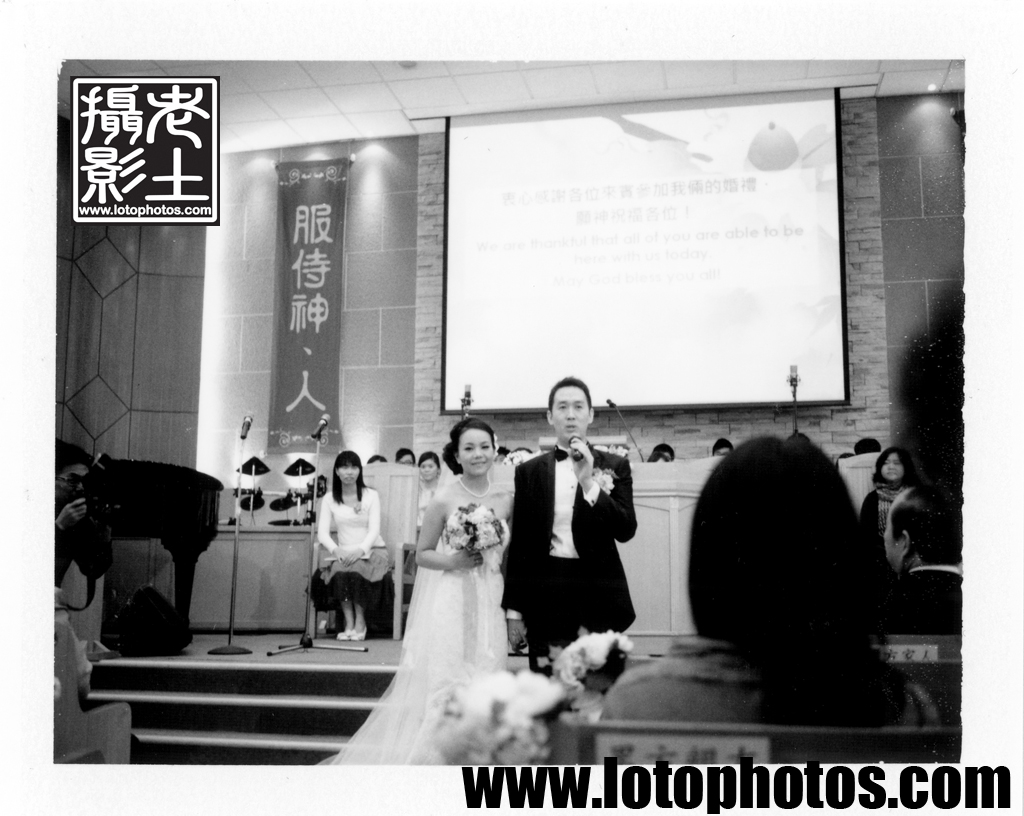
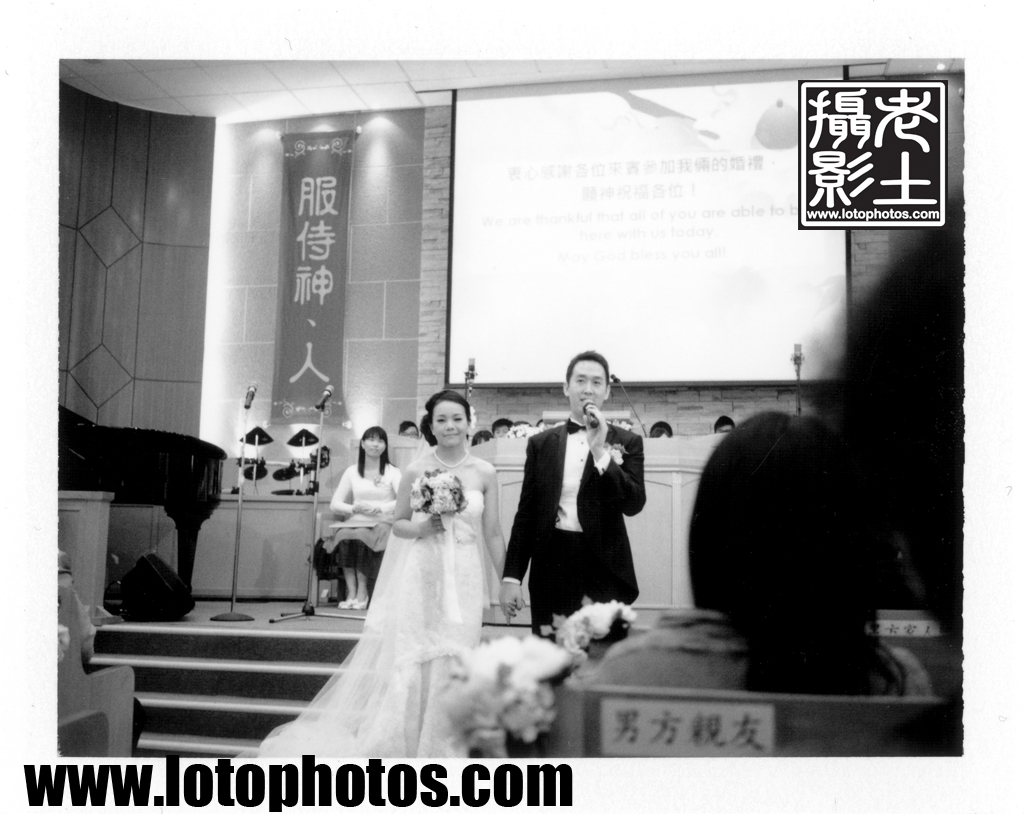
My Mamiya Universal had not seen light for a while and I figured will be the perfect camera to shoot during the ceremony. Manual exposure, F4.7 lens, nice shutter release and hand grip, everything ready. Just before the bridal party started the march in, I took the Universal for a test shot at the groom’s family. Weight lifting the 15 pound machine, I clicked the shutter. I hear no “click” sound, crap. I knew somehow the shutter didn’t go off and somehow it was stuck. I dashed back to my seat, pulled the film out and just as I suspected, it was completely black.
Frantically, as the bridal party started to march in, I took the film pack out of the Mamiya Universal and inserted it in the Polaroid Land 250. I did not have my dark bag with me nor did I had time to waste. By taking the pack of film out like this, I openly exposed one shot. I pulled the dead shot from the Polaroid Land 250 and it was ready to go. Life is good again.
The church was well-lit and the FP3000b film was good enough for hand held shots. Here are the lotophotos taken with the Polaroid Land 250 that day.
Even with ISO 3000 film, action shots were proven difficult with the wide opened f8.8 aperture. Both of the following shots were slightly blurred but exhibited strong sense of movement.
This shot I particularly liked the flower bell bokeh.
Semi-still shots were acceptable, given the couple weren’t moving too much.
With still shots, this is when the Polaroid Land 250 performed the best. These cameras were made for still shots and the resulting photos were all super sharp. The following shot was taken with a tripod and a modified Polaroid self timer #192. I will post another blog featuring this timer and why it has to be modified in the near future.
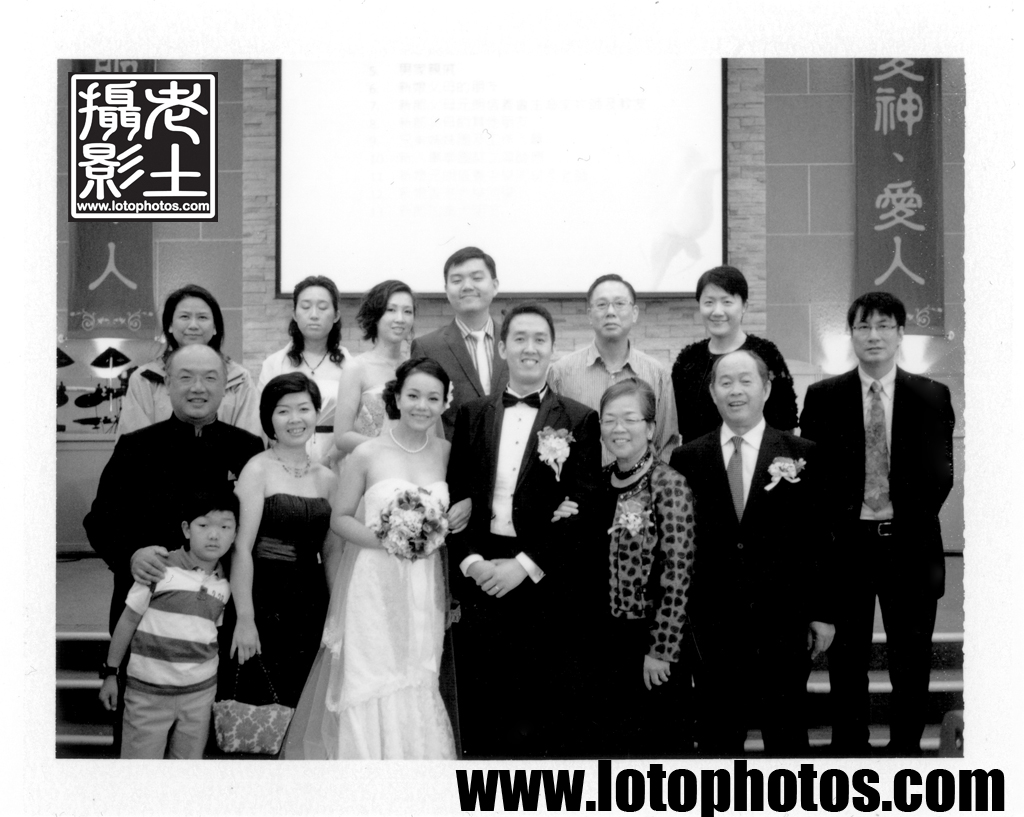
Family photos are among my favorites and below is a lotophoto that I took of Dennis’ family. Always loved to see some people with their eyes closed. With film, this was the way it was. You won’t be able to see the result until you develop it, long after the event. With that mentality, I didn’t even bother taking another shot with my Polaroid.
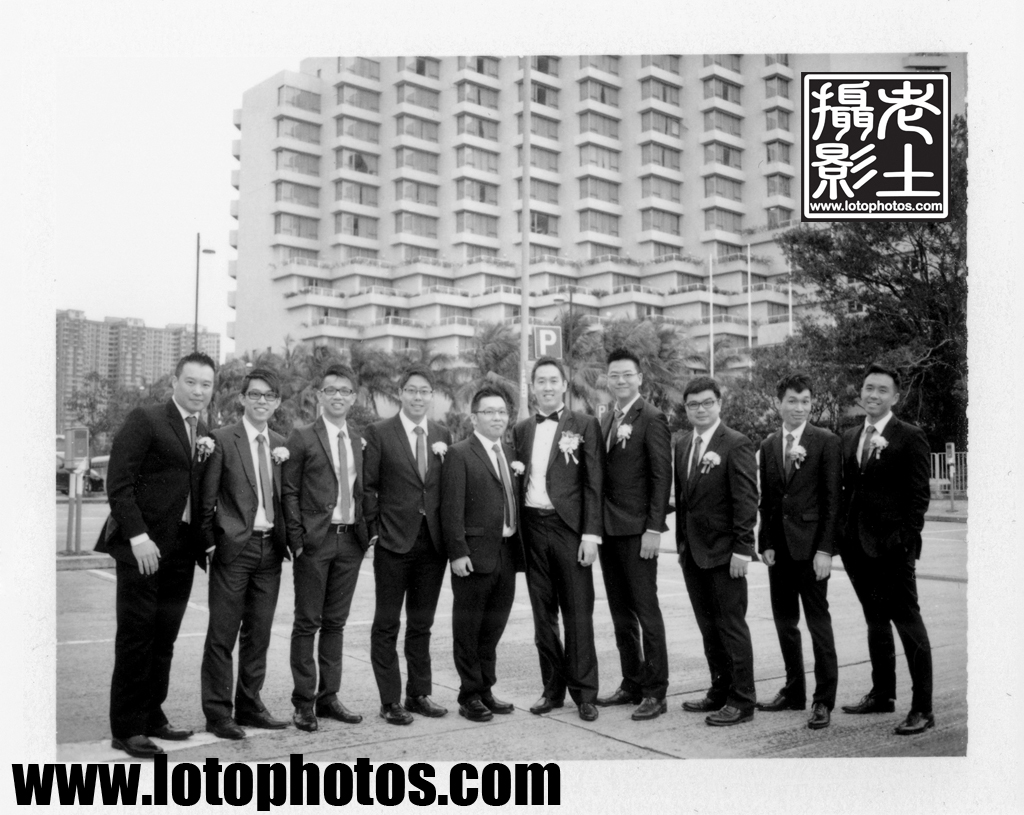
I attached the portrait lens kit with the following two lovely shots. Here is Joseph, the best man and the groom.

The last and certainly my favorite shot of the day. I was delighted to capture the genuinely happy couple in this photo.
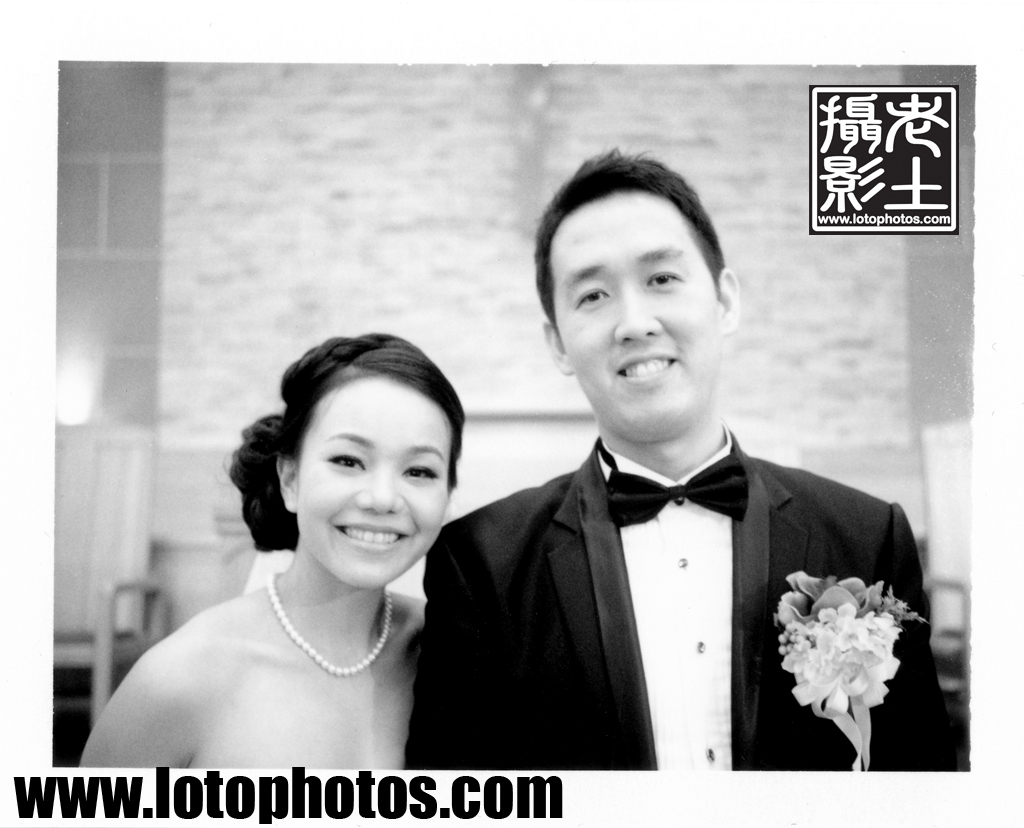
The shoot was proven successful. It’s amazing what you can achieve with simply a pack of film and an old camera. The overhauled Polaroid Land 250’s exposure was dead on. Particularly the last shot, totally reminded me of the 2R sized photos of my parents of their wedding day that are still in their wallets. With the Polaroid Land 250, a camera that was made in the mid 1960s, even after almost half a century later, continues to capture the special moments for the reason of its first existence. Looking at the eight shots I made, reminded me of my parents’ lotophotos of their wedding day and the dusty albums that I loved going through when I was a child. I hope one day, the children of the happily wedded couple will enjoy them the same way as I did with the ones of my parents.
The first camera that I learned how to use was my father’s Minolta SRT camera. It was heavy and was quite a complicated machine to use for a child. All I remembered was a lot of knobs and my father will be advising numbers like f5.6, 125 here or f8, f11, which at the time meant nothing to me.
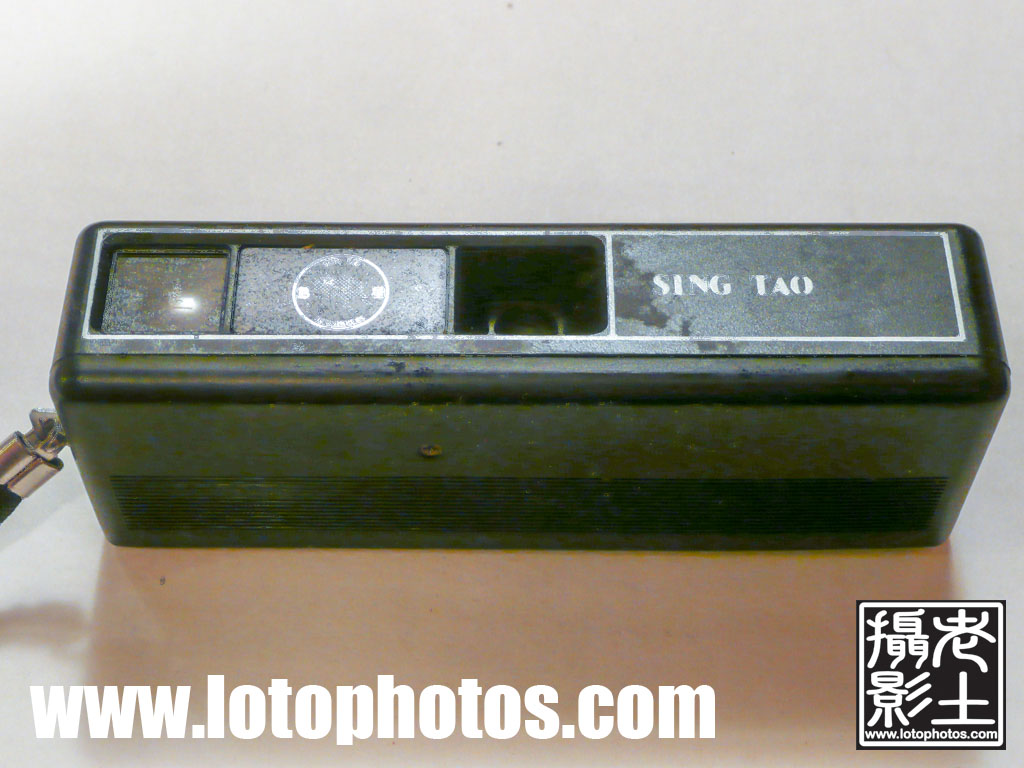
My father later bought my older brother, Ed a toy 110 film camera from the Singtao newspaper shop. It was a much simpler camera and we had a lot of fun with it. This camera rarely produced encouraging result. I remembered one time, I put in a roll of 110 film, shot it and gave the roll to my father. A couple of days later, he handed me the envelop from the photo shop. I opened it up, there was only one print in the bag. I asked him what happened to the other photos, he replied, only one showed up. I examined the negative and only shot was exposed and all others were blank. It was quite a dismal experience and that was the last roll of 110 I shot.
My first real camera was a fifty cents Kodak Instamatic X-15, which I rescued from a local garage sale. After mild cleaning of the dusty box, I still remember I was quite excited when I first saw the shutter fire. See video here: http://youtu.be/Og1zzugSk7E
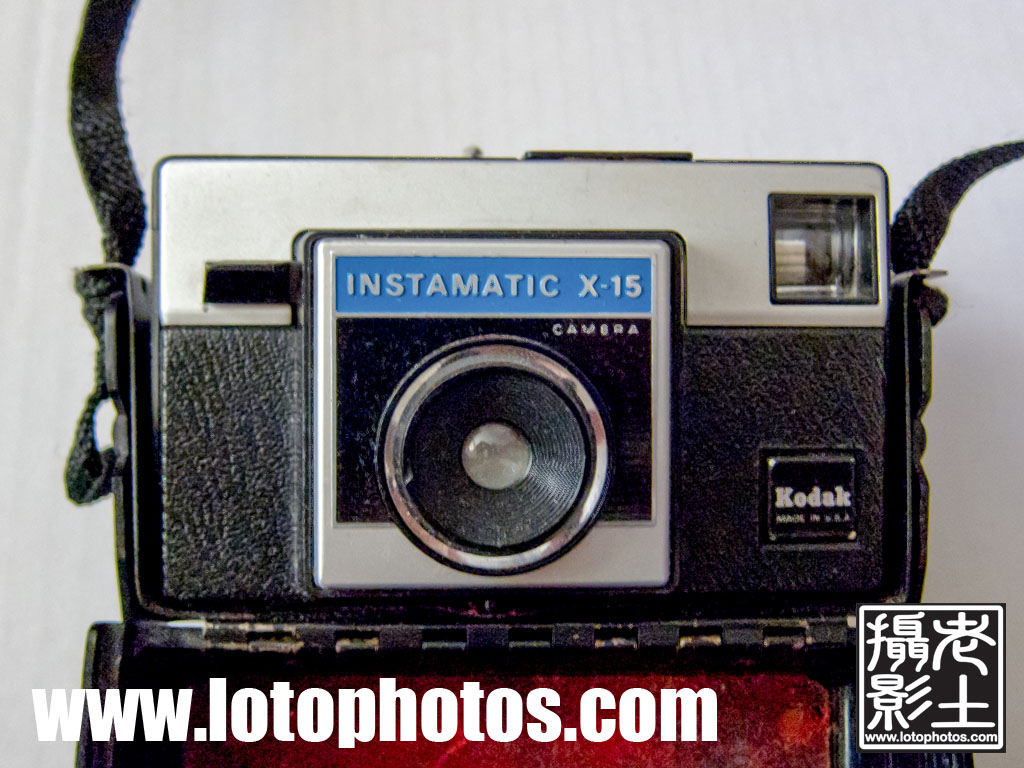
Right after, I rode my bike to the local photo hut and picked up a roll of Kodak 126 format ISO 200 film and started shooting. My first subjects of course were family members and other classmates. Success rate was low and I was lucky if half the roll was exposed correctly. I was however happy with the few shots I got and continued with it. Once I took it to a three week long US trip with only 12 shots! Think about saving your shots for the right moments! It will never happen again with the technology available today.
The Kodak Instamatic was easy to use, no focus necessary and no settings were available. The film was in a cartridge, and you simply pop it in the camera. You wind the film through the film advance and you trip the shutter. It was dead simple. A 43mm lens with fixed aperture of f11 and shutter speed of 1/90, even with 400iso film, indoor photography was hopeless and flash cubes were a must.
The images from the Kodak Instamatic were blurry and often wrongly exposed,
but for a ten year kid, it was an awesome experience.
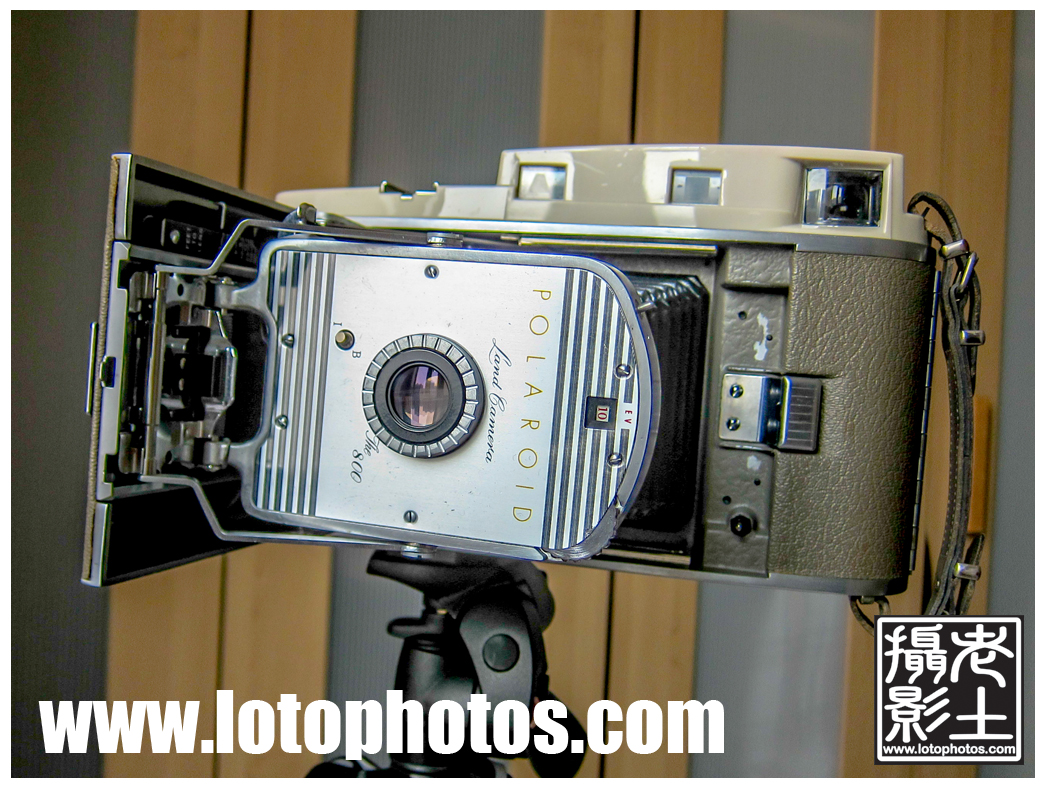
Polaroid Land 800 and Shanghai 4×5 film
These cameras were produced from 1957 to 1962. Since the disappearance of roll film in the 90s, this camera had been abandoned as trash since.
I picked up a couple of these units when I was back in Toronto a few months ago. Both were in perfect condition and all the accessories intact. This camera features an EV lighting system with fixed aperture and shutter speed.
The pairing is as follows:
EV 10 f/8.8 1/12
EV 11 f/8.8 1/25
EV 12 f/8.8 1/50
EV 13 f/8.8 1/100
EV 14 f/12.5 1/100
EV 15 f/17.5 1/100
EV 16 f/25 1/100
EV 17 f/35 1/100
Initially getting these two cameras, I wanted to modify it so that I can use it as a medium format panoramic camera. I wanted to put in a roll of 120 and see if I can get 6×10 or 6×12 shots out of this.
Walking in the camera market in Shanghai prior to my trip back to Toronto, I saw some really cheap Shanghai 100 ISO 4×5 film. Doing medium format for years, I am always itching to move onto large format. So I picked up a box of el cheapo Shanghai 4×5 film and off I went.
Honestly, it’s a pain to insert the 4×5 film into these Polaroid 800 cameras in a dark bag. Basically, I have to do this once for every shot. This work flow is extremely not portable, but hey, reminding myself, it’s large format, it’s not supposed to be that portable.
On this camera, there are two viewfinders, one for focusing and one for framing. I was impressed with the rangefinder. It was crisp and accurate and with a maximum aperture of only F8.8, I experienced no focusing issues.
My first two shots with this camera, however, was a disaster. The photos came out totally underexposed. This can be traced back to two mistakes I made. First, I used the Polaroid light meter that came with the cameras. Bad call. Second, reading in the many forums, a lot of people are over exposing this film and shooting it like a ISO 50 film.
The second and third trials got better and basically I needed to overexpose the original settings by about 1.5 EVs.

The details were amazing. The Polaroid land 800 has a mask with rounded corners. The exposed area of of the photo is not 4×5 but a bit smaller than that.
My film development process. All chemical temperature @20C. Water bath one minute. Guan Long (冠龍) D76 1+1 14 minutes. Water Stop Rince 3x + 2 mins. Guan Long F-5 Fix 8 mins. Water Rince 3x + 2 mins and Kodak Photoflo. Scanned with Epson Perfection 4870.
The first experience with the Polaroid Land 800 was quite successful and I finished the whole box of 25 shots in within the first two weeks.
Why Polaroid Land 800? Simple. It’s cheap, readily available, full manual and has no electronic components.